
Perfect 🌸 — let’s make it step-by-step so you can follow even if you’re a beginner.
We’ll make exactly the same crochet Christmas wreath you showed in the photo.
🎀 CROCHET MINI WREATH ORNAMENT (DETAILED TUTORIAL)
🧶 Materials
- Yarn: 3 colors —
- Red (center base)
- Yellow or Gold (accent dots)
- Green (leaves)
- Crochet Hook: 3.0 mm or 3.5 mm (depends on yarn thickness)
- Plastic or Wooden Ring (6–8 cm diameter)
- Scissors
- Yarn needle
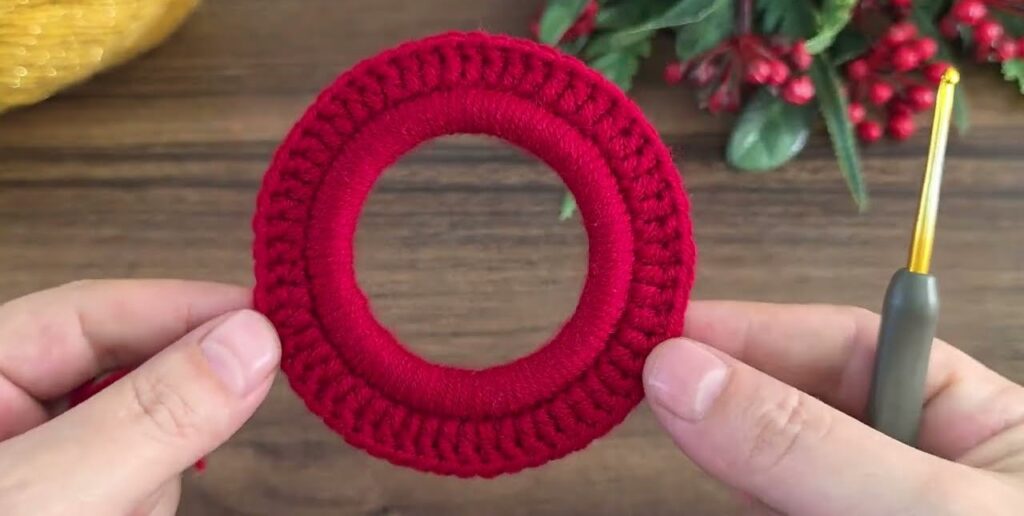
🔴 PART 1: Wrapping the Ring (Red Base)
- Attach yarn to the ring
- Make a slip knot and insert hook into the ring.
- Pull the loop through and tighten gently.
- Single Crochet Around the Ring
- Yarn over, insert hook into the ring, pull up a loop (2 loops on hook), yarn over again, and pull through both loops.
- Keep your stitches tight and close together so the ring is fully covered.
- Continue single crocheting all around the ring until there are no gaps.
- Finish
- When the ring is covered, join to the first single crochet with a slip stitch.
- Cut the yarn and weave in the ends securely.
✅ Tip: The red layer should look smooth and even, covering the plastic/wood completely.
🟡 PART 2: Yellow Accent Dots (optional decorative round)
- Attach yellow yarn into any stitch of the red round.
- Chain 1, skip 1 stitch, single crochet in the next stitch.
- This creates little gaps between yellow stitches.
- Repeat the pattern [ch 1, skip 1, sc in next] around the whole ring.
- Join with a slip stitch in the first sc.
- Cut the yarn and fasten off.
✅ Tip: You’ll have alternating yellow “dots” showing between the red stitches.
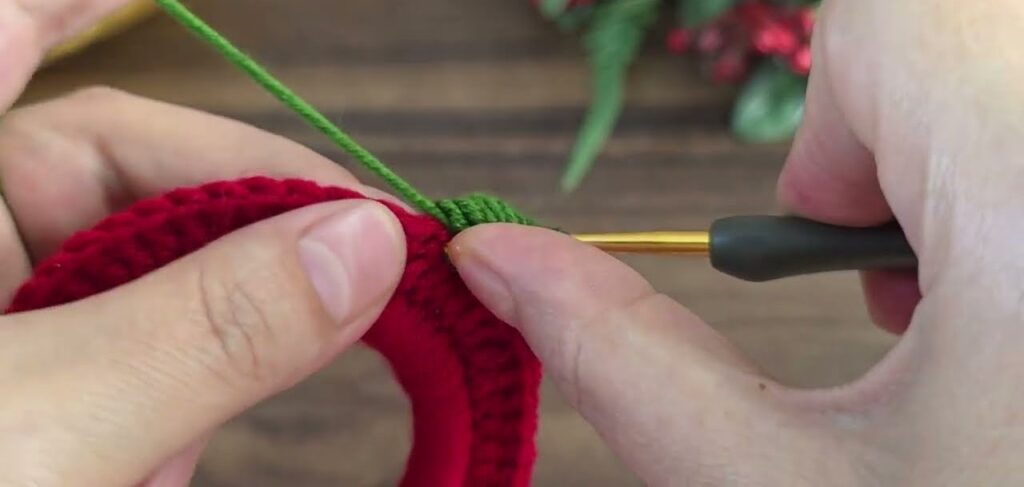
🟢 PART 3: Green Leaves (the outer petals)
- Attach green yarn into any skipped stitch from the red base (behind a yellow dot).
- Chain 3 (this counts as your first double crochet).
- In the same stitch, work 2 double crochets, chain 2, 3 double crochets — all in the same place.
- This creates one “leaf cluster” (a small petal shape).
- Skip the next stitch and repeat step 3.
- Continue around the whole ring.
- You should have about 10–12 leaf clusters depending on ring size.
- Join with a slip stitch to the top of the first ch-3.
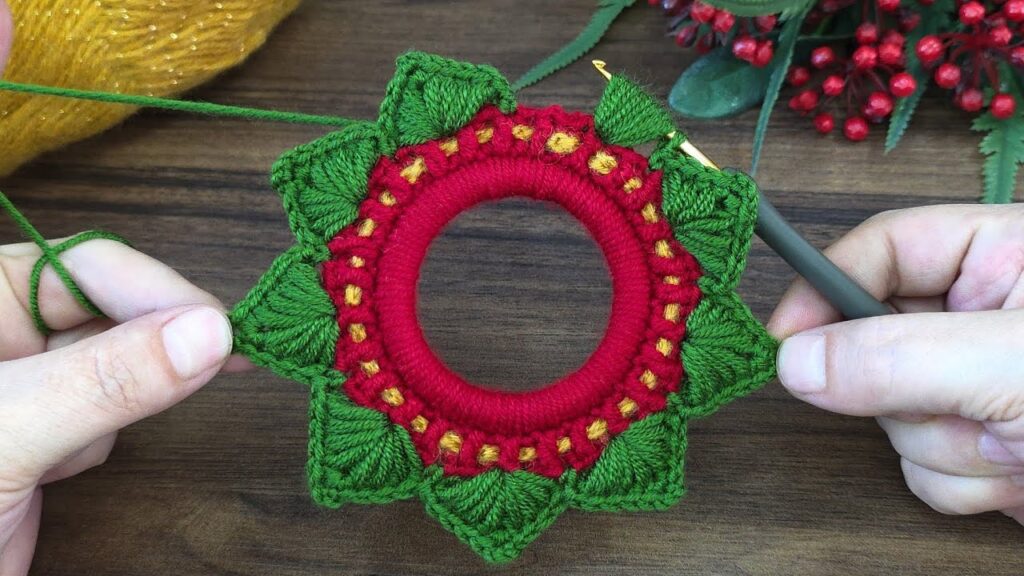
✅ Now your wreath has red in the middle, yellow dots, and green “spiky leaves.”
🍃 PART 4: Leaf Tips Shaping
To make the leaf tips pointy and more realistic:
- Slip stitch into the next 2 double crochets to move to the center (chain-2 space) of your first leaf.
- In the chain-2 space, make:
- 1 single crochet (sc)
- 1 half double crochet (hdc)
- 1 double crochet (dc)
- 1 half double crochet (hdc)
- 1 single crochet (sc)
→ This gives your leaf a nice peak at the top.
- Slip stitch into the next 3 double crochets to move to the next chain space.
- Repeat the same tip pattern (sc, hdc, dc, hdc, sc) for every leaf around.
- Join with a slip stitch into the first leaf tip.
- Cut yarn and weave in ends.
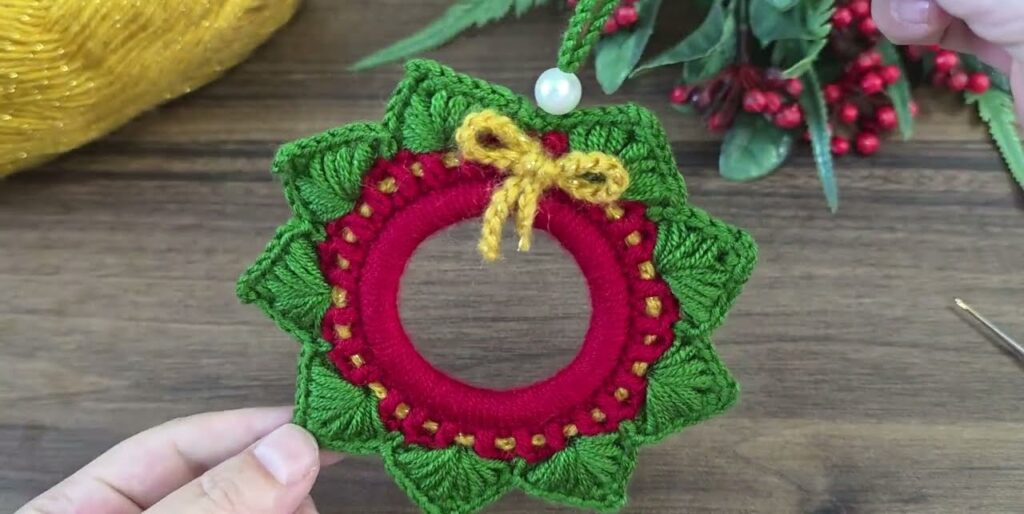
🎁 PART 5: Finishing Touches
- Add a small bow using ribbon or yarn on the top.
- Make a hanging loop:
- Cut a small piece of yarn or ribbon, thread it through a top stitch, and tie a knot.
- Optionally, sew or glue on tiny beads or bells for sparkle.
🌟 Final Look
You now have a mini crochet wreath with:
- Red wrapped center
- Yellow accent dots
- Green textured leaves
Perfect as a Christmas ornament, gift topper, or wall decoration.