
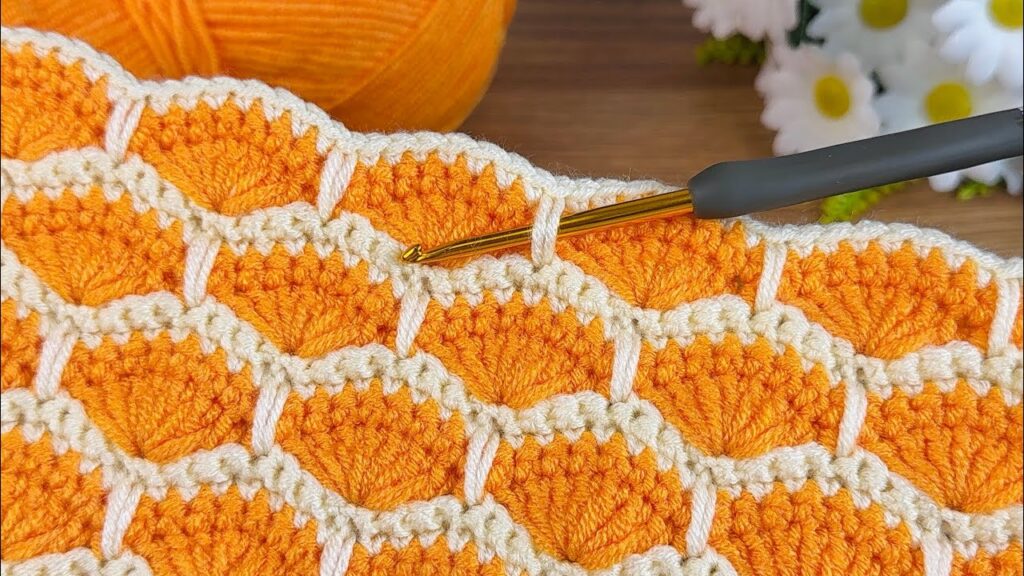
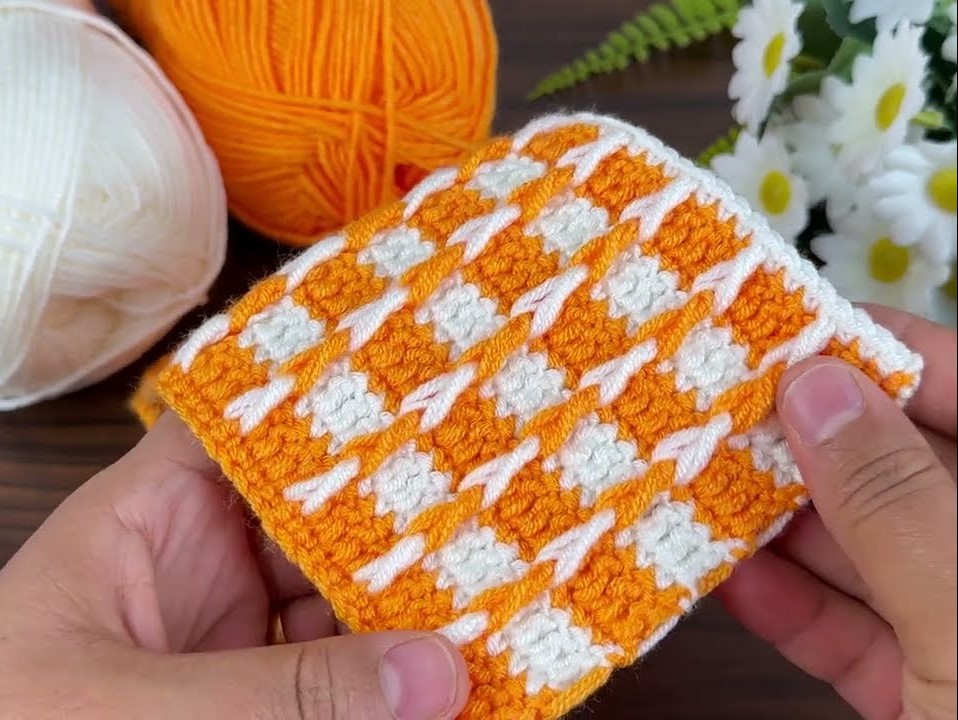
This beautiful crochet pattern in your image is known as the Crocodile Scale or Shell Stitch with Overlay Vertical Stripes — it combines shell stitches (in orange) and surface slip stitches (in cream/white) to create a textured honeycomb look.
Here’s how you can make it step-by-step:
🧵 Pattern Name:
Shell Stitch with Overlay Slip Stitch (Honeycomb Texture)
🧶 Materials Needed:
- Yarn A (orange) – for shells
- Yarn B (cream/white) – for borders and vertical lines
- 4 mm crochet hook (or match your yarn size)
- Scissors + Yarn needle
🔸 Abbreviations (US terms)
| Symbol | Meaning |
|---|---|
| ch | chain |
| dc | double crochet |
| sc | single crochet |
| sl st | slip stitch |
| st | stitch |
| sk | skip |
| rep | repeat |
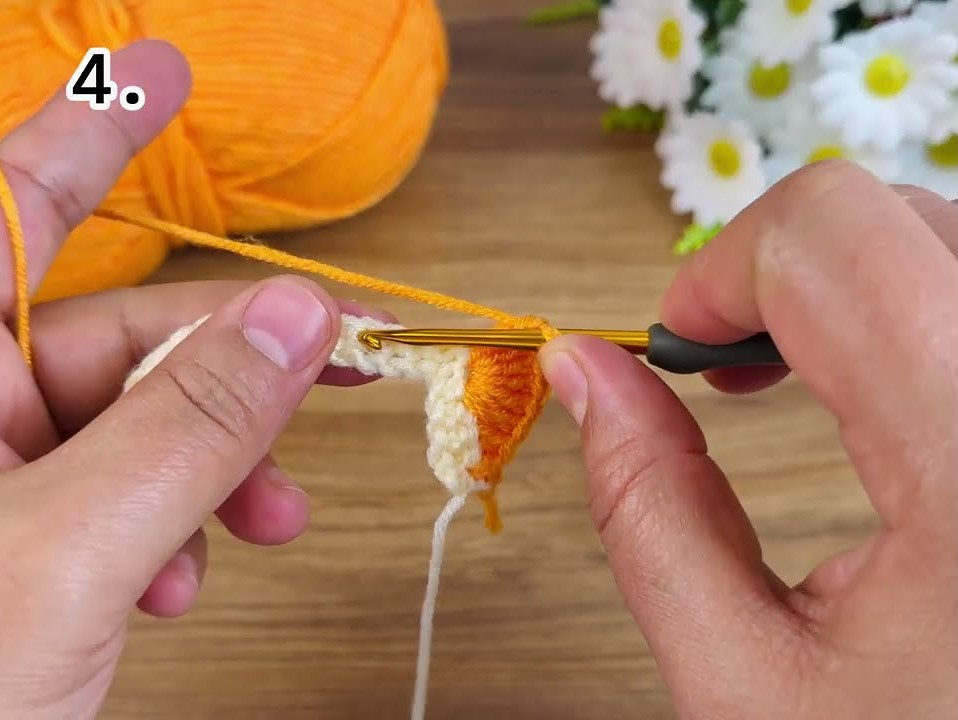
🔹 Step 1: Foundation
- Using Yarn A (orange), ch a multiple of 8 + 3.
👉 Example: ch 35 (8×4 + 3). - Row 1: dc in 4th ch from hook and in each ch across.
(This gives a solid base row.)
Turn your work.
🔹 Step 2: First Shell Row
- Ch 3 (counts as 1 dc), sk 3 sts, then work 7 dc in next st (this is your shell).
- Sk 3 sts, dc in next st.
- Repeat from * to * across the row.
You should end with 1 dc in the last stitch.
Turn your work.
You’ll see beautiful orange shells forming.
🔹 Step 3: Offset Shell Row
- Ch 3, dc 3 times into the space between the first dc and shell below.
- Sk 3 sts, dc in next st (top of middle dc of shell), 7 dc in next space.
- Repeat to end, finishing with 4 dc (one in each remaining st).
Turn.
This creates staggered shells, filling the gaps between the previous ones.
🔹 Step 4: Repeat Pattern
Repeat Row 2 and Row 3 alternately.
Each new row shifts the shells up and interlocks them.
Continue until your piece reaches the desired size.
🔹 Step 5: Border (optional)
When your pattern is complete, you can make 1–2 rows of sc in Yarn B (cream) around the entire piece for a clean edge.
This also sets up your base for the overlay lines.
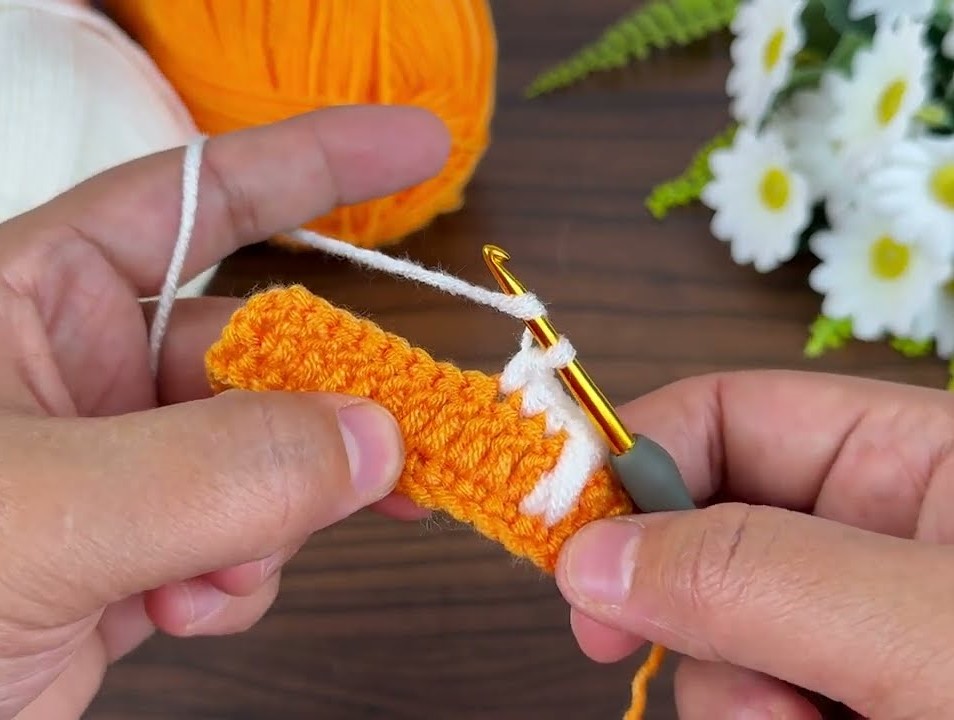
🔹 Step 6: Add Vertical Overlay Lines
Now we create the beautiful white lines that give this pattern a 3D look.
- Attach Yarn B (cream) at the top of your work between two shells.
- Insert your hook downward through the stitches between shells (like tracing a straight vertical path).
- Pull up a loop and make a slip stitch (sl st) over the surface.
- Continue slip stitching straight down the row, keeping tension even.
- At the bottom, cut the yarn and weave in the end.
- Repeat between each shell row to form evenly spaced vertical lines.
This is called surface slip stitching or surface crochet — it’s what gives the elegant white lines you see in the picture.
🧡 Helpful Tips:
- Keep your slip stitches loose so they don’t pull the fabric.
- If the shells curve too much, block your piece (lightly stretch and steam).
- You can use contrasting colors (like teal and white, or pink and cream) for different looks.
📏 Example Pattern (Short Sample)
If you want a small swatch to practice:
With orange:
Ch 19 (8x2 + 3)
Row 1: Dc in 4th ch from hook and across. (17 sts)
Row 2: Ch 3, *sk 3 sts, 7 dc in next st, sk 3 sts, dc in next st*; rep to end. Turn.
Row 3: Ch 3, 3 dc in space, *sk 3 sts, dc in next st, 7 dc in space*; end with 4 dc. Turn.
Rep Rows 2–3 for pattern.
Add white vertical slip stitches at the end.