
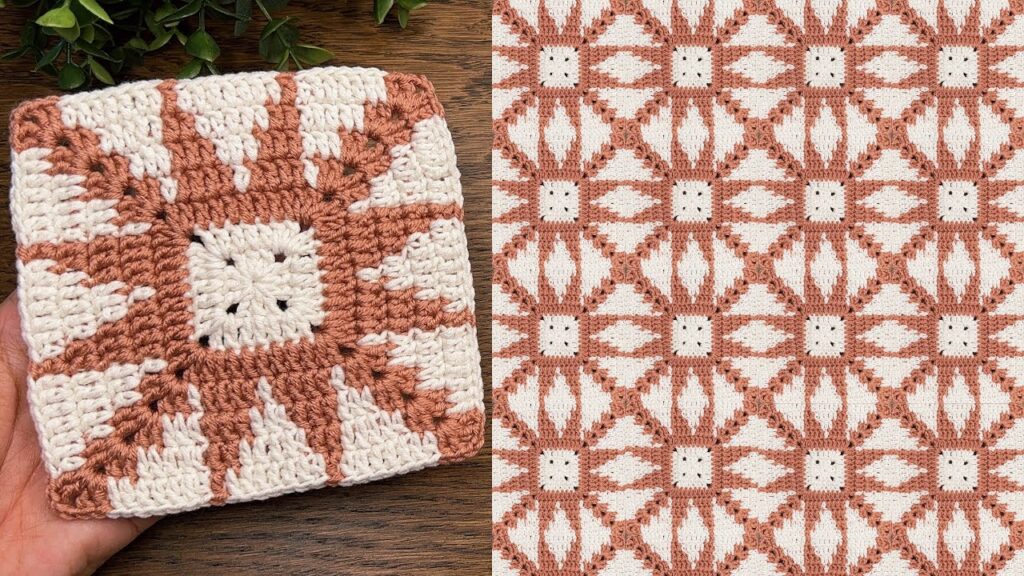
This is a mosaic crochet square pattern, often called a Starburst Mosaic Square or Sunburst Tile. It uses two colors to create the geometric, sun-like design you see. Below is a step-by-step guide to make one square like in your photo:
🧶 MATERIALS
- Yarn: 2 contrasting colors (Color A = cream, Color B = terracotta)
- Hook: 4.0 mm (or size recommended for your yarn)
- Notions: Scissors, yarn needle
- Skill Level: Intermediate (uses front post stitches & color changes)
🪡 STITCH GUIDE
| Abbreviation | Stitch Name |
|---|---|
| ch | chain |
| sl st | slip stitch |
| sc | single crochet |
| dc | double crochet |
| fpdc | front post double crochet |
| st | stitch |
| sp | space |
| ch-2 sp | chain 2 space |
| rep | repeat |
🌼 STEP-BY-STEP INSTRUCTIONS
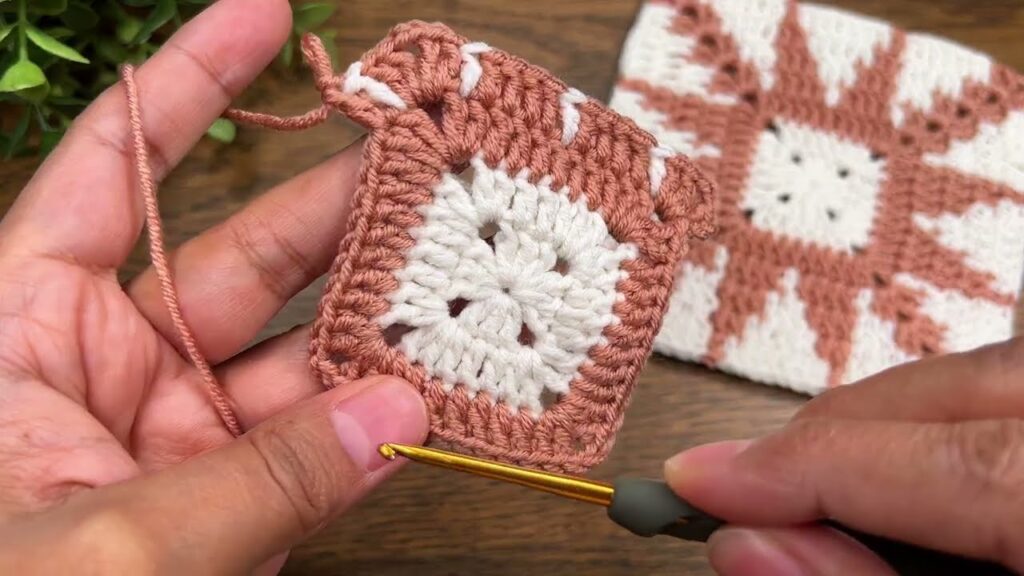
🌸 ROUND 1 – Center Square (Color A)
- Make a magic ring.
- Ch 3 (counts as first dc), 2 dc in ring.
- Ch 2, 3 dc → repeat 3 more times (you’ll have 4 groups of 3 dc, each separated by ch-2 spaces).
- Join with a sl st to the top of ch 3.
- Fasten off Color A.
👉 You now have a small square base.
🌸 ROUND 2 – Base Expansion (Color B)
- Join Color B in any ch-2 corner space.
- Ch 3 (counts as dc), 2 dc, ch 2, 3 dc in same corner.
- Ch 1, (3 dc, ch 2, 3 dc) in next corner — repeat this 3 more times.
- Ch 1, join with sl st to top of ch 3.
- Fasten off.
🧩 You now have 4 corners and 4 small spaces on each side.
🌸 ROUND 3 – Base Color Layer (Color A)
- Join Color A in any ch-1 space.
- Ch 3 (counts as dc), 2 dc in same space.
- Skip to next corner → (3 dc, ch 2, 3 dc), then 3 dc in next ch-1 space.
- Repeat around.
- Join with sl st to top of ch 3.
- Don’t fasten off (if you plan to carry yarns up).
This gives you a solid background ready for the mosaic overlay.
☀️ MOSAIC “RAYS” SECTION
This is where the magic happens — the triangle shapes (“rays”) are formed using fpdc stitches worked around stitches from 2 rounds below.
🌸 ROUND 4 – First Mosaic Rays (Color B)
- Attach Color B in the first dc after a corner.
- Ch 3 (counts as dc).
- Dc in next dc, then fpdc around dc from Round 2 below (the same color B) → this pulls up the stitch to form a spike.
- Continue pattern:
[2 dc, fpdc] repeat across side. - In corners: (2 dc, ch 2, 2 dc).
- Join with sl st to top of ch 3.
- Do not cut yarn if you plan to alternate colors every round.
✨ You will start seeing a “sunburst” shape forming — each fpdc pulls the design inward.
🌸 ROUND 5 – Background Fill (Color A)
- Join Color A in any stitch.
- Work 1 dc in each st and 1 dc in each fpdc.
- In corners: (2 dc, ch 2, 2 dc).
- Join with sl st to top of ch 3.
- Fasten off if not carrying yarn.
This round fills in and frames the mosaic rays.
🌸 ROUND 6 – Second Mosaic Expansion (Color B)
- Join Color B in first dc after corner.
- Dc in next 2 sts, fpdc around the fpdc 2 rounds below.
- Continue across sides.
- Corners: (2 dc, ch 2, 2 dc).
- Join, fasten off.
🌸 ROUND 7 – Final Background (Color A)
- Join Color A in any stitch.
- Dc in each dc and fpdc.
- Corners: (2 dc, ch 2, 2 dc).
- Join with sl st and fasten off.
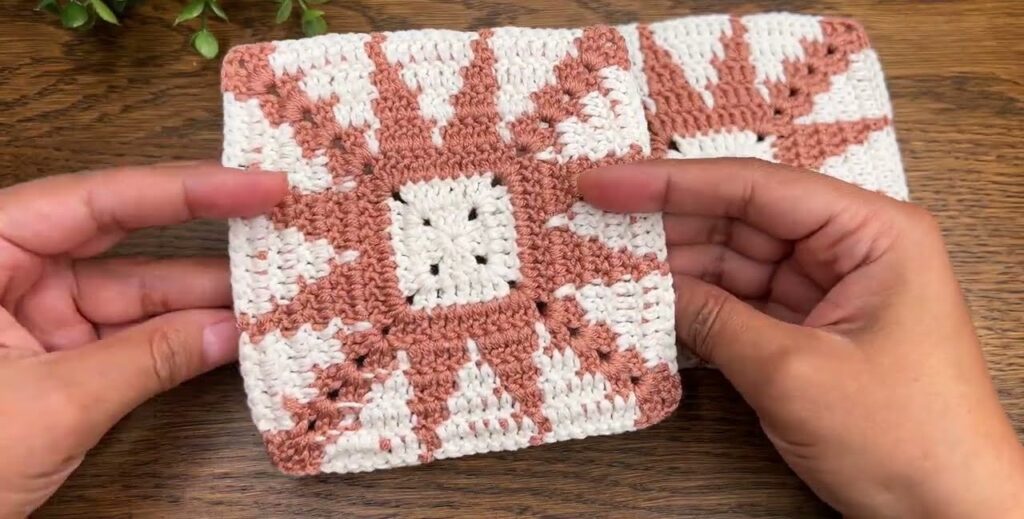
Now you have your complete Sunburst Mosaic Square! 🌞
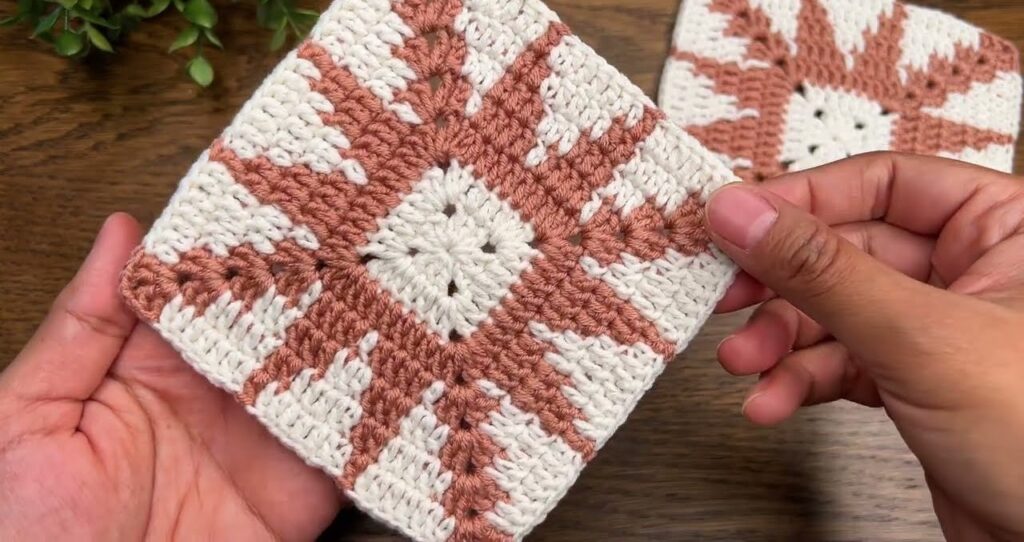
🔁 JOINING SQUARES
Once you make multiple squares:
- Block them for even shape.
- Join with whip stitch, mattress stitch, or slip stitch through back loops.
- Optionally, add a border:
- 1 row sc around with Color A,
- Optional final row of dc or crab stitch.
🧩 TIP
If you want to create the repeating geometric blanket look (like on the right side of your image):
- Arrange squares so the “sunbursts” line up corner to corner.
- Alternate the rotation of each square (every other one turned 90°) for a diamond/star layout.