That’s a crochet puff shell or scallop border pattern, often used for edges of blankets, scarves, or garments. Here’s how you can make it step-by-step:
🧶 MATERIALS
- Yarn: Medium (category 3 or 4) cotton or acrylic yarn.
- Hook: Use the size recommended on your yarn (usually 3.5–4.5 mm).
- Extras: Scissors, yarn needle.

🌼 ABBREVIATIONS (US TERMS)
| Symbol | Meaning |
|---|---|
| ch | chain |
| sc | single crochet |
| dc | double crochet |
| puff | puff stitch |
| st(s) | stitch(es) |
| yo | yarn over |
🌸 HOW TO MAKE A PUFF STITCH
- Yo, insert hook into stitch, yo, pull up a loop (3 loops on hook).
- Repeat yo, insert, pull up 4 more times (total 11 loops on hook).
- Yo and pull through all loops, chain 1 to close the puff.
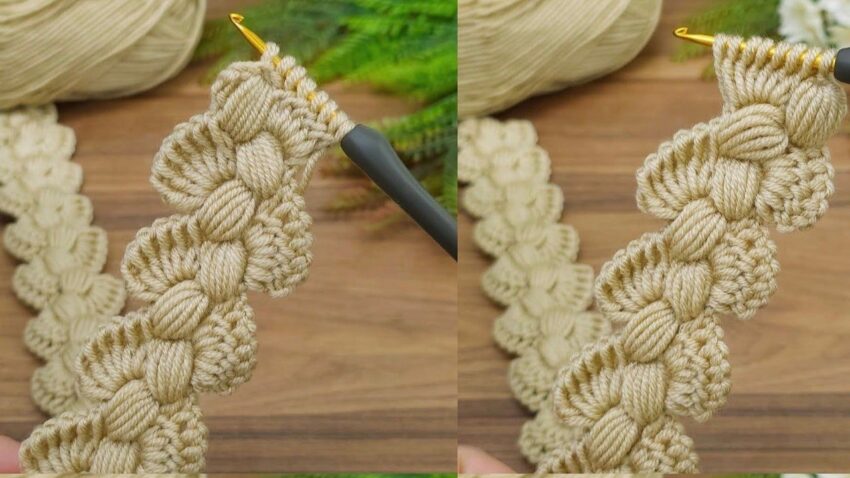
👉 This makes one thick puff that looks like the ones in your photo.
🌿 STEP-BY-STEP BORDER PATTERN
🔹 Step 1: Foundation
- Make a foundation chain in multiples of 6 + 1.
Example: 6×5 = 30 + 1 = 31 chains.
🔹 Step 2: Row 1 (Base Row)
- Start in 2nd chain from hook, make 1 sc.
- Skip 2 chains, then make 7 dc in the next chain — this forms your first shell.
- Skip 2 chains, make 1 sc in next chain.
- Repeat across: (skip 2, 7 dc in next, skip 2, sc in next)
- At the end of row, you’ll have a pretty scalloped edge.
💡 Tip: Each shell = 7 dc cluster → it’s the base for your puff petals later.

🔹 Step 3: Row 2 (Building the Puff Layer)
- Chain 3 (counts as first dc), turn your work.
- In the middle dc of the shell below (4th dc of 7), work 1 sc.
- Chain 3, then in same place make 1 puff stitch.
- Chain 2, make another puff stitch in the same space.
→ You now have two puffs emerging from the center of one shell. - Chain 3, skip to next shell’s middle dc, and repeat steps 3–4.
- Continue across the row.
Now your border has thick 3D puff petals stacked diagonally — just like the photo!
🔹 Step 4: Row 3 (Second Side Puff Connection)
- Turn your work.
- Work 1 sc at base of previous puff.
- In the space between puff pairs, make another puff cluster (same as before).
- Continue this process down the row — this helps form the twisting, braided effect.
You should now see the overlapping puff “leaves” forming.

🔹 Step 5: Finishing
- Fasten off securely.
- Weave in all yarn ends neatly.
- Gently steam or press flat (optional).
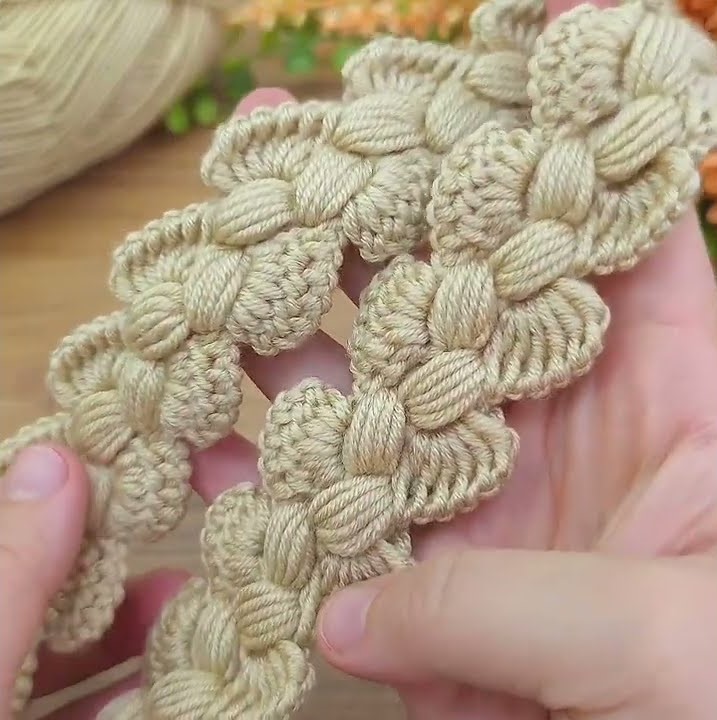
🌼 RESULT
You’ll have a soft, 3D puff scallop border that looks like petals or braided leaves — perfect for edging blankets, scarves, or pillowcases.