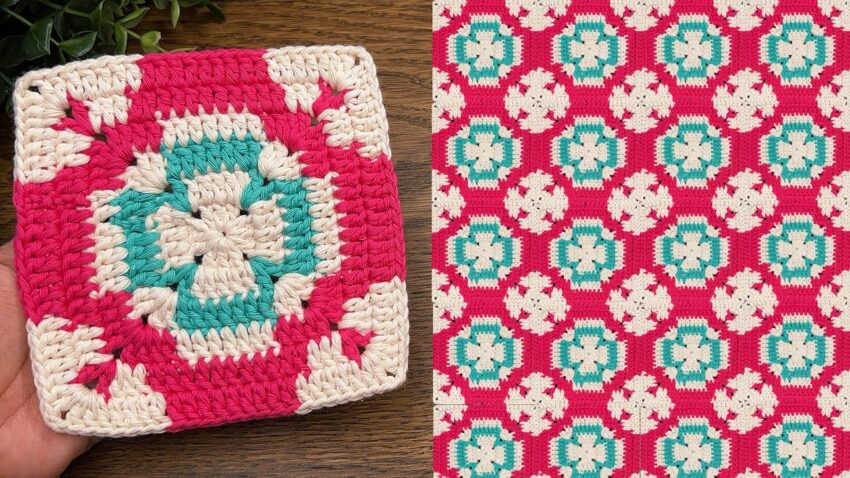
Here is a step-by-step tutorial to make the beautiful three-color crochet square shown in your image.
This design looks like a multi-round textured granny square with color changes that create a mosaic/overlay look.
⭐ Crochet Pattern: 3-Color Mosaic Granny Square
(Exactly like your picture)
Stitches Used:
• MR = Magic Ring
• ch = chain
• sc = single crochet
• dc = double crochet
• puff = (yo, insert, pull up loop) × 4, yo, pull through all loops
• sl st = slip stitch
Colors:
• A = Cream
• B = Teal
• C = Pink

🧶 ROUND-BY-ROUND — FULL DETAILS
🌼 ROUND 1 – Center (Color A – Cream)
- MR
- Ch 3 (counts as dc)
- Work 2 dc, ch 2 into ring
- Repeat (3 dc, ch 2) 3 more times
You now have 4 clusters separated by ch-2 corners. - Sl st to top of ch-3
- Pull MR closed
Stitch Count:
4 corners, each corner = 3 dc + ch 2

🌿 ROUND 2 — Teal Petal Extension (Color B – Teal)
Start in any corner ch-2 space.
- Join B with sl st
- Corner: Ch 3 (counts as dc), 2 dc, ch 2, 3 dc
- Move to next ch-2 space → repeat the same corner
- Do this for all 4 corners
- Sl st to close
Stitch Count per side:
3 dc (corner) + 3 dc (next corner) = 6 dc per side
This makes the teal “windmill” shape you see.
🌸 ROUND 3 — Cream Overlay Puff Petals (Color A)
This is where the creamy “petals” appear between teal stitches.
- Join A in any corner space
- Corner:(Puff, ch 2, Puff)
- Puff = (yo, insert hook into corner space, pull up loop) × 4, yo, pull through all loops
- Side:
- In each teal space between clusters, work 1 puff
- Total per side = 3 puffs
- Repeat corner + 3 puffs for each side
- Sl st to finish
Stitch Count per side:
Corner puff + 3 side puffs + corner puff = 5 puffs
The square looks floral and raised.

🌺 ROUND 4 — Pink Framing (Color C)
This round forms the bright square border.
- Join C in any corner
- Corner: ch 3, 2 dc, ch 2, 3 dc
- Side:
- dc in every puff from previous round
- dc between the puffs
→ Total stitches per side = 11 dc
- Repeat around
- Sl st to close
Now the square is bigger and clearly framed.

🌼 ROUND 5 — Pink + Cream Mosaic Split (Color C + A)
This is the special part: the cream “petal blocks” appear inside the pink round.
Work in color C, but switch to A at specific stitch locations.
🧶 Side Pattern (for each side):
- dc 3 with Pink (C)
- Switch to Cream (A): 2 dc
- Switch back to Pink (C): 3 dc
- Cream (A): 2 dc
- Pink (C): 3 dc to corner
🧶 Corner Pattern:
In corner space with Pink (C):
(3 dc, ch 2, 3 dc)
Repeat this around all four sides.
This creates the cream wedge-shapes that match your photo exactly.

🧩 Joining into Blanket (Right Side of your image)
Squares are joined after finishing Round 5.
Best method:
→ Join-as-you-go slip stitch
- Hold 2 squares wrong sides together
- Insert hook through both outer loops
- Sl st across
- Repeat for vertical + horizontal joins
This preserves the clean mosaic look.