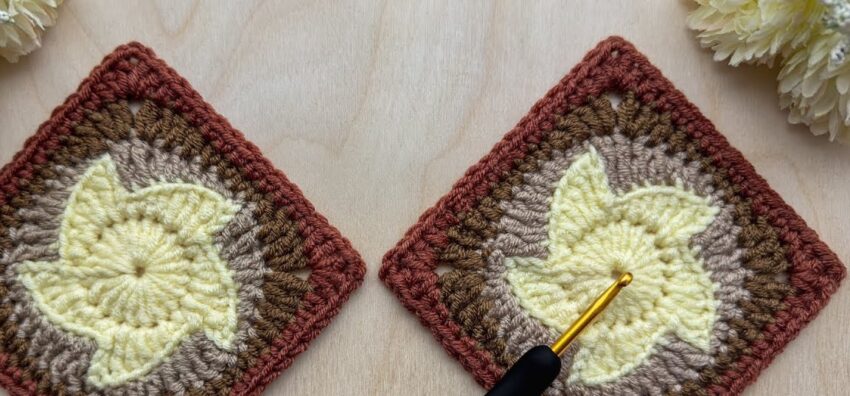
This crochet square pattern looks like a Leaf Swirl Granny Square, a textured motif where the center forms a swirl resembling petals or leaves, surrounded by rounds that turn it into a square. Here’s how you can make one like in your image:
🌿 Detailed Crochet Tutorial: Leaf Swirl Granny Square
🧶 What You’ll Need
- 4 yarn colors:
- Color A (center/leaf): Pale yellow
- Color B: Light brown
- Color C: Medium brown
- Color D (border): Reddish-brown
- Crochet hook: 3.5mm or 4.0mm
- Scissors, yarn needle

🪡 Step-by-Step Instructions
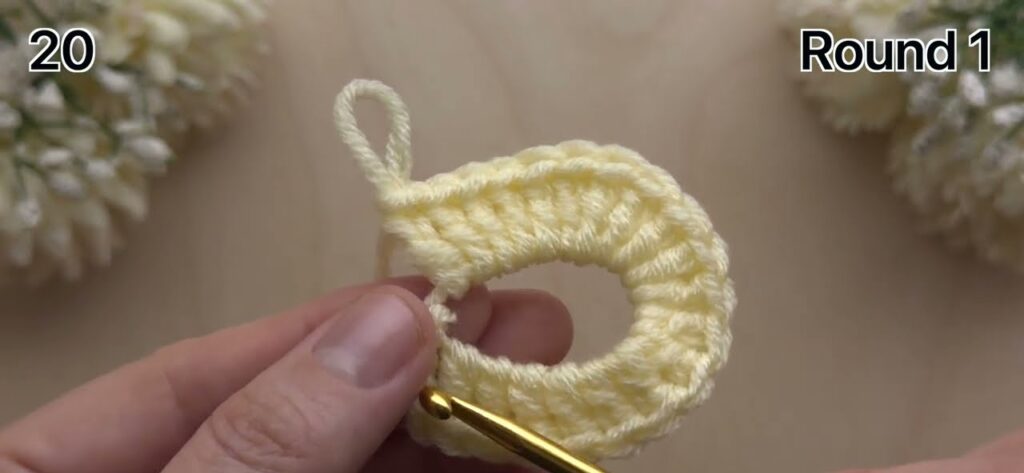
Round 1: Center Circle
Using Color A (pale yellow)
- Make a magic ring.
- Chain 3 (counts as 1 double crochet).
- Work 11 double crochets (dc) into the ring.
→ You now have 12 stitches including the beginning chain 3. - Pull the ring tight and join with a slip stitch into the top of the chain 3.
🧩 Round complete: 12 dc.
Round 2: Starting the Leaf Swirl
We begin to form the leaf swirl using front post stitches.
- Chain 3 (counts as 1 dc).
- Front Post Double Crochet (FPdc) around the next stitch.
- Work 1 dc in the next stitch, then FPdc around the next stitch.
- Continue alternating 1 dc, 1 FPdc around the circle.
- Join with a slip stitch to the first chain 3.
🧩 Round complete: 24 stitches total (12 dc + 12 FPdc).
Tip: FPdc creates the raised ridge that gives the leaf its shape.
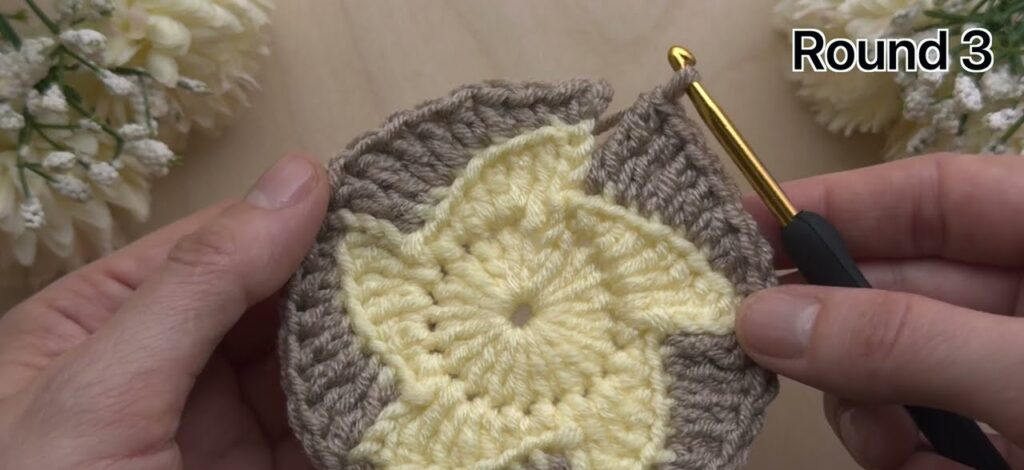
Round 3: Expanding the Petals
Still with Color A.
- Chain 3.
- In next stitch: 1 dc.
- FPdc around the next post (to keep the swirl raised).
- Work 2 dc in next stitch (increase), then FPdc in next.
- Repeat (2 dc, FPdc) pattern around.
- Join with slip stitch.
🧩 You’ll start to see a soft swirl form like overlapping petals.
Round 4: Finishing the Swirl Shape
- Continue in Color A.
- Chain 3.
- Work 1 dc in each stitch and FPdc around every other stitch (to maintain texture).
- If needed, add increases (2 dc in one stitch) where the piece starts to curl.
- Join with slip stitch.
🧩 You now have a round piece with a clear leaf swirl pattern.
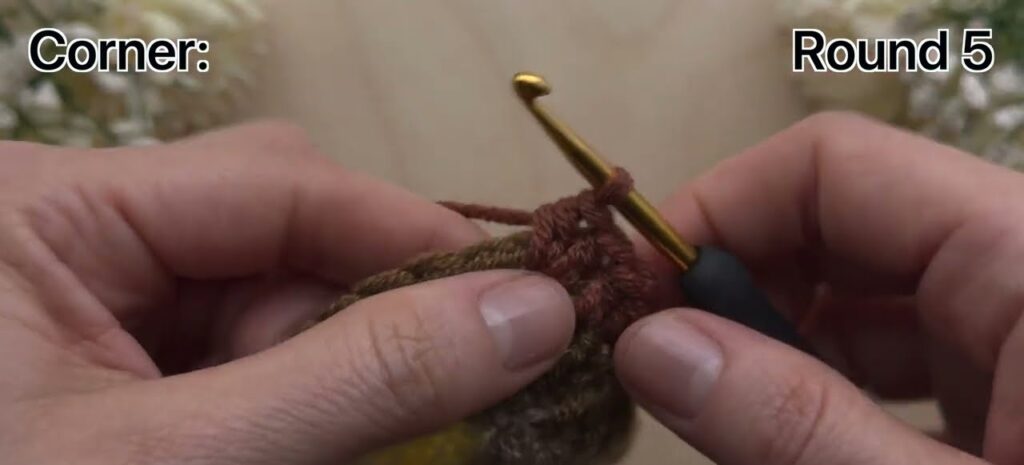
Round 5: Begin Background
Change to Color B (light brown).
- Attach yarn in any stitch.
- Chain 3 (counts as dc).
- Work 1 dc in each stitch around.
- Add small increases (every 8–10 stitches, do 2 dc in one stitch) to keep it flat.
- Join with slip stitch.
🧩 Round complete: about 72 stitches (depends on your tension).
Round 6: Add Another Layer of Background
Switch to Color C (medium brown).
- Chain 3.
- Continue working dc around, increasing evenly to keep it circular.
- Join with slip stitch.
🧩 At this stage, it’s still round — the next round will square it off.
Round 7: Turn Circle into Square
Stay with Color C.
We form 4 corners to make a square.
- Chain 3 (counts as dc).
- In next 2 stitches: dc in each.
- In next stitch, make a corner: (2 dc, ch 2, 2 dc).
- Continue around — after every 16–18 stitches, make another corner (2 dc, ch 2, 2 dc).
- Join with slip stitch to first chain 3.
🧩 You now have a square shape.
Round 8: Border
Switch to Color D (reddish-brown).
- Chain 3.
- Work dc in each stitch across each side.
- In each corner space, work (2 dc, ch 2, 2 dc).
- Continue all around.
- Join with slip stitch, fasten off, and weave in ends.
🧩 Finished Size: About 12–15 cm (depending on yarn and hook size).
🌸 Finishing
- Block your square using steam or pins to shape it perfectly.
- Combine multiple squares for a blanket, bag, or table cover.
🧵 Stitches Used Recap
| Stitch | Abbreviation | Description |
|---|---|---|
| Chain | ch | Yarn over, pull through loop |
| Double Crochet | dc | Yarn over, insert hook, yarn over, pull through 2 twice |
| Front Post Double Crochet | FPdc | Yarn over, insert hook around post from front to back to front |
| Slip Stitch | sl st | Insert hook, yarn over, pull through all loops |