
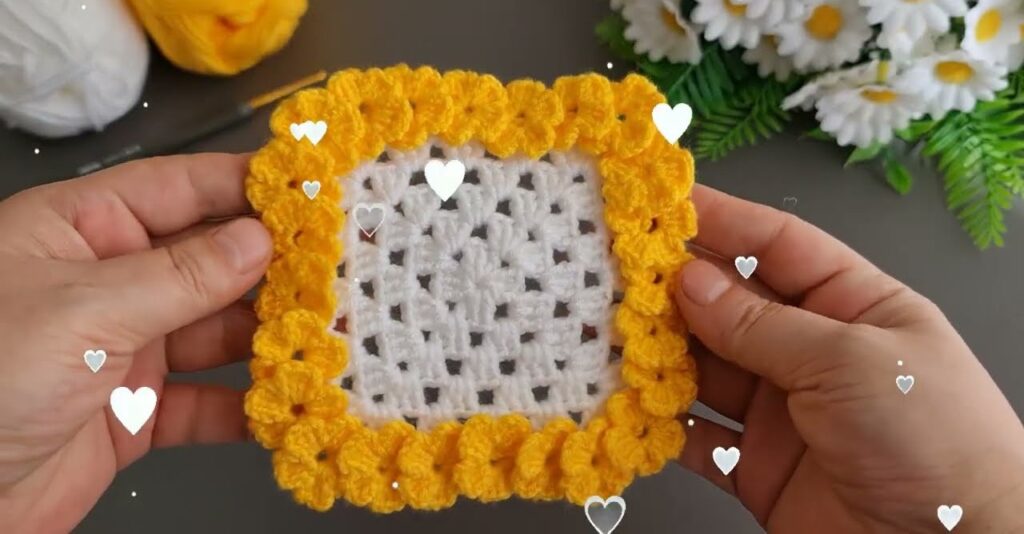
This beautiful crochet edge you shared is a flower or scalloped border pattern often used to decorate granny squares, blankets, or coasters. Here’s how to make it step-by-step 🌼
🧶 Crochet Flower Border Detailed Tutorial
🌸 Materials
- Yarn: Two colors — one for the base (white), one for the flowers (yellow).
- Hook: The same size you used for your main square (usually 3–4 mm).
- Scissors and yarn needle for finishing.
🌼 Step 1: Prepare the Base
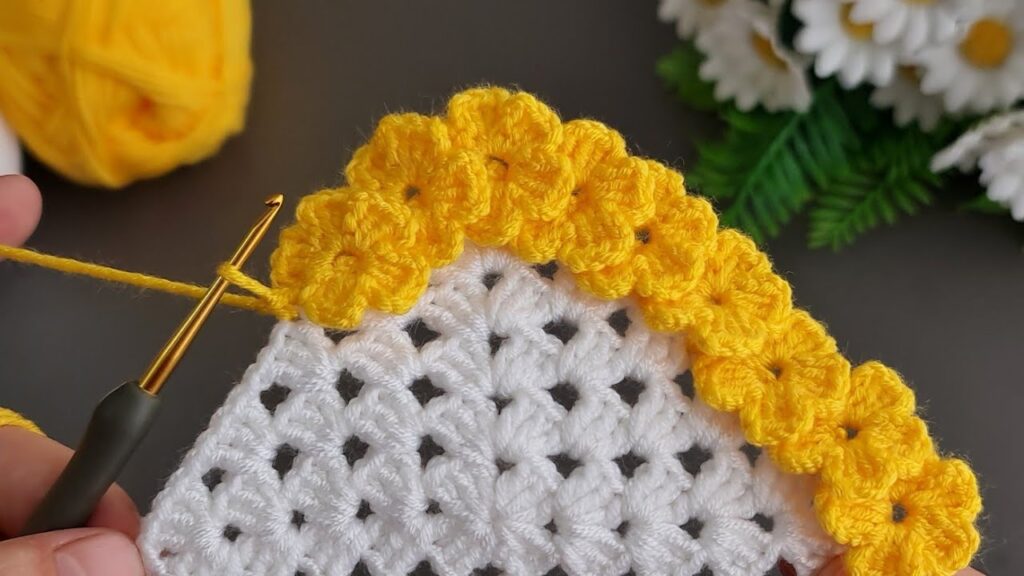
Make sure your main piece (like the white granny square in the photo) is finished and the edges are neat.
If you haven’t already, crochet one round of single crochet (sc) around the edge — this gives a clean base for the border.
🌼 Step 2: Attach Border Yarn
- Take your yellow yarn.
- Insert your hook into any corner stitch.
- Yarn over, pull through, and slip stitch to attach the new yarn.
- Chain 1 to start.
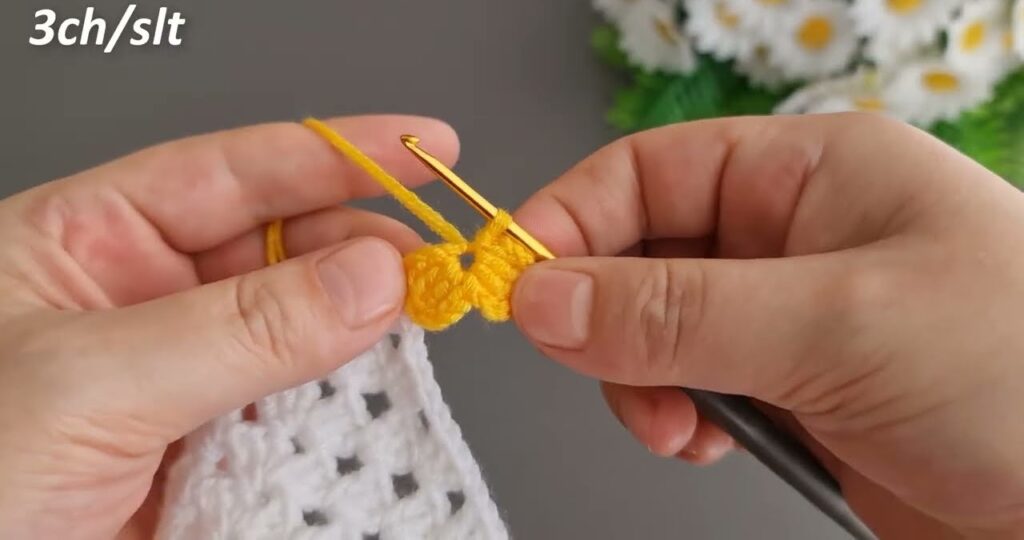
🌼 Step 3: Make the First Flower
- In the same stitch (or space), chain 3 (this counts as the first double crochet).
- Make 4 more double crochets (dc) in the same stitch — you now have 5 dc in total.
- Chain 1, then slip stitch into the same stitch/space.
→ This forms one small flower (or shell) with 5 petals.
🌼 Step 4: Move to the Next Flower
- Skip 2 stitches on the base.
- Insert the hook into the next stitch, slip stitch to attach.
- Chain 3.
- Make 4 dc in the same stitch, chain 1, and slip stitch in the same stitch again.
→ Another flower is complete!
Repeat this around the entire edge.
🌼 Step 5: Handling Corners
When you reach a corner:
- To make the turn smooth, crochet 2 flowers in the same corner space.
- This helps the border stay flat without curling.
Example corner:
[5 dc, ch 1, sl st in same space]
ch 1
[5 dc, ch 1, sl st in same space again]
🌼 Step 6: Finishing
- Continue making flowers along all edges.
- When you reach the beginning, slip stitch into the first flower’s base to join.
- Cut the yarn and pull through.
- Use a yarn needle to weave in the ends neatly at the back.
🌼 Optional Variation
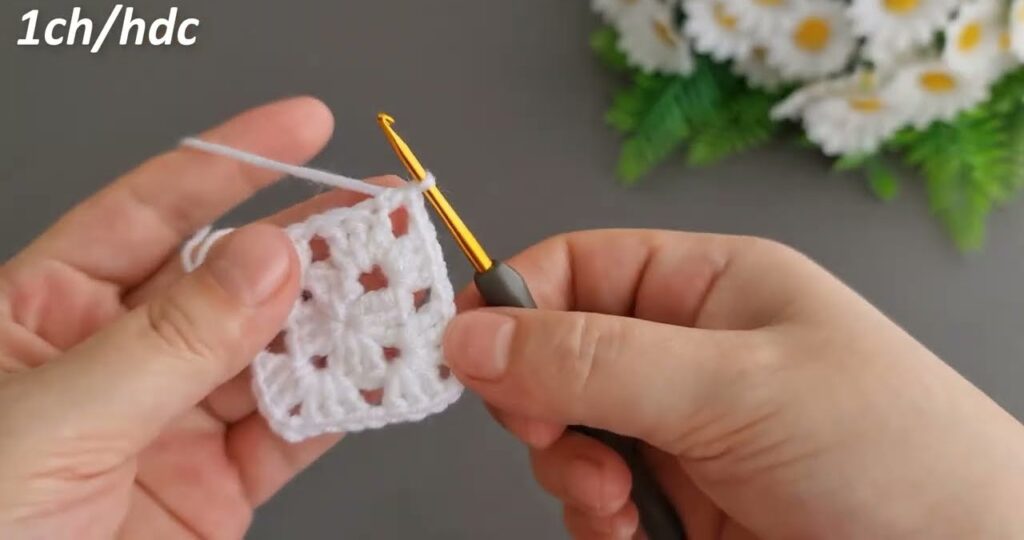
If you want smaller or puffier flowers:
- Use half double crochets (hdc) instead of dc → smaller petals.
- Use 6 dc per flower → puffier, fuller petals.
🌻 Example Pattern Summary (in shorthand)
Attach yarn in any stitch.
* [5 dc, ch 1, sl st in same st], skip 2 sts, sl st in next st, rep from * around.
For corners: make 2 flower clusters in same corner space.
Join, cut yarn, weave ends.