
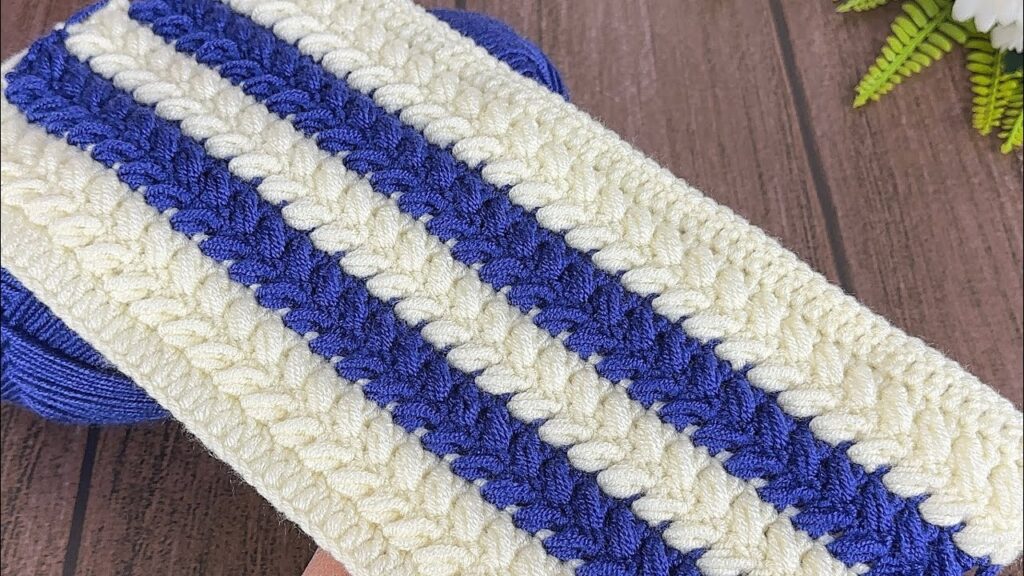
This crochet pattern in your image is a striped textured stitch that combines front post and back post stitches with V-stitches or cross stitches to create raised rows in two colors (blue and cream). Here’s how you can make it:
🧶 Materials
- Yarn A (cream) – for textured rows
- Yarn B (blue) – for the middle ridges
- 4.0 mm crochet hook (or hook size that matches yarn)
- Scissors
- Yarn needle
🪡 Stitches Used
| Abbrev. | Stitch name | How to do it |
|---|---|---|
| ch | chain | Yarn over, pull through loop |
| dc | double crochet | Yarn over, insert hook, yarn over, pull through, yarn over, pull through 2 loops twice |
| fpdc | front post double crochet | Yarn over, insert hook around front of the post of the dc below (from front to back to front), yarn over, finish as dc |
| bpdc | back post double crochet | Yarn over, insert hook around back of post (from back to front to back), yarn over, finish as dc |
| v-st | V-stitch | (dc, ch 1, dc) all in same stitch |
🧵 Pattern Instructions
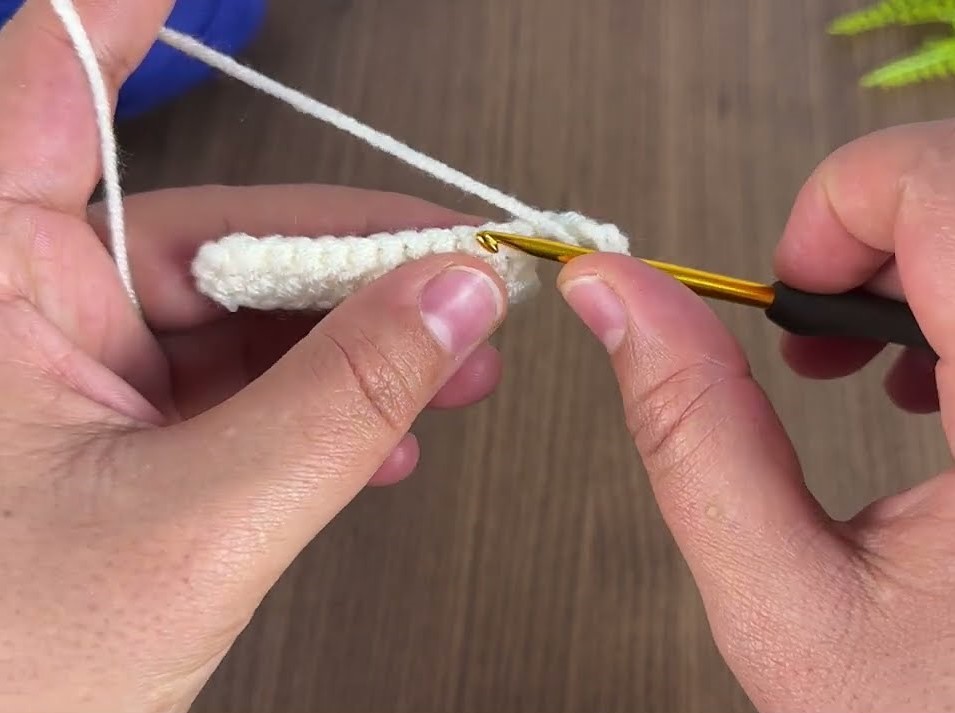
🩶 Foundation Row
- With Yarn A (cream), chain a multiple of 4 + 2 (for example, ch 30).
- Row 1: dc in 4th ch from hook and in each ch across.
→ You now have one base row of dc.
→ Turn your work.
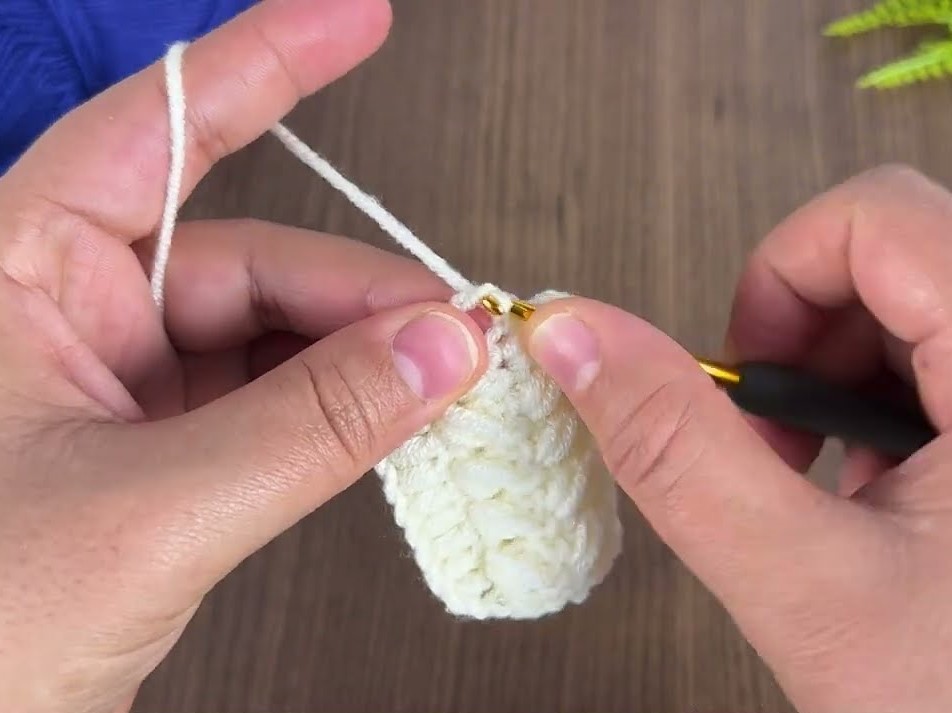
🤍 Row 2 – Texture Base (Cream)
- ch 2 (counts as first dc).
- fpdc around the next stitch.
- bpdc around the next stitch.
- Repeat steps 2–3 across the row, alternating fpdc and bpdc.
- End with 1 dc on top of the turning ch from the previous row.
→ Turn.
📝 Tip: This row gives that nice ribbed texture.
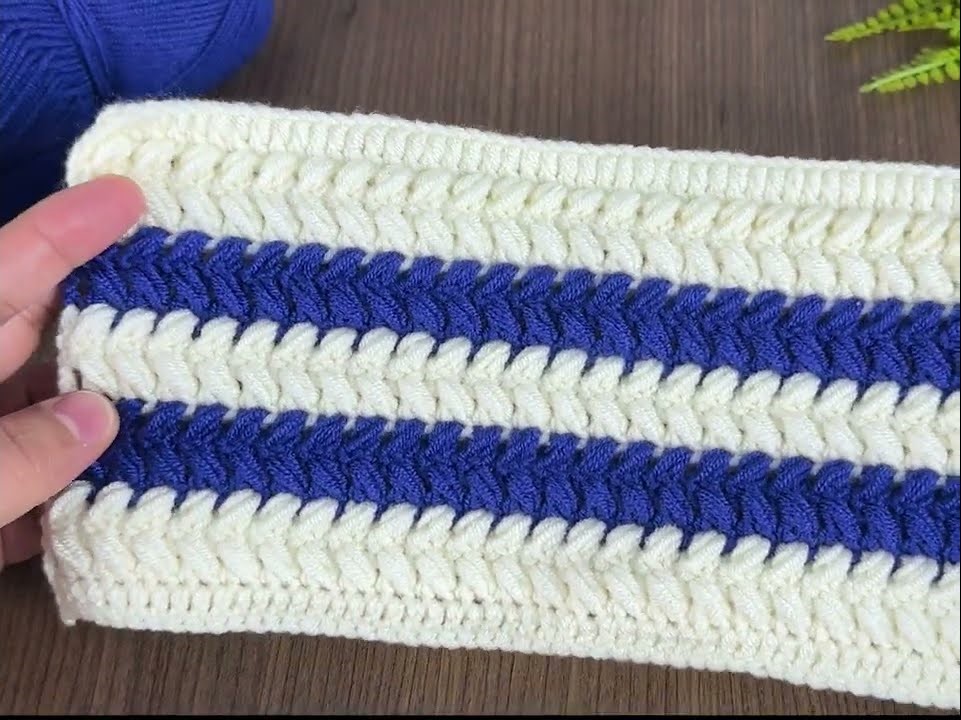
💙 Row 3 – Blue Ridge (V-Stitches)
- Attach Yarn B (blue), ch 3 (counts as first dc).
- Skip 1 st, work (dc, ch 1, dc) in next st (that’s 1 V-stitch).
- Skip 1 st, make V-st in next st — repeat this across the row.
- End with 1 dc in last stitch.
→ Turn.
💙 Row 4 – Blue Raised Texture
- ch 2 (counts as dc).
- fpdc around the first dc post of the V-stitch below, bpdc around the next dc post of the same V-stitch.
- Repeat this across: for every V-stitch, do (fpdc, bpdc).
- End with 1 dc in last stitch.
→ Turn.
🪶 Now you’ll see the blue row stand out between the cream sections.
🤍 Row 5 – Cream Texture
- Switch back to Yarn A (cream).
- Repeat Row 2 (fpdc, bpdc) pattern.
→ This adds another cream band.
→ Turn.
💙 Row 6 – Blue Ridge Again
Repeat Rows 3 and 4 with Yarn B.
🔁 Continue Pattern
Alternate between:
- 2 rows of cream (textured fpdc/bpdc),
- 2 rows of blue (V-stitch and post stitches).
Repeat until you reach your desired length.
🧺 Finishing
- End with a cream textured row.
- Fasten off and weave in all yarn ends neatly using your yarn needle.
- Block your piece if needed to even out the stitches.
🌟 Tips for a Neat Result
- Keep your color changes on the same side each time (so one edge looks tidy).
- When switching colors: after the last yarn-over of the last dc of the row, pull the new color through to complete the stitch.
- For extra thickness, use two strands of yarn A together on cream rows.