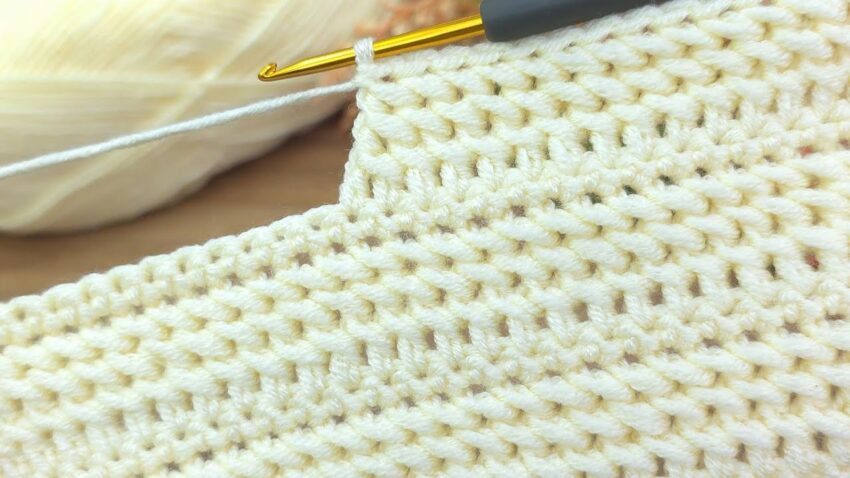
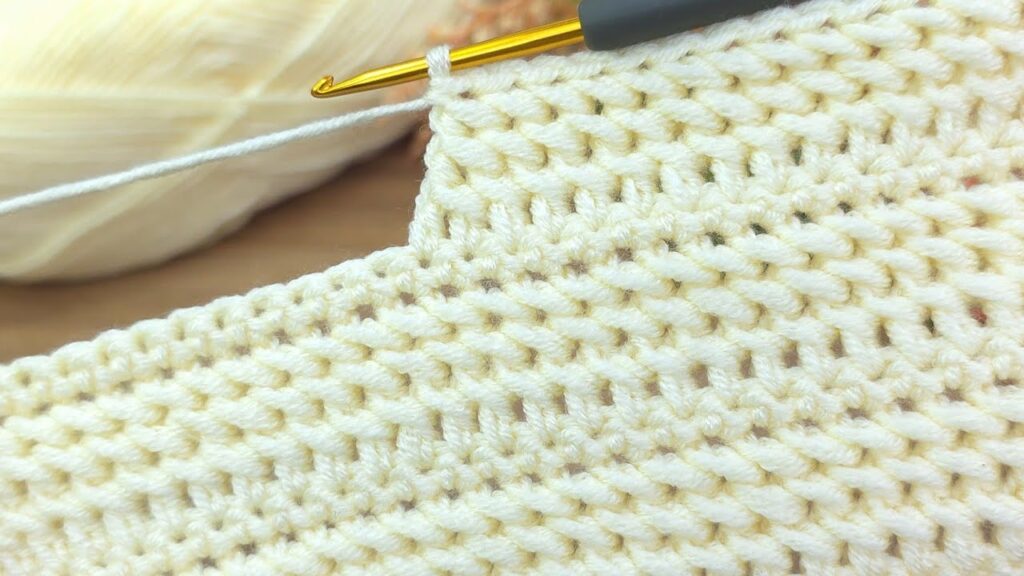
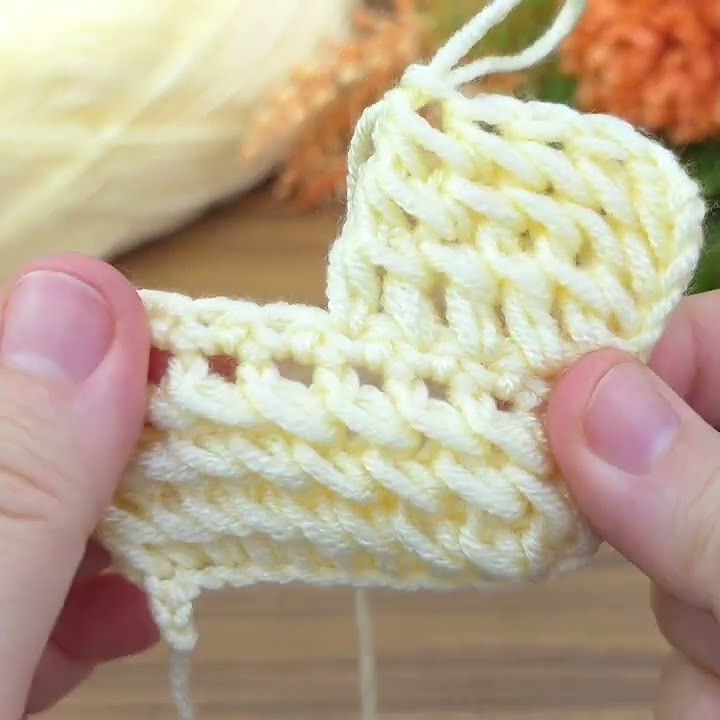
The image you uploaded shows a crochet project made with double crochet stitches (also known as “dc” in patterns). I’ll guide you through how to make this exact texture and shape.
🧶 Materials
- Yarn: Medium (Worsted weight, category 4) in a light color (like cream or white)
- Crochet Hook: 5.0 mm (H-8) or size recommended on the yarn label
- Scissors and Tapestry needle for finishing
🪡 Step-by-Step Instructions
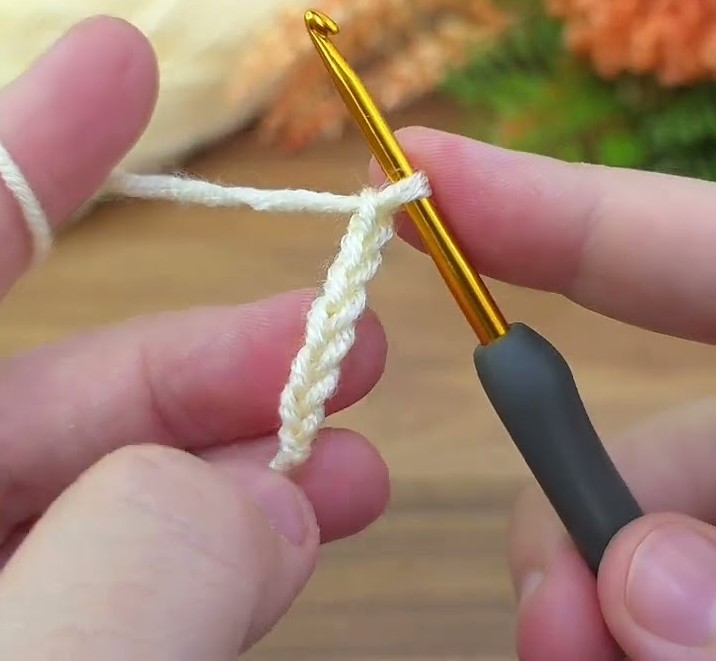
🧩 Step 1: Make the Foundation Chain
- Make a slipknot and place it on your hook.
- Chain (ch) the number of stitches you want for the width of your piece — for example, 30 chains.
- The last 3 chains will count as the first double crochet in your first row.
🧵 Step 2: Row 1 – Double Crochet (dc)
- Yarn over (YO).
- Insert your hook into the 4th chain from the hook.
- YO again, and pull up a loop (you now have 3 loops on the hook).
- YO, pull through 2 loops (you’ll have 2 left).
- YO again, and pull through the last 2 loops — that’s one double crochet (dc).
- Repeat steps 1–5 across the row.
👉 When you reach the end, chain 3 (this counts as your first dc of the next row), and turn your work.
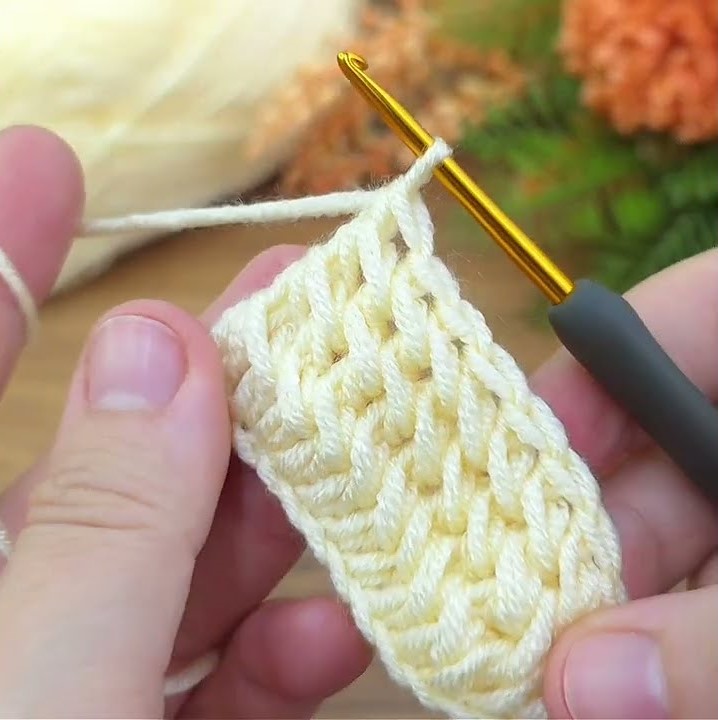
🧶 Step 3: Row 2 – Continue the Double Crochet Pattern
- Skip the first stitch (because your ch-3 counts as a dc).
- Yarn over, insert your hook into the next stitch, and make a dc.
- Continue making dc across the row.
- Chain 3, turn.
Keep repeating this until you have about 6 or 7 rows.
This creates the neat, even rows like in the lower section of your photo.
🪄 Step 4: Create the Step Shape (Partial Rows)
Now you’ll create that shorter raised section shown in the image.
- Crochet across only part of the row — for example, stop halfway through instead of going all the way to the end.
- Turn your work.
- Chain 3 (counts as dc), and crochet back across just that section.
- Repeat for several rows to build up that smaller “step” area.
This is called working partial rows, and it’s used for shaping — for example, armholes, necklines, or heel sections in crochet slippers.
✨ Optional – Texture Variation
The slightly ribbed look may come from crocheting into the back loops only:
- Instead of inserting your hook under both loops at the top of a stitch, insert it only under the back loop (the one farther from you).
- This gives a beautiful horizontal texture, just like the one in your photo.
🔁 Summary Pattern Example
Row 1: DC in 4th ch from hook and in each ch across. Ch 3, turn.
Row 2–6: DC in each st across. Ch 3, turn.
Row 7: DC halfway across the row (for shaping). Ch 3, turn.
Rows 8–10: DC in each st across partial section. Ch 3, turn.
You’ll end up with the same step-shaped piece shown in your image.