
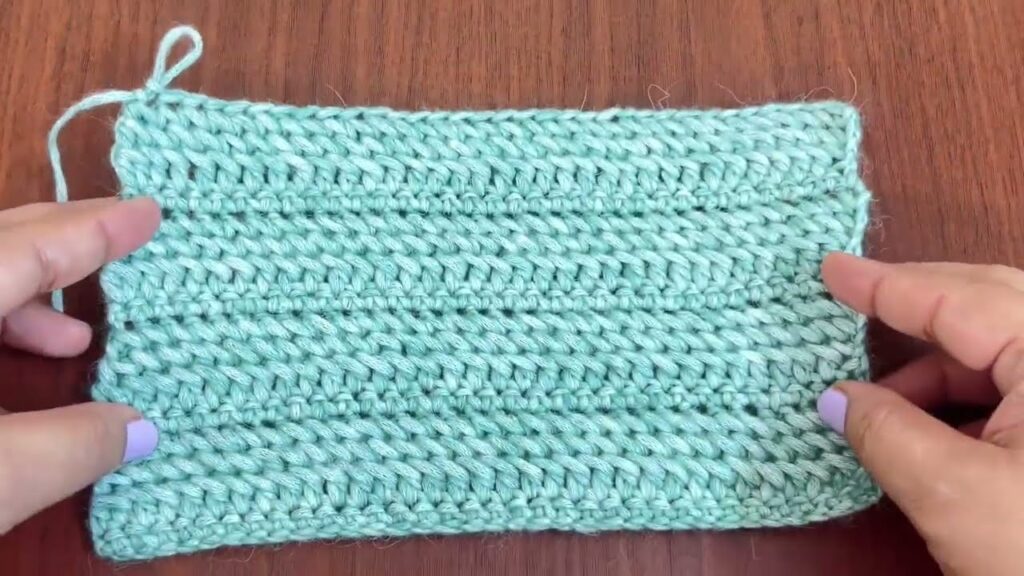
That image shows Tunisian Knit Stitch crochet, also called the Tunisian Stockinette Stitch. It looks very similar to knitted fabric but is made with a Tunisian crochet hook. Here’s how to make it step-by-step:
🧵 PART 1: Tunisian Knit Stitch (TKS) — Detailed Step-by-Step
✳️ Materials:
- Tunisian crochet hook (with or without cable — slightly larger than your yarn label recommends)
- Yarn (smooth yarn works best for learning)
- Scissors + yarn needle
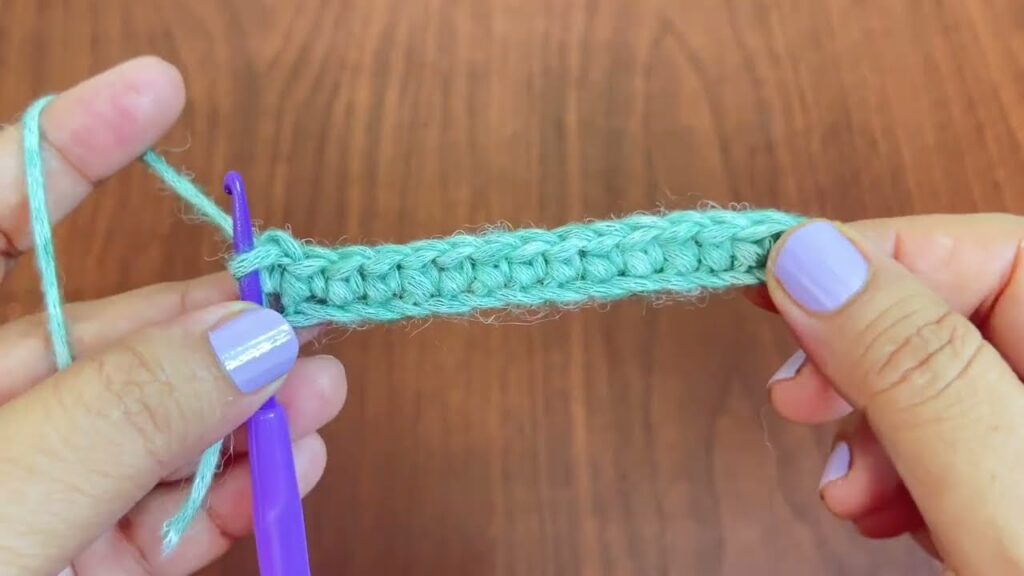
🔹 Step 1: Foundation Chain
- Make a slip knot and place it on your hook.
- Chain (ch) the desired number of stitches (for practice, try 20–25 chains).
🔹 Step 2: Foundation Forward Pass
- Insert the hook into the second chain from the hook.
- Yarn over (yo) and pull up a loop, leaving it on your hook.
- Repeat this across the chain — you’ll end up with a row of loops on your hook.
🧠 Tip: Each chain = one loop on your hook.
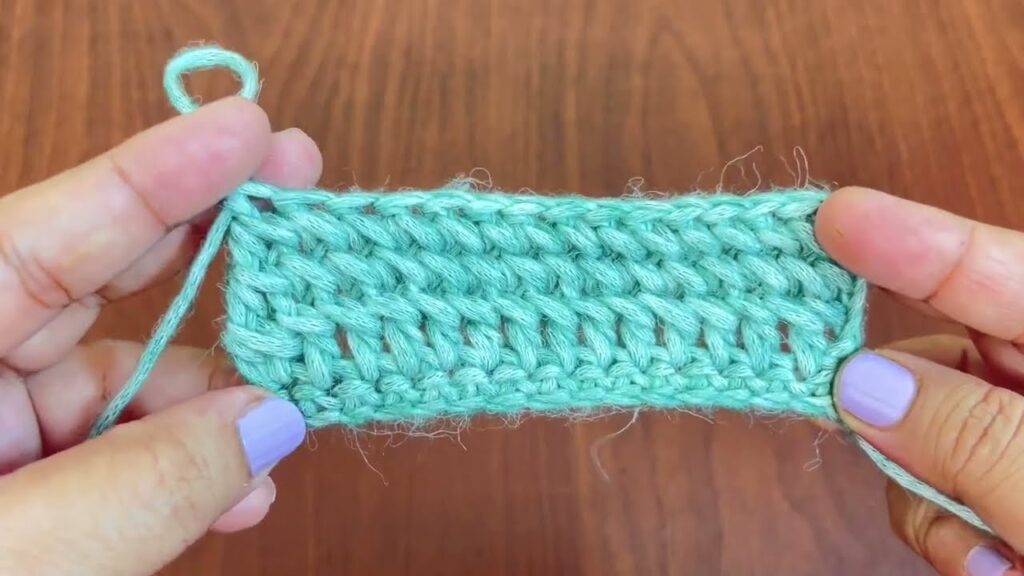
🔹 Step 3: Return Pass (work loops off)
- Yarn over, pull through one loop (edge stitch).
- Then yarn over, pull through two loops repeatedly until only one loop remains on your hook.
That’s one full row done.
🔹 Step 4: Tunisian Knit Stitch (TKS) Forward Pass
Now you start forming the knit look.
- Skip the first vertical bar (the one right under your working loop).
- Insert your hook between the front and back vertical bars of the next stitch — right into the middle of that “V” shape. 💡 The tip of the hook should go all the way to the back of the fabric.
- Yarn over, pull up a loop, and leave it on your hook.
- Continue this across the entire row.
🧠 Each vertical “V” is one stitch.
🔹 Step 5: Return Pass
Same as before:
- Yarn over, pull through 1 loop (edge).
- Yarn over, pull through 2 loops repeatedly until only one remains.
Repeat Steps 4–5 for each new row.
🔹 Step 6: Bind Off
To finish cleanly:
- Insert your hook between the front and back vertical bars (as for TKS).
- Yarn over, pull through both loops on the hook (like a slip stitch).
- Continue across the row.
- Cut yarn and weave in ends.
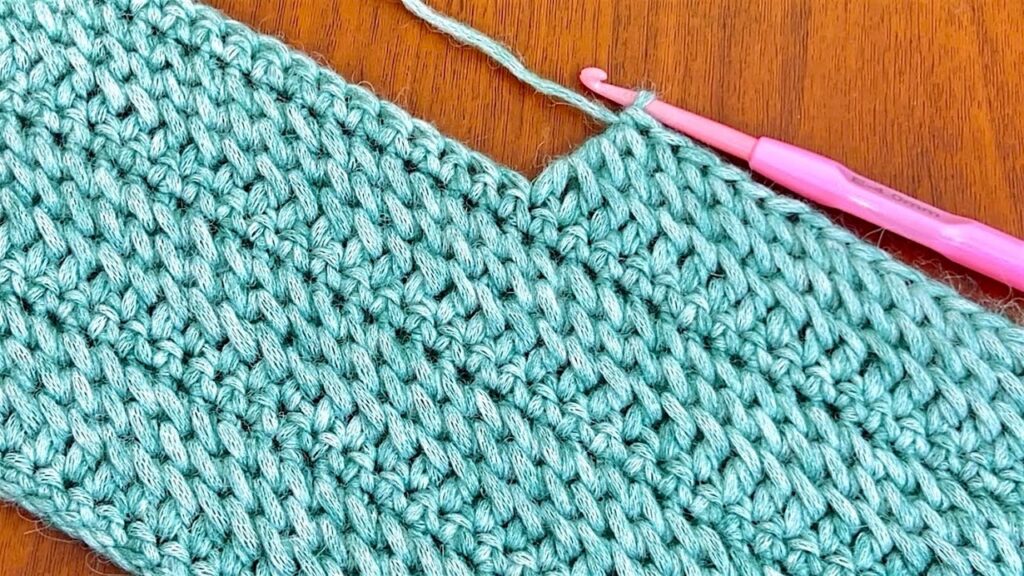
🪡 PART 2: Making the V-Shape Neckline (as in your photo)
The photo shows a center V-shaping where you stop working a few stitches in the middle — common for neck openings in sweaters or vests.
✳️ How to Shape the V-Neck
Let’s say your total row has 20 stitches.
Step 1: Work up to the neckline
Work normally in Tunisian Knit Stitch until you reach the row where you want to begin the neckline.
Step 2: Split your work into two sides
You’ll work each side separately.
- Left side: Work the first 10 stitches only, then stop.
- Right side: Reattach yarn at the other edge and work those 10 stitches separately.
So you’ll have two separate sections forming the sides of the V.
Step 3: Shaping the V (Decreasing)
To create the angled slope, you’ll decrease one stitch near the center edge on each side every few rows.
Decrease method:
- When you reach the center edge, insert hook into the next two vertical bars together, yarn over, pull up a loop.
- Continue as normal.
Do this decrease every 1 or 2 rows (depending on how sharp you want the V).
Step 4: Keep both sides even
Alternate between working the left and right sides, keeping the same number of rows and decreases so the neckline stays symmetrical.
Step 5: Finish edges
Once the neckline is deep enough:
- You can bind off each side,
- Or later add a Tunisian Simple Stitch border or single crochet edging around the neckline for a clean finish.
🌟 Extra Tips
- Block your fabric — Tunisian stitches tend to curl.
- If the fabric curls too much, try adding 1–2 rows of Tunisian Reverse Stitch or Single Crochet around the edges.
- Use a slightly looser tension to make shaping easier.