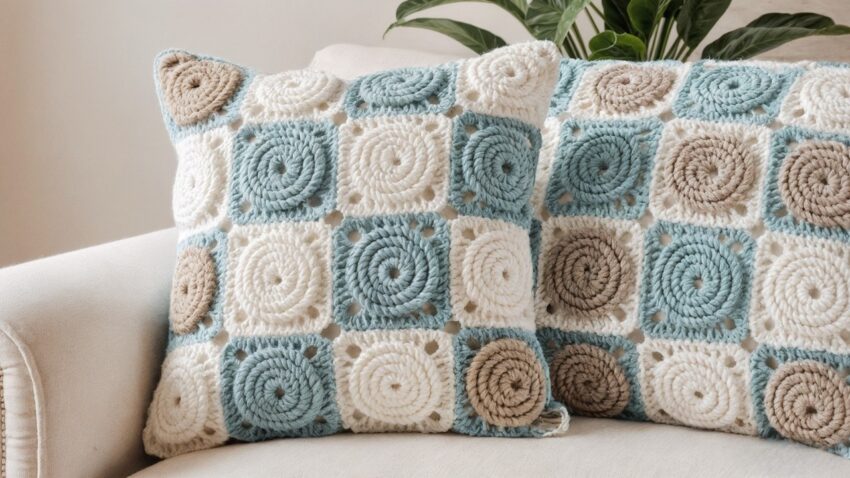
That’s a beautiful crochet spiral square pillow! 🧶
Let’s go step-by-step so you can make one like in your image.
🧶 CROCHET SPIRAL SQUARE PILLOW — DETAILED TUTORIAL
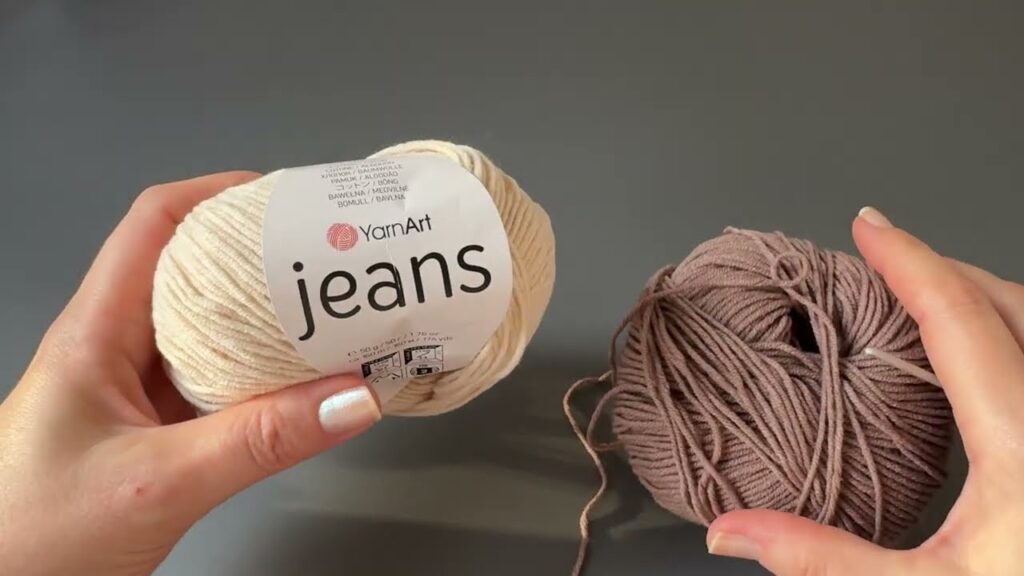
🧵 Supplies
| Item | Description |
|---|---|
| Yarn | 3 colors (Color A – Cream, Color B – Light Blue, Color C – Beige) |
| Hook | 5.0 mm (H) crochet hook |
| Other | Yarn needle, scissors, stitch markers, pillow insert |
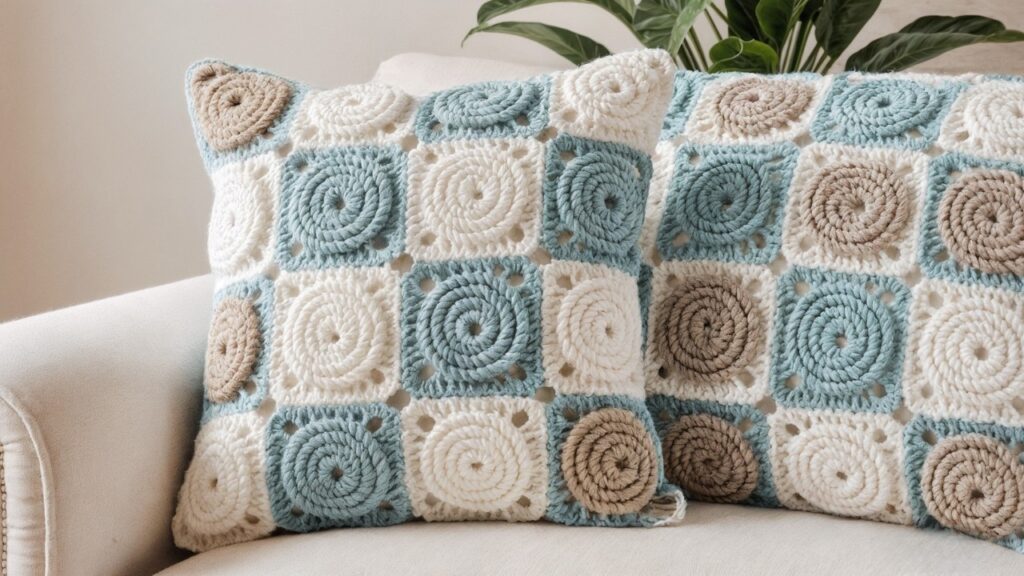
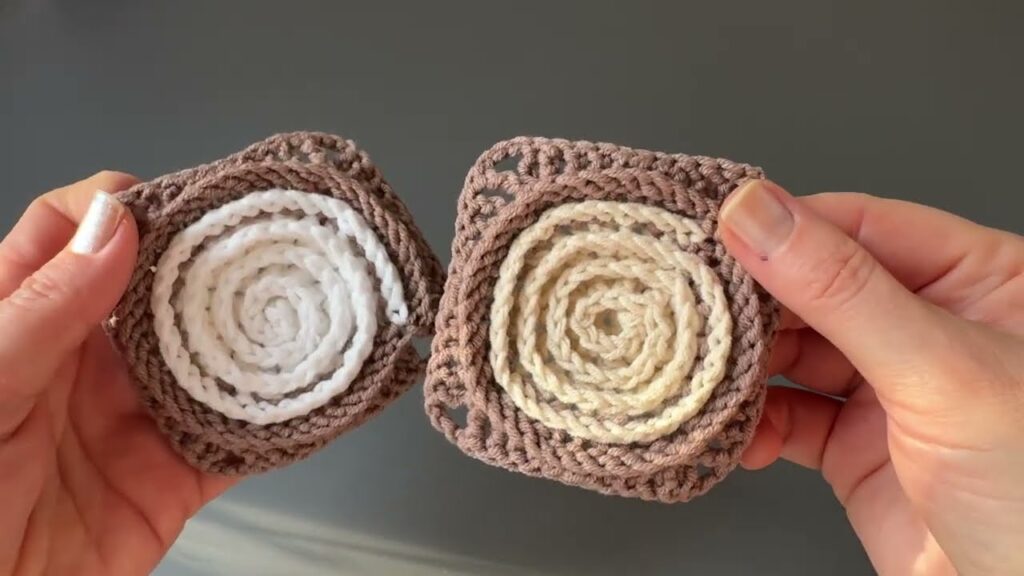
✨ PART 1: Spiral Granny Square
Each pillow is made up of many spiral squares.
Each square starts as a two-color spiral circle, then turns into a square.
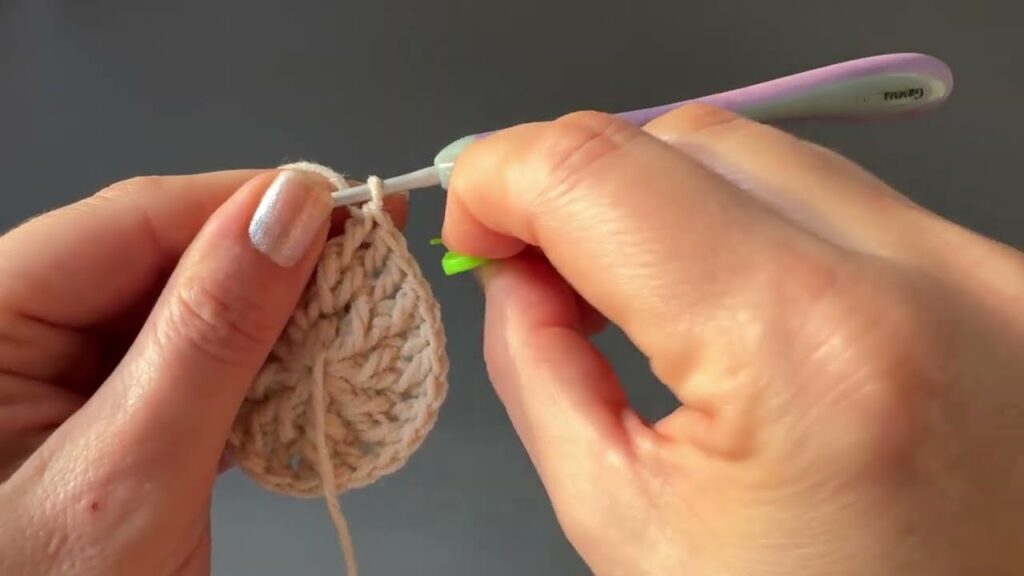
🌀 Step 1: Foundation Spiral (Round 1)
With Color A:
- Make a magic ring.
- Ch 3 (counts as 1 dc).
- Work 11 dc into the ring (12 dc total including ch-3).
- Do not close the round.
- Remove your hook (leave the loop).
- You’ll continue with the next color.
With Color B:
- Attach yarn to the same magic ring.
- Ch 3 (counts as 1 dc).
- Work 11 dc into the ring (12 dc total).
- Pull the magic ring tight.
You now have two spirals started.
➡️ You should see both colors curving side by side.
🌀 Step 2: Expanding the Spiral (Round 2)
With Color A:
- Reinsert hook into the last loop of Color A.
- 2 dc into each dc from the previous round (12 → 24 dc).
- Drop yarn but don’t cut.
With Color B:
- Continue the same way — 2 dc in each dc (12 → 24 dc).
➡️ The spiral pattern will grow evenly and stay smooth.
🌀 Step 3: Next Expansion (Round 3)
With Color A:
- (2 dc in first stitch, 1 dc in next stitch) — repeat all around. (36 dc total)
With Color B:
- Same as Color A — (2 dc in first stitch, 1 dc in next) — around. (36 dc total)
➡️ The spiral now measures about 10–11 cm in diameter.
🔲 Step 4: Shaping the Square
Switch to a single color (for example, Light Blue or Cream) to make the edges.
- Join new color in any stitch.
- Work the following pattern to make 4 corners:
(sc, hdc, dc, tr, ch 2, tr, dc, hdc, sc) all in one stitch → corner made skip 1 stitch 1 hdc in next 1 dc in next 1 dc in next 1 hdc in next skip 1 stitch repeat corner pattern - Continue this pattern around until you have 4 corners.
- Slip stitch to the first stitch to close.
- Fasten off and weave ends.
🔗 PART 2: Joining Squares
You’ll need about:
- 18 squares for one pillow front
- 18 squares for the back (depends on pillow size)
Joining Options:
- Slip Stitch Join:
- Place two squares with right sides facing each other.
- Slip stitch through the back loops only along the edges.
- Flat Join (as shown in photo):
- Lay squares flat and use join-as-you-go method or whip stitch with yarn needle.
- Use the blue color for joining to create contrast.
🧺 PART 3: Assembly (Pillow Construction)
- Make two panels (same size: front & back).
- Place them right sides facing.
- Join around 3 sides with single crochet or slip stitch.
- Insert pillow form.
- Close the last side neatly.
🌟 Optional Finishing Touches
- Add a border around the entire pillow with single crochet rounds.
- Mix and match square colors for variety.
- Steam block your squares before sewing for perfect shape.
📏 Example Layout (for standard 16×16 inch pillow)
| Rows | Columns | Total Squares |
|---|---|---|
| 4 | 4 | 16 per side |
| Total | 32 squares |