Here is a step-by-step explanation so you can clearly understand how each leaf is formed. Take it slow and follow stitch by stitch.
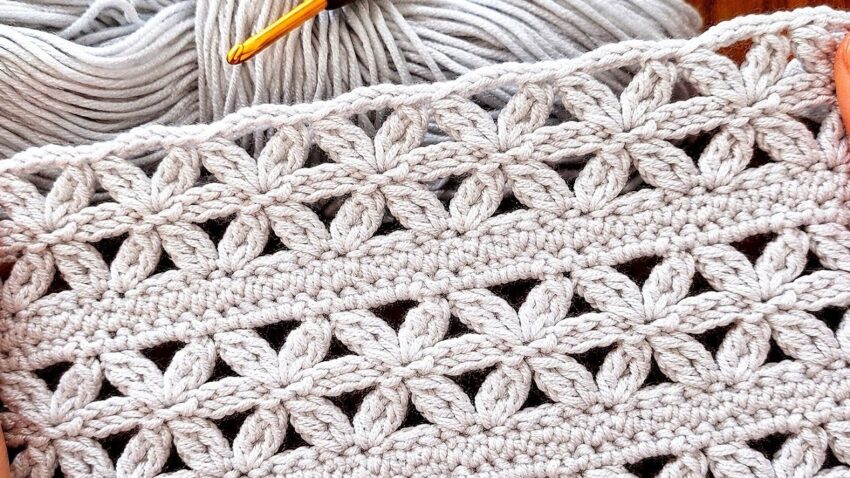
Crochet Interlocking Leaf / Oval Lace Stitch
(Very Detailed English Tutorial)
This stitch is made from long chains that cross and are locked in the middle, forming leaf-shaped ovals.
MATERIALS
- Yarn: medium (worsted / DK also works)
- Hook: 4–5 mm
- Scissors

STITCH ABBREVIATIONS
- ch = chain
- sl st = slip stitch
- sc = single crochet
- st(s) = stitch(es)
- sp = space
STEP 1: FOUNDATION CHAIN
- Chain a multiple of 8 + 2
- Example (recommended for practice):
Chain 26
Why?
- Each leaf uses 8 chains
- +2 chains are for the turning edge
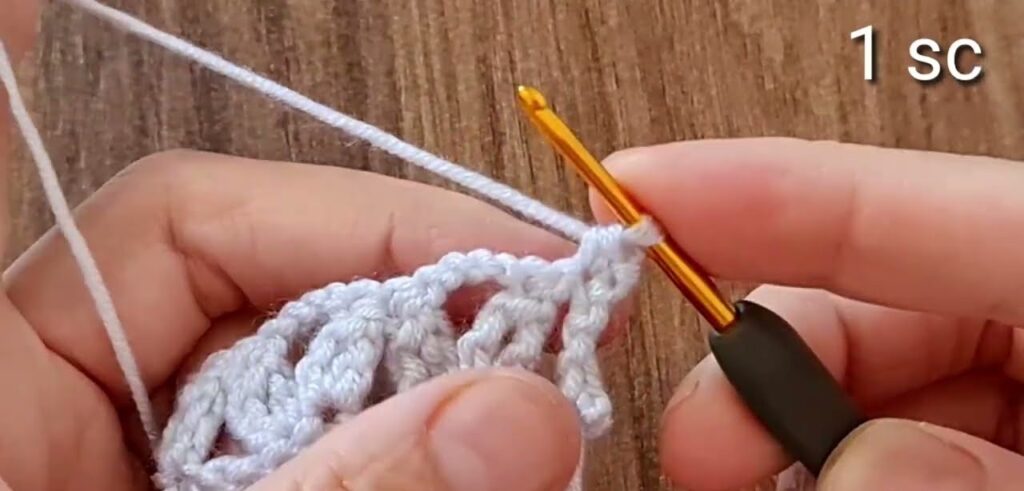
STEP 2: ROW 1 – BASE ROW (Solid Support)
This row gives strength to hold the lace.
- Insert hook into 2nd chain from hook
- Make 1 sc
- Make 1 sc in every chain across
- Turn your work
👉 You should now have a solid single crochet row
STEP 3: ROW 2 – MAKE LONG LOOPS
This row creates the loops that become leaves.
- Ch 1 (does NOT count as a stitch)
- Sc in first stitch
- Ch 7
- Skip 3 stitches
- Sc in next stitch
Repeat this across:
sc – ch 7 – skip 3 – sc
End with:
- 1 sc in the last stitch
- Turn
👉 You should see long chain arches across the row
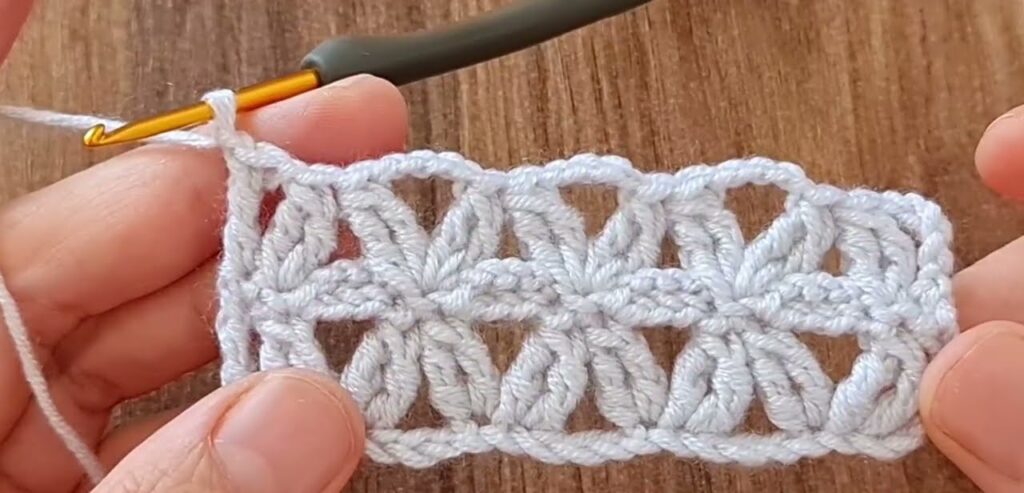
STEP 4: ROW 3 – FORM THE LEAF SHAPES
This is the most important row.
- Ch 1
- Insert hook into the center of the first ch-7 loop
- Make sl st
- Ch 4
- Insert hook into the center of the next ch-7 loop
- Make sl st
Repeat across:
sl st in loop – ch 4 – sl st in next loop
👉 What’s happening:
- The ch-4 crosses over
- The slip stitches lock the loops together
- This creates the oval / leaf shape
Turn your work.
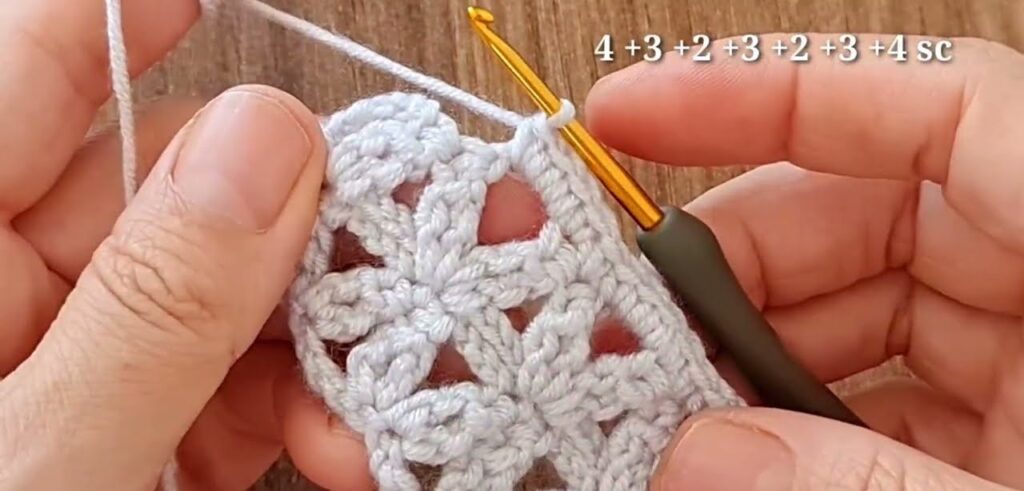
STEP 5: ROW 4 – LOCK & STABILIZE
This row holds the leaf shape in place.
- Ch 1
- Make 1 sc into each sl st
- Make 1 sc into each chain space
- Sc evenly across
- Turn
👉 The leaves are now secure and visible
STEP 6: REPEAT PATTERN
To continue the design:
- Repeat Row 2 → Row 4
- Each repeat adds one row of interlocking leaves
IMPORTANT TIPS (VERY HELPFUL)
✔ Keep chains loose, not tight
✔ Slip stitches should be gentle, not pulled
✔ Cotton yarn shows the leaf shape best
✔ Blocking makes leaves open beautifully
COMMON MISTAKES
❌ Chains too tight → leaves shrink
❌ Skipping wrong number of stitches
❌ Slip stitching in wrong place (must be center of loop)