
Here is a slow, beginner-friendly tutorial for the exact lace strip in your picture.
I will break it down step by step, including chain counts, joining, and how to keep the shape even.
🌿 CROCHET LINKED LEAF / FAN STRIP – Detailed Tutorial
📌 Pattern Structure
Each “leaf” is made from:
- A small ring (made from chain + slip stitch)
- A fan of tall stitches (all worked into the ring)
The leaves are connected ring-to-ring through chain loops.
🧶 MATERIALS
- 3.0–3.5 mm hook
- Cotton DK yarn
- Scissors

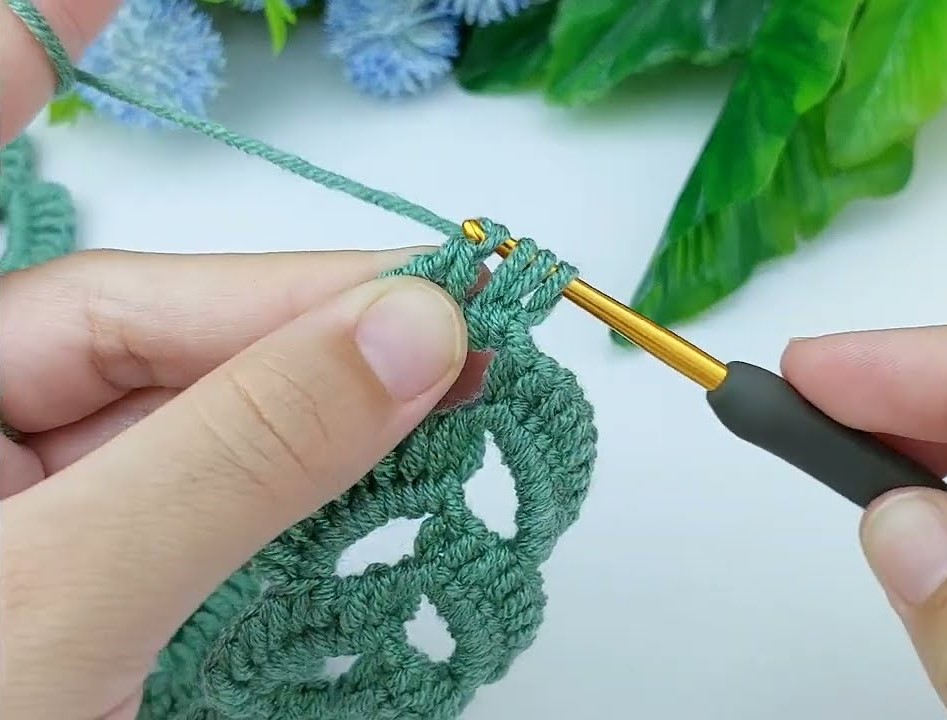
🍃 STEP 1 — Start with the First Leaf Ring
- Chain 10.
(You can chain between 8–12 depending on how big you want the hole.) - Insert hook into the first chain you made.
- Slip stitch to form a closed ring.
📝 You now have a small ring where you will build your first fan.
🍃 STEP 2 — Crochet the First Fan (Leaf Shape)
Inside the ring:
1. Chain 3
This counts as 1 double crochet (dc).
2. Work 13 more double crochets into the ring.
Total stitches in ring = 14 dc (including the ch-3).
👉 If you want the leaf bigger, use 16–18 dc.
3. Pull the ring slightly tight with your fingers to shape the curve.
4. Slip stitch to the top of the initial ch-3 to close the fan.
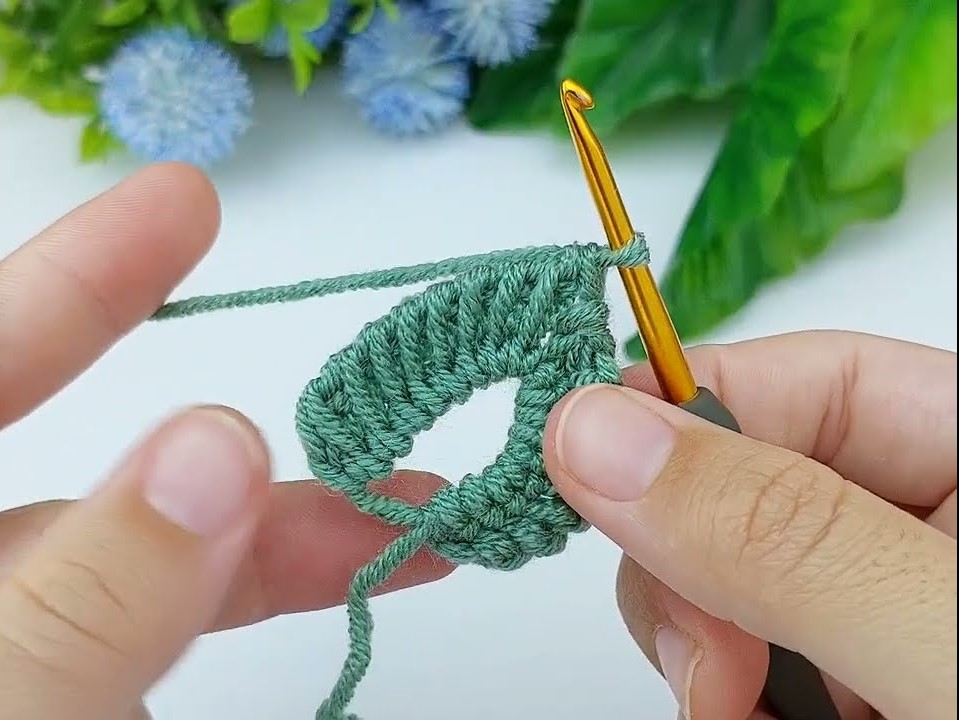
Your first curved leaf is done!
🍃 STEP 3 — Make the Connecting Chain to the Next Leaf
You will now build another hollow ring.
- Chain 8
(Again, this determines the size of the next ring—8 makes a small hole.) - Insert hook into the first chain of the 8.
- Slip stitch to form the next ring.
Now you have two rings:
✔ First one filled with a fan
✔ Second one empty, waiting for stitches
🍃 STEP 4 — Crochet the Second Fan
Inside the new ring:
- Chain 3 (counts as dc)
- Work 13 double crochets into the ring
(Total: 14 dc) - Slip stitch into the top of your starting ch-3.
Now you have two connected leaves.
🍃 STEP 5 — Repeat to Desired Length
From this point on, repeat:
⭐ Repeat Pattern
- Chain 8
- Slip stitch into 1st chain → forms a ring
- Ch 3
- 13 dc into ring
- Slip stitch to close fan
Continue until your strip is long enough.
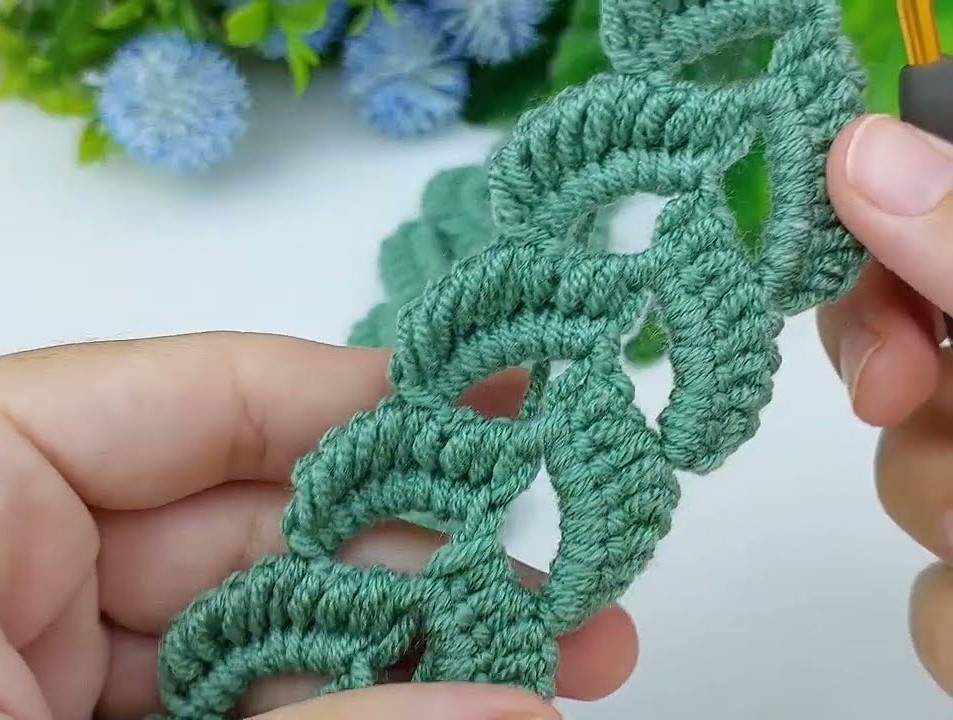
🌿 IF YOU WANT IT EXACTLY LIKE THE PHOTO
The leaf edges look textured because:
✔ The stitch used may be treble crochet (tr) instead of dc
✔ The leaf is built with slightly taller stitches
So here’s the photo-accurate version:
PHOTO-ACCURATE VERSION
Inside the ring:
- Ch 4 (counts as tr)
- 14–16 treble crochets
- Slip stitch to close
This creates the big curved edging exactly like your image.
🍃 OPTIONAL EDGING (for stability)
To make the strip lie flatter:
Along the straight bottom edge:
- Work 1 single crochet in each chain space between leaves