
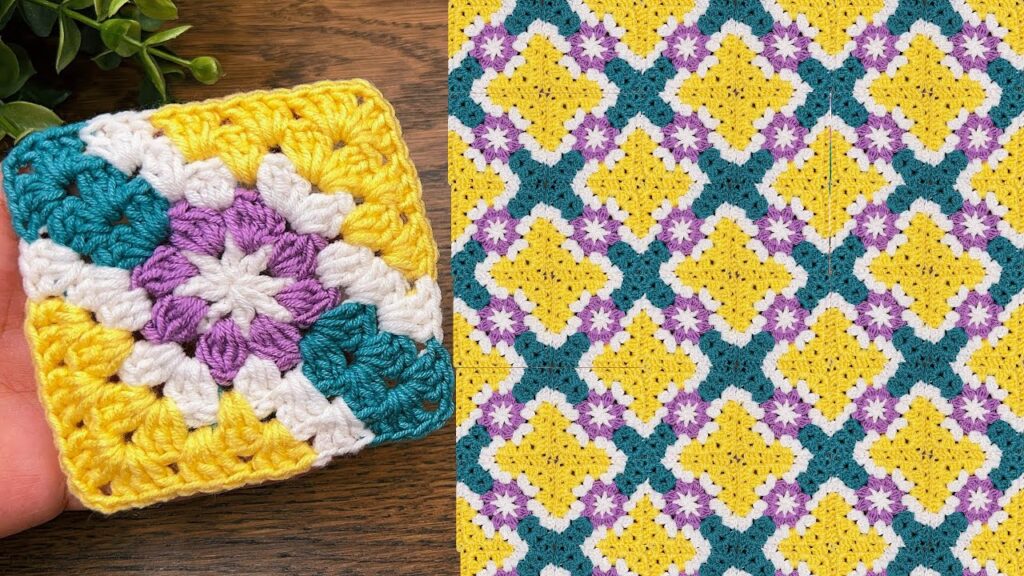
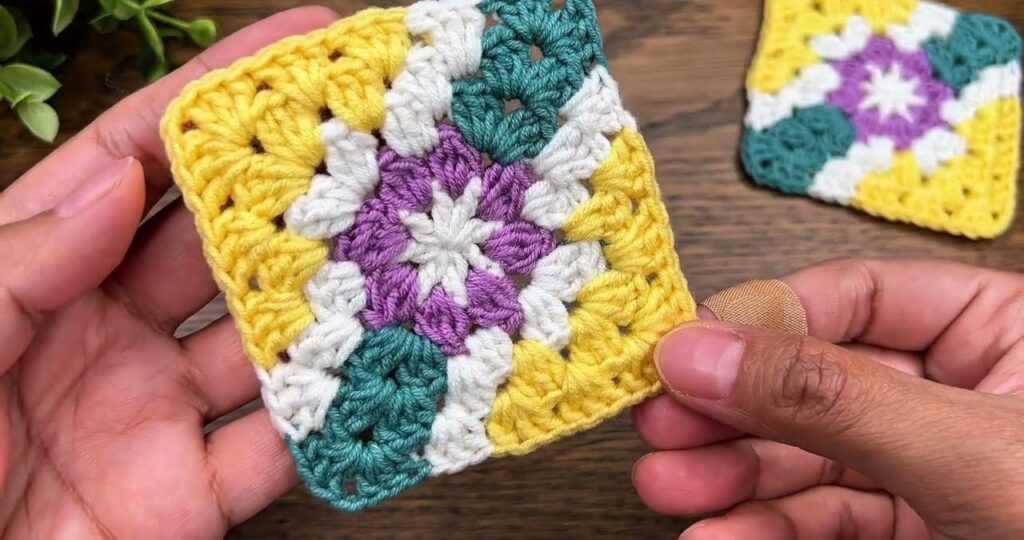
Great! I can teach you how to make this granny square block.
This design is made using cluster stitches (3 double crochets) and color changes each round.
You Need
Scissors and yarn needle
4 colors of yarn (example from picture):
A: Purple (center)
B: White
C: Teal
D: Yellow
Hook size suitable for your yarn
✅ Before You Start
Yarn colors used (you can choose your own):
- Color A – Center (Purple)
- Color B – Surround (White)
- Color C – Next ring (Teal/Green)
- Color D – Outer ring (Yellow)
Hook: Use the hook size recommended on your yarn label.
🧶 Stitch Key (US Terms)
| Abbreviation | Meaning |
|---|---|
| ch | chain |
| sl st | slip stitch |
| dc | double crochet |
| sp | space |
| ch-2 corner | space where corner is formed |
| Cluster | group of 3 dc in same space |
🌸 Round 1 — Center (Color A)
- Make a magic ring (or ch 4 and sl st to form ring).
- ch 3 (counts as dc), 2 dc into ring → this makes your first cluster.
- ch 1.
- Repeat:
3 dc into ring, ch 1 → Do this 3 more times → total 4 clusters. - Pull ring tight.
- Sl st into top of ch 3 to close.
You Should See:
A tiny flower shape with 4 petals and 4 gaps between clusters.
🤍 Round 2 — Turn Into a Square (Color B)
Attach color B in any ch-1 space from last round.
- ch 3 (counts as dc), 2 dc in same space (that is your first cluster).
- ch 2 → this makes the corner.
- 3 dc in the same space → full corner formed.
Now go to the next ch-1 space:
- 3 dc, ch 2, 3 dc in the next ch-1 space.
- Repeat for the remaining spaces until you have 4 corners.
- Sl st to top of beginning ch 3 and fasten off.
You Should See:
A small square with a hole in each corner.
🟩 Round 3 — First Border Ring (Color C)
Attach into any corner ch-2 space.
- ch 3, 2 dc, ch 2, 3 dc → this is a corner.
- Move to the space between two clusters (side space): 3 dc (just 3 dc, no chains).
- Next corner space: 3 dc, ch 2, 3 dc.
- Continue:
- Corners = 3 dc, ch 2, 3 dc
- Side spaces = 3 dc
Work all the way around, sl st to join, fasten off.
You Should See:
A larger square, with 4 corners and 1 cluster group on each side.
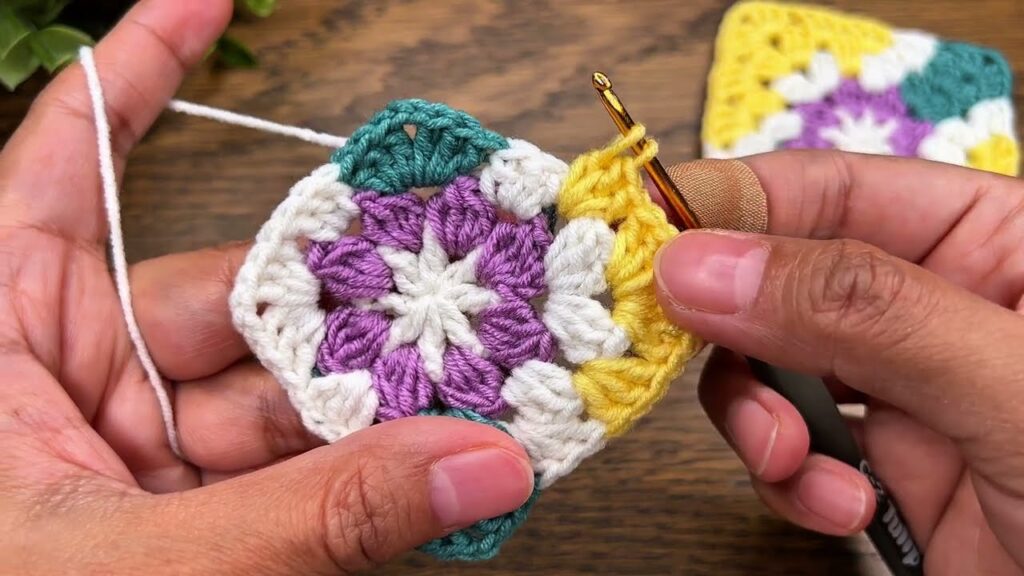
💛 Round 4 — Outer Color Ring (Color D)
Attach into any corner ch-2 space.
- ch 3, 2 dc, ch 2, 3 dc → corner.
- On each side, you will now have 2 spaces:
- In each space: 3 dc.
- Work all around:
- Corners = 3 dc, ch 2, 3 dc
- Each side space = 3 dc
- Join with sl st and fasten off.
You Should Now Have:
A completed granny square with:
- 4 groups of clusters in the center
- 4 corners
- 2 groups on each side
✨ Border (Optional Smooth Edge)
Attach any color.
Work sc around, placing:
- 1 sc in each dc
- 3 sc in each corner space
This makes the square neat for joining.
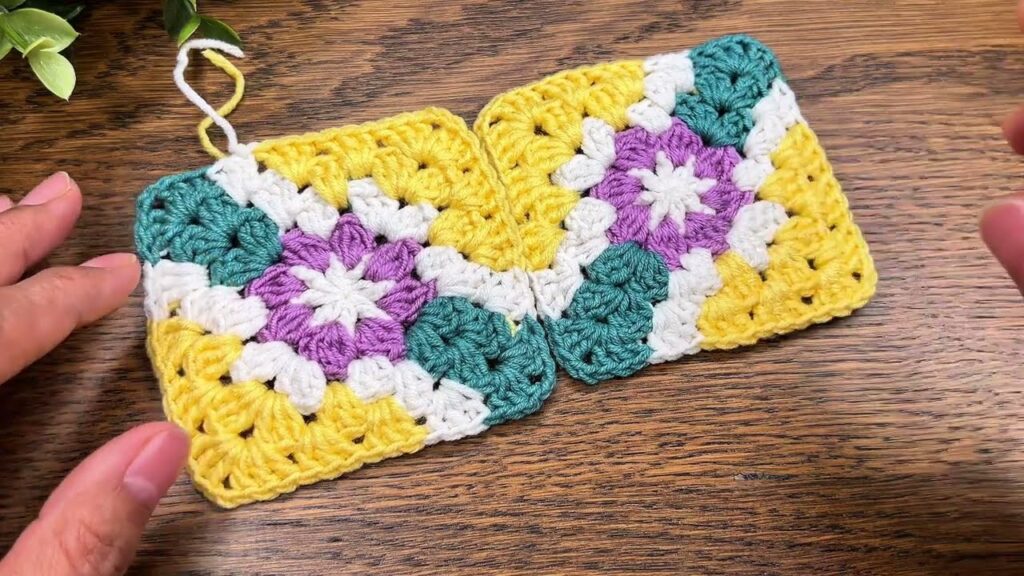
🔗 Joining the Squares
To create the pattern on the right image:
- Arrange each square rotated 90° from the next.
- Join with slip stitch join or whip stitch in back loops.
That creates the diamond mosaic look.