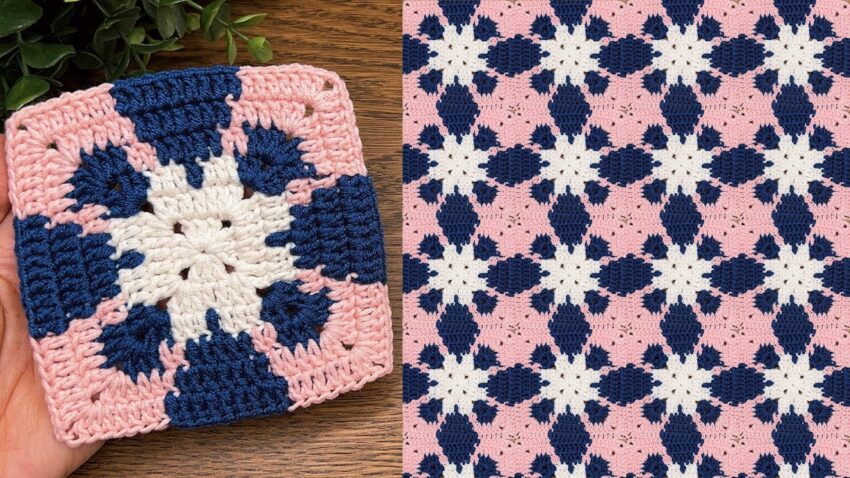
This beautiful crochet pattern is a granny square variation with a three-color geometric design (white, navy blue, and pink). It’s made by joining squares to create the repeating pattern on the right side of the image. Here’s a detailed step-by-step guide:
🧶 Crochet Pattern: 3-Color Geometric Granny Square
This pattern combines classic granny technique with modern block color changes.
🌸 MATERIALS
- Yarn: 3 colors (Medium / DK weight)
- Color A – White (center)
- Color B – Navy blue (middle)
- Color C – Pink (outer)
- Hook: 4 mm or 4.5 mm
- Scissors and yarn needle

🧩 STEP-BY-STEP INSTRUCTIONS
🔹 Round 1: Center (White)
- Make a magic ring (or chain 4, join with slip stitch to form a ring).
- Chain 3 (counts as 1 double crochet).
- Work 2 double crochets (dc) into the ring.
- Chain 2 (corner space).
- (3 dc, ch 2) repeat 3 more times into the ring.
- Join with slip stitch to top of starting ch-3.
- Pull the magic ring tight.
→ You should have 4 groups of 3 dc, separated by ch-2 corners.
🧵 Cut yarn and fasten off (or carry yarn if you prefer color changes without cutting).
🔹 Round 2: Navy Blue Section
- Attach Color B (navy blue) in any corner ch-2 space.
- Chain 3 (counts as dc), 2 dc, ch 1, 3 dc in the same corner.
→ That’s your first corner cluster. - Skip to next corner space.
- In next ch-2 space, work (3 dc, ch 1, 3 dc).
- Repeat this pattern around (4 corners total).
- Join with slip stitch to top of beginning ch-3.
🧵 Cut yarn and fasten off.
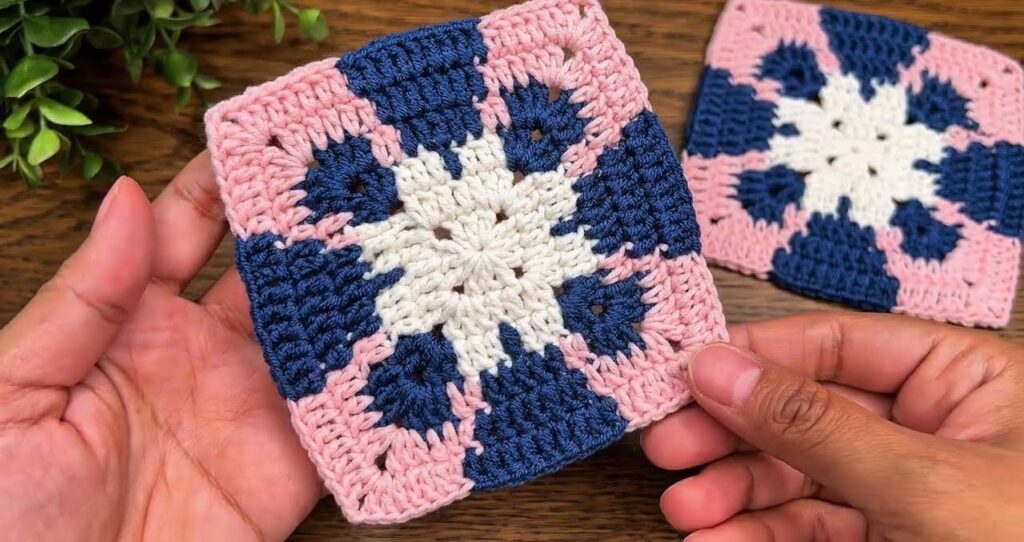
💡 Now you should have a white center with navy blue cross-like petals forming around it.

🔹 Round 3: Pink Border
- Attach Color C (pink) in any corner ch-1 space.
- Chain 3, 2 dc, ch 2, 3 dc in same space (corner made).
- Between the two navy clusters (in space between them), work 3 dc.
- In next corner space: (3 dc, ch 2, 3 dc).
- Repeat this pattern all the way around:
- 3 dc in side spaces
- (3 dc, ch 2, 3 dc) in corner spaces
- Join with slip stitch to top of starting ch-3.
💡 This round finishes the square shape and gives the final pink frame.
🔹 Optional Rounds (if you want a bigger square)
If you want to make it larger, repeat additional rounds as follows:
- Continue alternating colors (white → blue → pink)
- Each new round: 3 dc in each side space, and (3 dc, ch 2, 3 dc) in each corner.
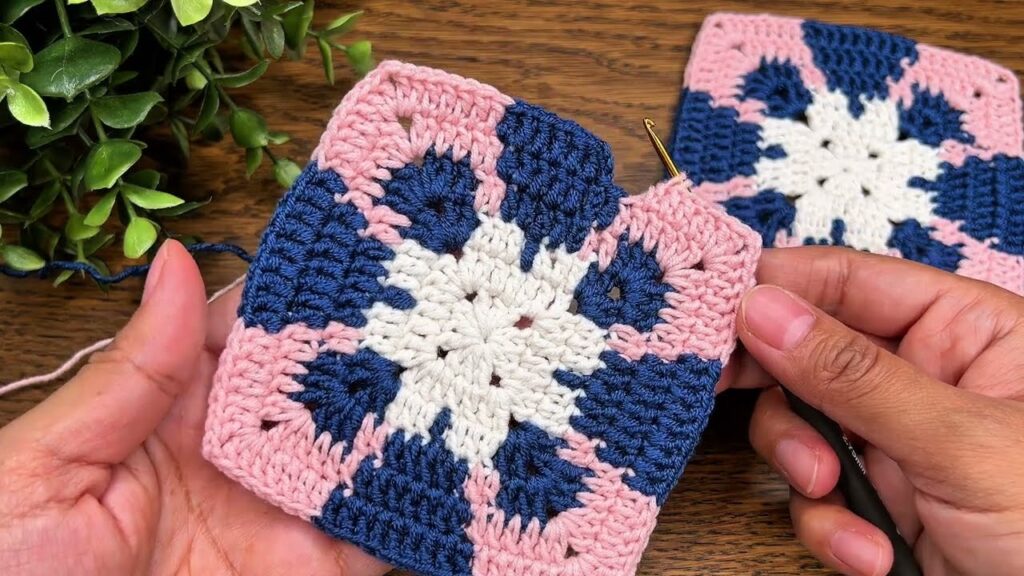
🔹 Joining the Squares
Once you’ve made multiple squares:
- Lay them out in the pattern you want (rotating as needed to create the diamond/star pattern).
- Join them using one of these methods:
- Slip Stitch Join: Place right sides together, slip stitch through back loops only.
- Join-as-you-go: On final round of each square, connect corners and sides directly into adjacent square spaces.
💡 When joined, the blue sections from one square connect to the pink and white sections of others, forming the geometric pattern seen on the right side of your image.
🔹 Finishing
- Weave in all ends securely with a yarn needle.
- Block your squares for even edges (optional but recommended).
🧵 COLOR ORDER SUMMARY
| Round | Color | Description |
|---|---|---|
| 1 | White | Center motif |
| 2 | Navy blue | Middle petals |
| 3 | Pink | Outer frame |