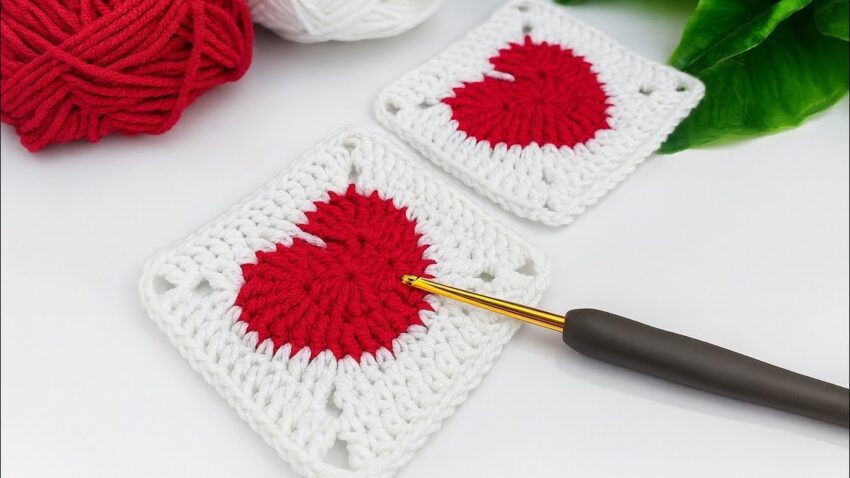
Here is a simple, crochet tutorial for making the heart granny square shown in your image. This pattern uses two colors: red for the heart and white for the square.
❤️ HEART GRANNY SQUARE — FULL DETAILED TUTORIAL
🔹 Materials
- Red yarn – for the heart
- White yarn – for the granny square border
- Hook 4.0–5.0 mm
- Scissors, needle

⭐ PART 1 — MAKE THE RED HEART
Round 1 — Center Circle
- Make a magic ring.
- Chain 3 (counts as DC).
- Work 11 DC inside the ring.
→ You have 12 stitches total (including the starting ch3). - Pull the ring tight.
- Slip stitch into top of ch3 to close the round.
✔ You now have a small red circle.
Round 2 — Form the Heart Shape
This entire round is worked into the stitches of Round 1 (not into the ring).
In the first stitch:
- 3 TR (treble crochet)
In the second stitch:
- 2 DC
In the third stitch:
- 2 DC
In the fourth stitch:
- 1 DC
In the fifth stitch:
- 1 DC
In the sixth stitch:
- (1 DC, ch 1, 1 DC) → this forms the top dip of the heart
In the seventh stitch:
- 1 DC
In the eighth stitch:
- 1 DC
In the ninth stitch:
- 2 DC
In the tenth stitch:
- 2 DC
In the eleventh stitch:
- 3 TR
In the twelfth stitch (bottom point):
- (1 DC, ch 3, 1 DC) → this forms the bottom point
Slip stitch to join.
Cut yarn and fasten off.
✔ You now have a perfect red heart.
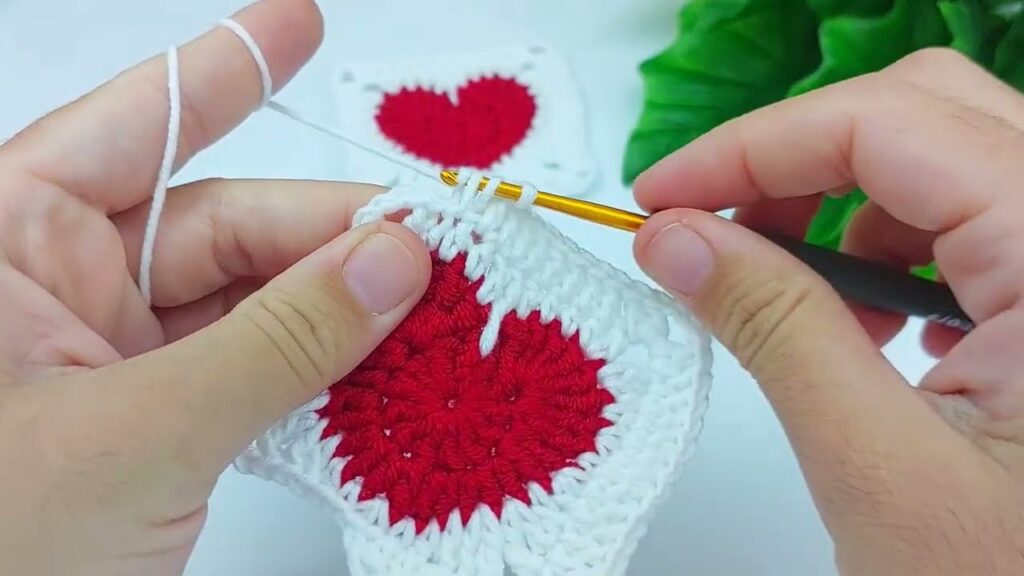
⭐ PART 2 — ADD WHITE BORDER (turn heart into a square)
Attach white yarn to the top right side of the heart.
Round 3 — Squaring the Heart
You will crochet around the heart, forming a square.
Top Right Curve
- Work 1 DC in the next 2 stitches.
- Work 2 DC in the next stitch.
Top Middle Dip
- In the ch-1 space at the dip:
→ (1 DC, ch 1, 1 DC)
Top Left Curve
- Work 2 DC in the next stitch.
- Work 1 DC in next 2 stitches.
1st Corner (Left Upper Corner)
- In next available space at curve edge:
→ (2 DC, ch 2, 2 DC)
Left Side
- Work DC evenly down the left side.
→ Usually 6–8 DC, depending on heart size.
2nd Corner (Bottom Left Corner)
- In the bottom left space:
→ (2 DC, ch 2, 2 DC)
Bottom Middle
- In the bottom point ch-3 space:
→ (1 DC, ch 1, 1 DC)
3rd Corner (Bottom Right Corner)
- In bottom right space:
→ (2 DC, ch 2, 2 DC)
Right Side
- Work DC evenly up the right side.
4th Corner (Top Right Corner)
- In the top right space:
→ (2 DC, ch 2, 2 DC)
Slip stitch to join.
⭐ Round 4 — Standard Granny Square Border
- Chain 3 (counts as DC).
- DC in every stitch around.
- At each corner (ch-2 space):
→ (2 DC, ch 2, 2 DC) - Continue until all 4 sides are done.
- Slip stitch to join and cut yarn.
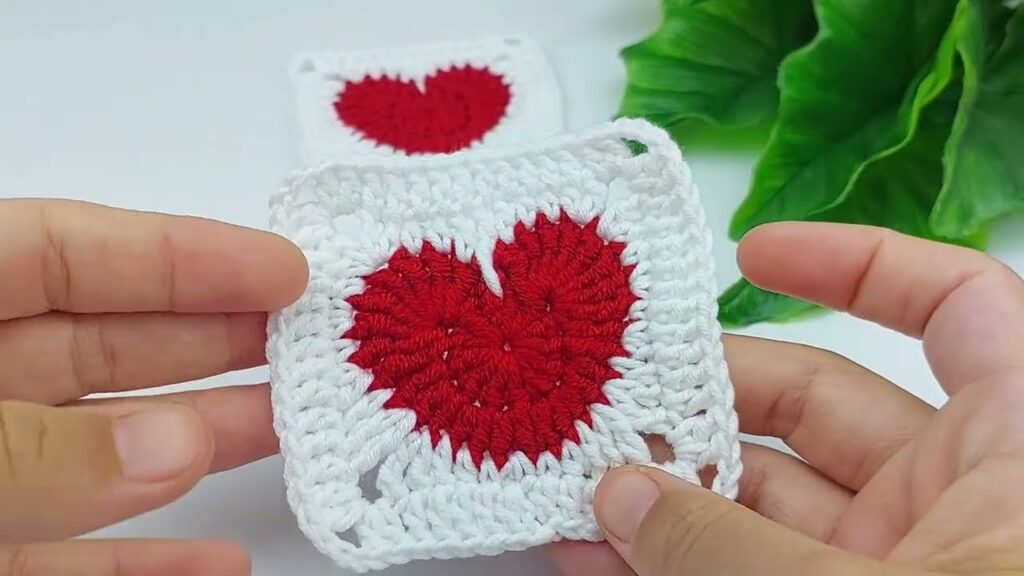
✔ Your heart granny square is finished!