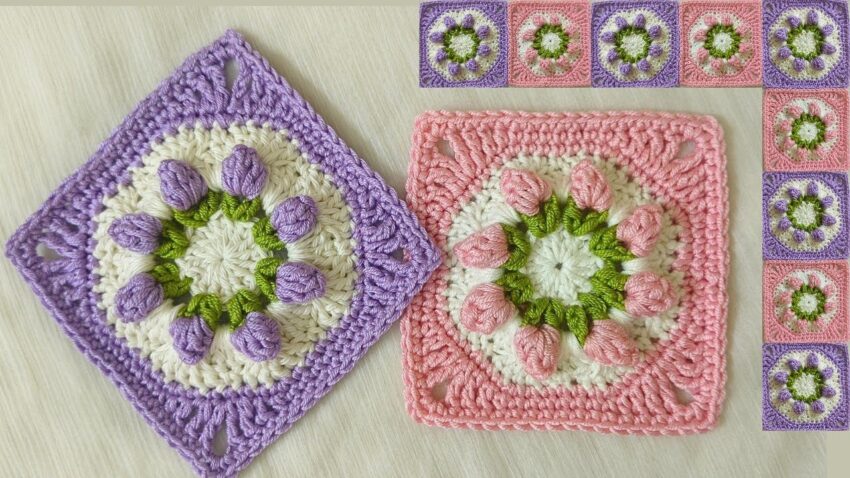
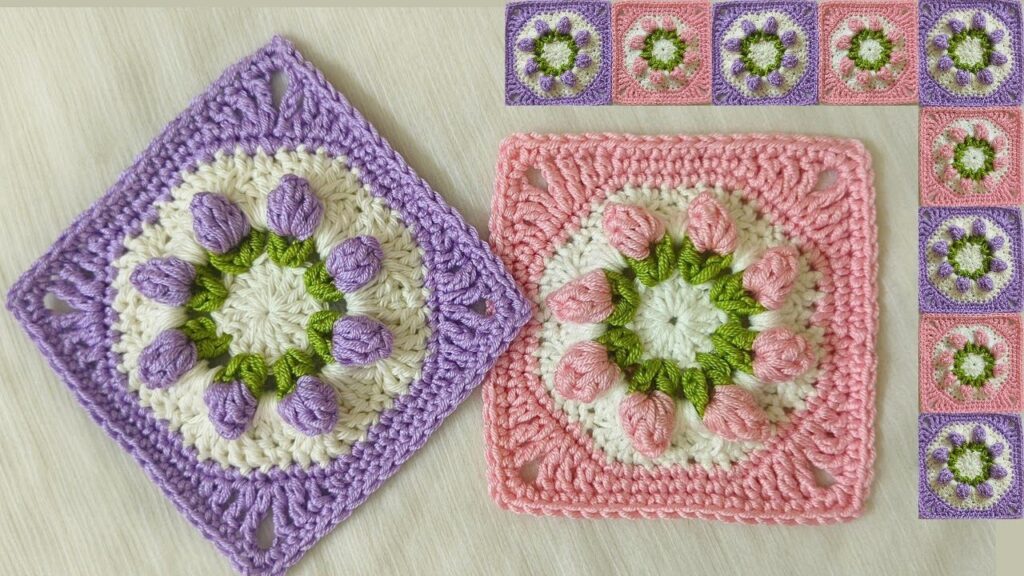
This crochet pattern is called a Tulip Flower Granny Square 🌷—a beautiful 3D floral design often used for blankets, cushions, and bags.
Here’s a step-by-step tutorial to make it like in your picture:
🌷 3D Tulip Granny Square – Detailed Crochet Tutorial
🧶 Materials
- Yarn: 4 colors
- Color A – White or Cream (background)
- Color B – Green (leaves & stems)
- Color C – Pink or Purple (tulips)
- Color D – Same as tulip color or matching border
- Hook: 3.0 mm or 3.5 mm
- Scissors & yarn needle
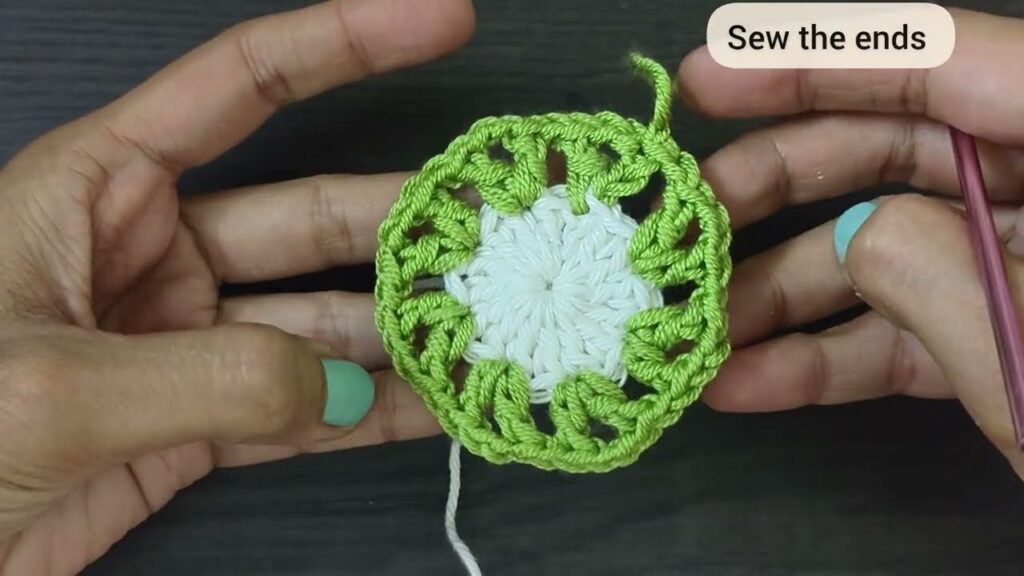
🔹 Step 1: Center Circle (Color A – White/Cream)
This forms the base circle.
- Magic Ring, or ch 4 and join to form a ring.
- Ch 3 (counts as 1 dc).
- Make 11 dc into ring (total 12 dc).
- Join with sl st to top of ch 3.
- Fasten off.
👉 Tip: You can pull the ring tight to close the center.
🌿 Step 2: Green Leaves Round (Color B)
This creates 6 green “leaf pairs” for each tulip.
- Attach green yarn into any dc from previous round.
- (Ch 4, skip next dc, sl st into next dc) × 6 times around.
→ You should have 6 chain-4 loops. - Into each ch-4 loop, work:
sc, hdc, 2 dc, hdc, sc→ this makes 1 leaf. - Sl st to first sc to join.
- Fasten off.
✅ Now you have 6 small green leaf clusters around the circle.

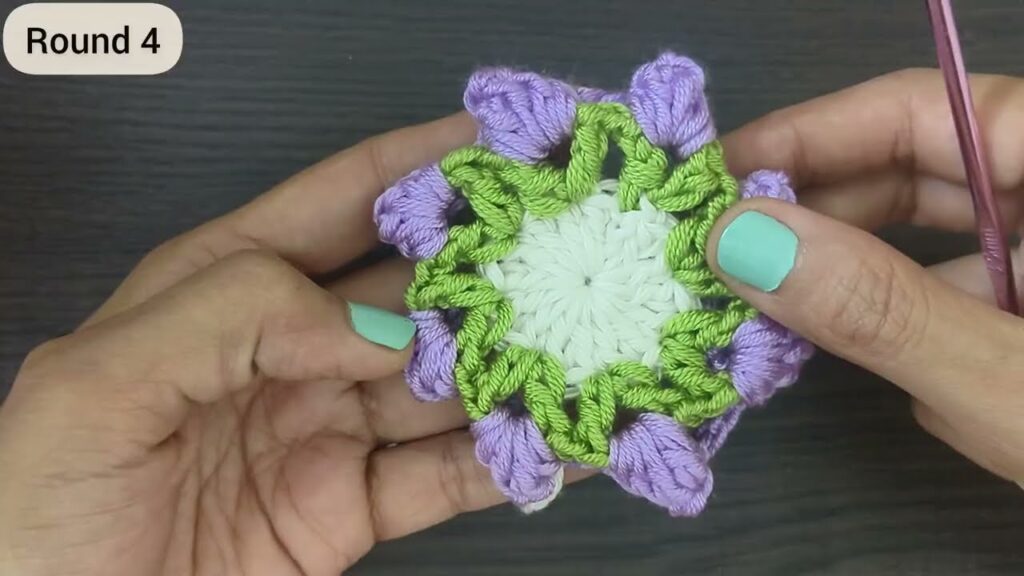
🌸 Step 3: Tulip Buds (Color C – Pink or Purple)
These sit between each leaf set, giving the tulip look.
- Attach pink/purple yarn in the space between two leaves (top of where you sl st’d before).
- Ch 2, then make a 4-dc puff stitch:
- (Yarn over, insert hook into same space, yarn over, pull up a loop) × 4 times,
- Yarn over, pull through all loops on hook.
- Ch 2, sl st into the same space.
- Skip to the next space between leaves → repeat puff tulip.
- Continue until you have 6 tulip buds all around.
- Fasten off.
👉 Each tulip will sit slightly raised (3D).
🌿 Step 4: Connect Stems (Color B – Green)
This connects the flowers and gives the round structure.
- Insert hook behind the tulip petals (in between the puff stitches).
- Attach green yarn behind one tulip.
- Ch 3, sl st behind next tulip (to connect them around in a ring).
- Continue all around (you’ll have 6 ch-3 spaces).
- Sl st to join, do not fasten off yet.
⚪ Step 5: Background Circle (Color A – White)
This creates a round behind the tulips.
- Still using the green base as your foundation, attach white/cream yarn into any ch-3 space behind tulips.
- Work 2 dc in each ch-3 space, working behind the tulips.
- After completing the round, join with sl st to top of ch 3.
- Fasten off.
👉 You now have a white circular background with tulips sitting on top.
🟪 Step 6: Form the Square (Color D – Border)
Now we’ll make the circle into a square.
- Attach your border color (pink or purple) in any dc stitch.
- Ch 3, dc in next 2 sts.
- (2 dc, ch 2, 2 dc) in next st → this is your first corner.
- Dc in next 7 sts, (2 dc, ch 2, 2 dc) in next for next corner.
- Repeat around until 4 corners formed.
- Join with sl st to first dc.
You can stop here or continue to add:
- 1 or 2 more rounds of dc to make the square larger.
✂️ Step 7: Finish
- Weave in all loose ends using a yarn needle.
- Steam block or pin block your square for clean edges.
💡 Optional:
You can join multiple tulip squares together using the “join-as-you-go” method or sew them together with whip stitch to make a blanket, bag, or pillow cover.