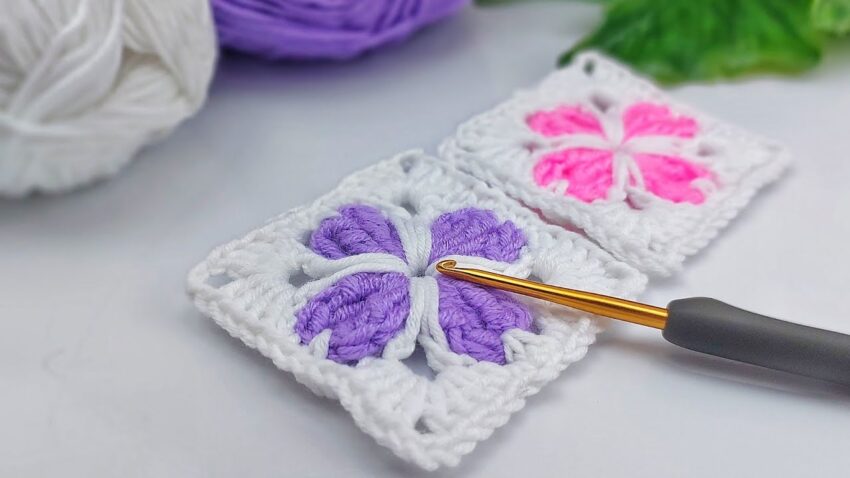
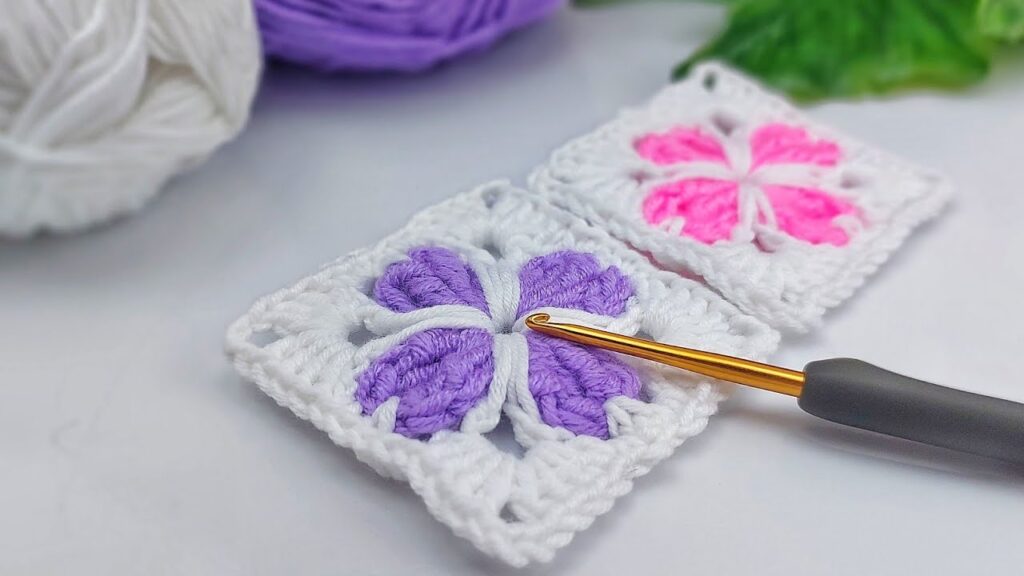
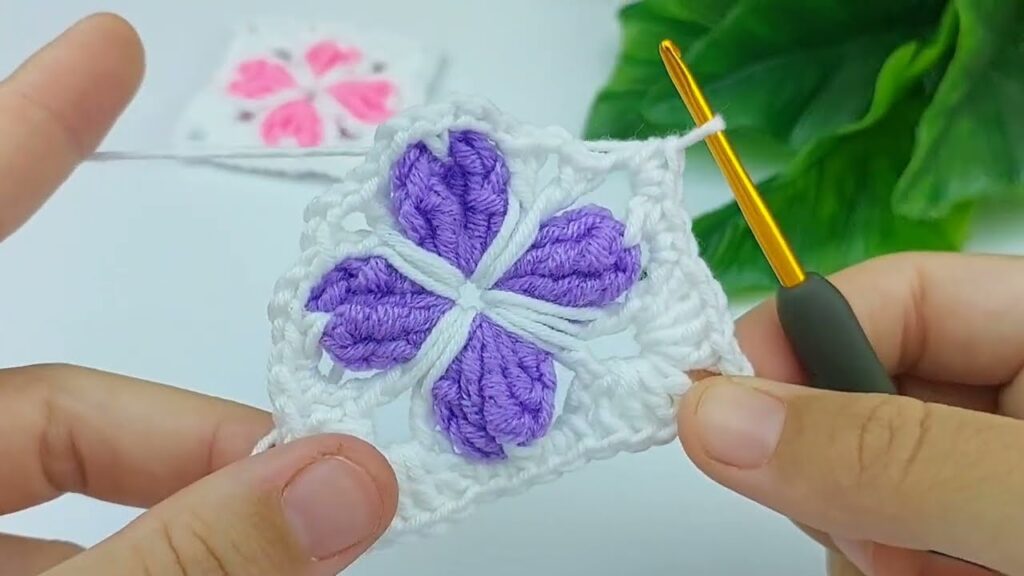
Here is a clear, beginner-friendly tutorial to make this 4-petal flower crochet square (like the image you sent).
This pattern uses two colors: one for the petals and one for the border.
🌸 SUPER DETAILED TUTORIAL — 4-Petal Flower Crochet Square
I’ll break it into Rounds and Steps, with exact stitch counts and how your work should look after each step.
🧶 MATERIALS
- Hook: 3.0–4.0 mm
- Yarn Color A = Petal color
- Yarn Color B = White border
- Scissors
- Needle
🔵 ROUND 1 — Create the 4 Petals
Step 1 — Magic Ring
Make a magic ring.
(Or ch 4 → join → ring.)
Step 2 — First Petal
- Attach Color A.
- Ch 3 (this is your first dc).
- Work 3 dc into the ring → total 4 dc.
- Drop your loop.
- Insert hook into the top of ch-3.
- Pick up the dropped loop and pull through → This closes the petal like a folded puff.
- Ch 2.
✓ You now have 1 petal + ch-2 space.
Step 3 — Petals 2, 3, and 4
Repeat the same petal process 3 more times:
For each petal:
- 4 dc
- Drop loop
- Insert hook into first dc
- Pull loop through
- Ch 2
After repeating 4 times, you should have:
✔ 4 petals
✔ 4 ch-2 spaces between petals
✔ A small flower shape
Step 4 — Close the Center
Pull magic ring tight.
Sl st to close.
Fasten off Color A.
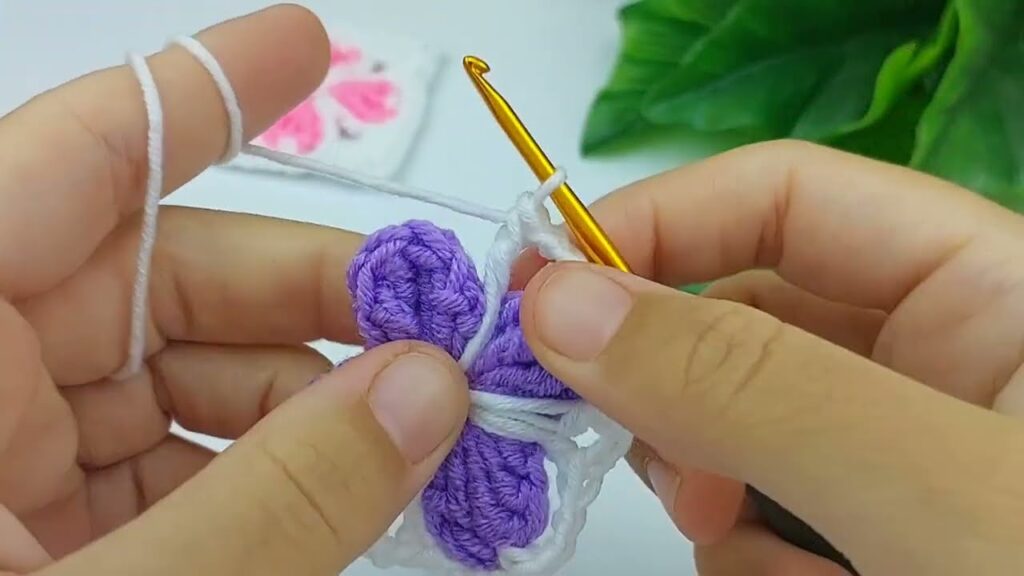
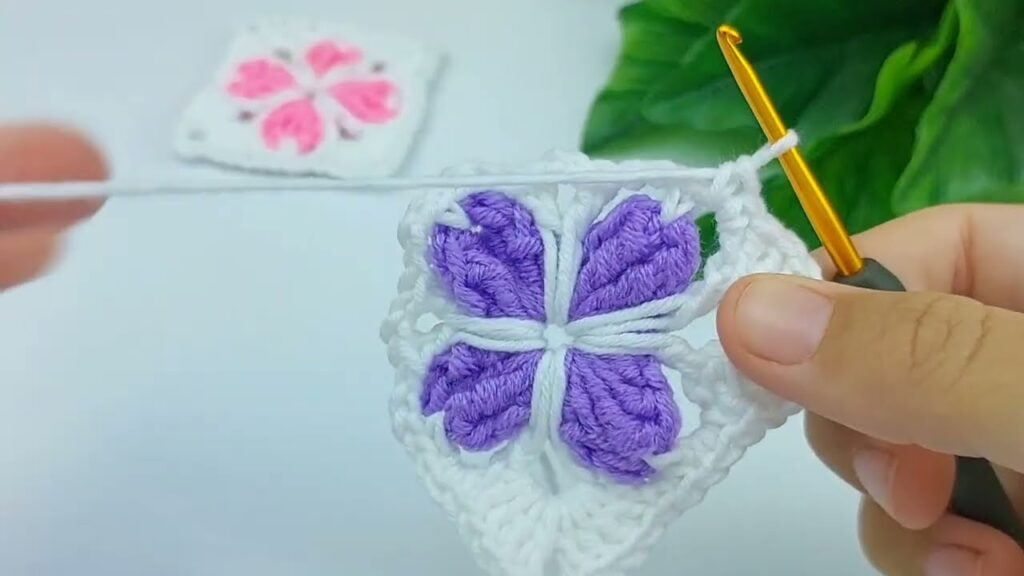
⚪ ROUND 2 — Square the Flower
Attach Color B (white) into ANY ch-2 space between petals.
You will make corners and sides in this round.
CORNER formula:
➡️ 3 dc, ch 3, 3 dc
SIDE formula:
➡️ 3 dc
There are 4 corners and 4 sides.
🟩 Work Round 2 in order
Step 1 — First Corner
In the same space:
- 3 dc
- ch 3
- 3 dc
This makes Corner 1.
Step 2 — Side 1
In next ch-2 space:
- 3 dc
Step 3 — Corner 2
Next space:
- 3 dc
- ch 3
- 3 dc
Step 4 — Side 2
Next space:
- 3 dc
Step 5 — Corner 3
Next space:
- 3 dc
- ch 3
- 3 dc
Step 6 — Side 3
Next space:
- 3 dc
Step 7 — Corner 4
Last space:
- 3 dc
- ch 3
- 3 dc
Step 8 — Side 4
Same space as start or next if your flower spacing shifts:
- 3 dc
Sl st to finish Round 2.
You now have a white bordered square.
⚪ ROUND 3 — Border (optional but matches your photo)
Attach white (if not still attached).
Step 1 — Along each side:
- 1 dc in each stitch (you should have 9 dc per side)
Step 2 — At each corner
- (2 dc, ch 2, 2 dc)
Repeat this for all 4 sides.
Sl st to finish.
Now your square looks exactly like your photo:
✔ four 3D petals
✔ clean white frame
✔ open corner holes (from ch-3)
🎉 YOU’RE DONE!
Your square should be:
- Flat
- Neat corners
- Puffy petals
- Same style as your image