
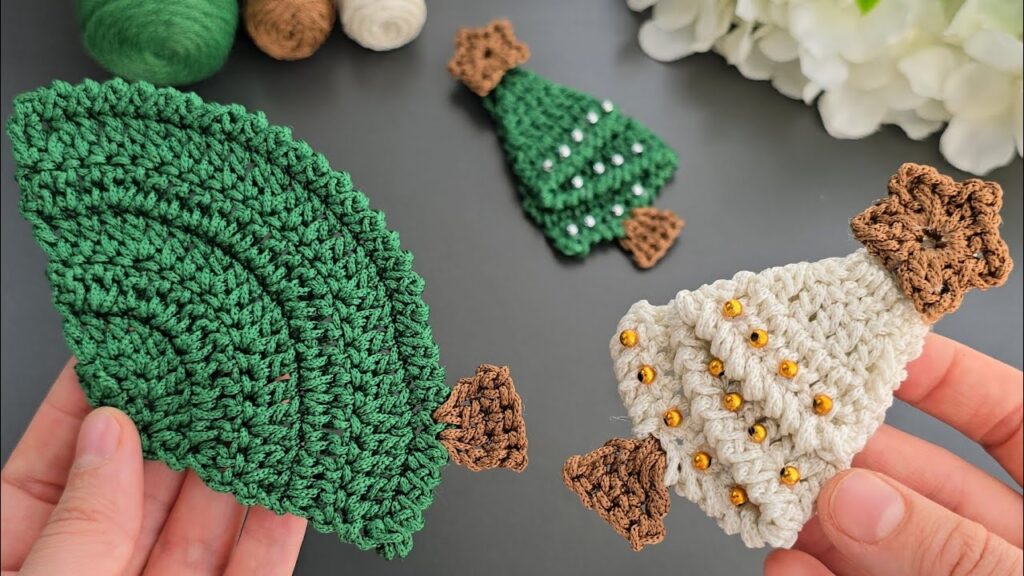
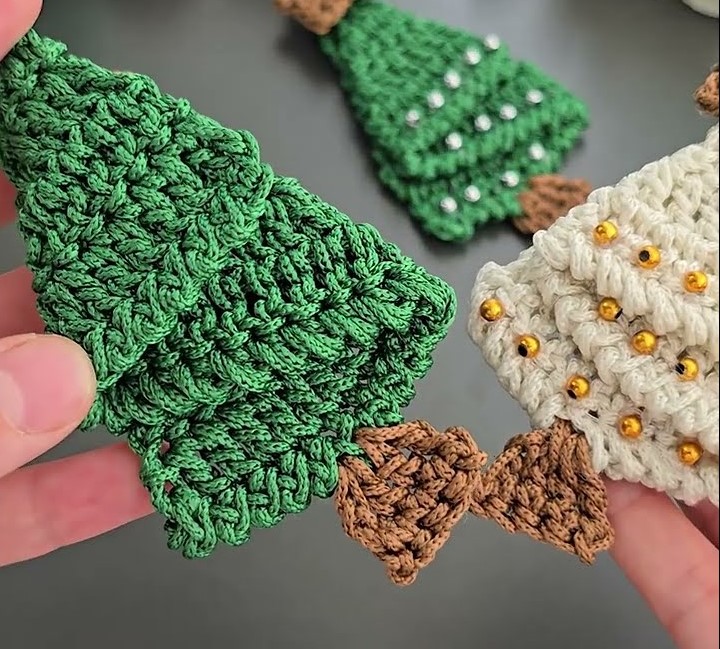
These crochet pieces are Christmas tree motifs made using basic crochet stitches. Here’s a step-by-step tutorial so you can make one like the green and white trees in the image:
🌲 Crochet Curved Leaf / Christmas Tree Pattern (like the large green one)
🧶 Materials
- Green cotton yarn (DK or sport weight works best)
- Brown yarn (for base if you want to attach it)
- 3.0–3.5 mm crochet hook
- Yarn needle, scissors
🪡 Abbreviations (US Terms)
| Abbrev | Meaning |
|---|---|
| ch | chain |
| sc | single crochet |
| hdc | half double crochet |
| dc | double crochet |
| tr | treble crochet |
| sl st | slip stitch |
| inc | increase (2 sts in same stitch) |
🧩 Pattern Instructions
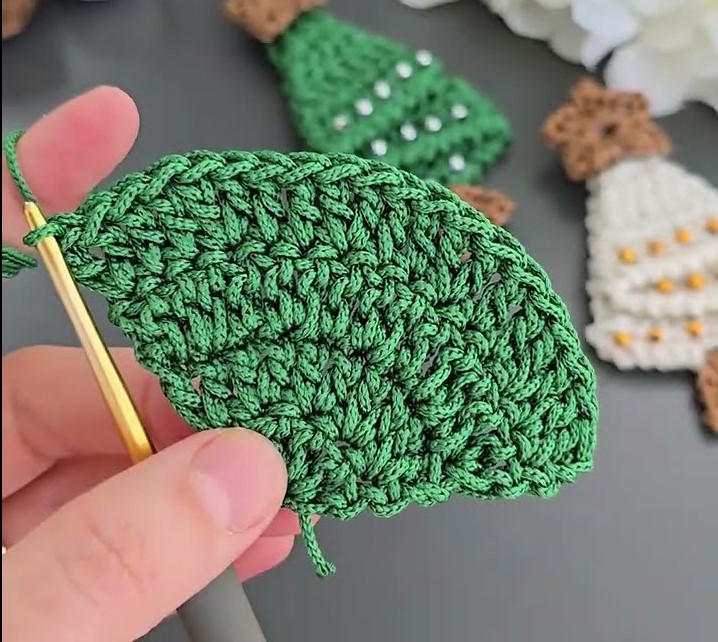
Step 1: Foundation
- Start with ch 15.
- In the 3rd ch from hook, make 1 dc.
- Continue across:
→ dc in next 11 ch (total: 12 dc including the ch-2 at start). - In the last ch, make 5 dc in the same stitch (this curves around to the other side).
- Now work along the other side of the chain:
→ dc in each ch across (12 dc). - Sl st to the top of the starting ch-2 to close the round.
🟢 You now have an oval with 34 stitches (12 + 5 + 12 + 5 from turns).
Step 2: Build Curved Ridges
You’ll now crochet in rounds, increasing at one end to form the curve.
Round 2:
- Ch 2, dc in next 11 sts.
- In next 5 sts (the curve at the tip): make 2 dc in each stitch.
- Dc in next 12 sts.
- Sl st to join.
🟢 You’ll start seeing the shape curving slightly.
Round 3:
- Ch 2, dc in next 13 sts.
- At curve: (2 dc in one st, 1 dc in next) repeat 5 times.
- Dc in remaining sts, sl st to join.
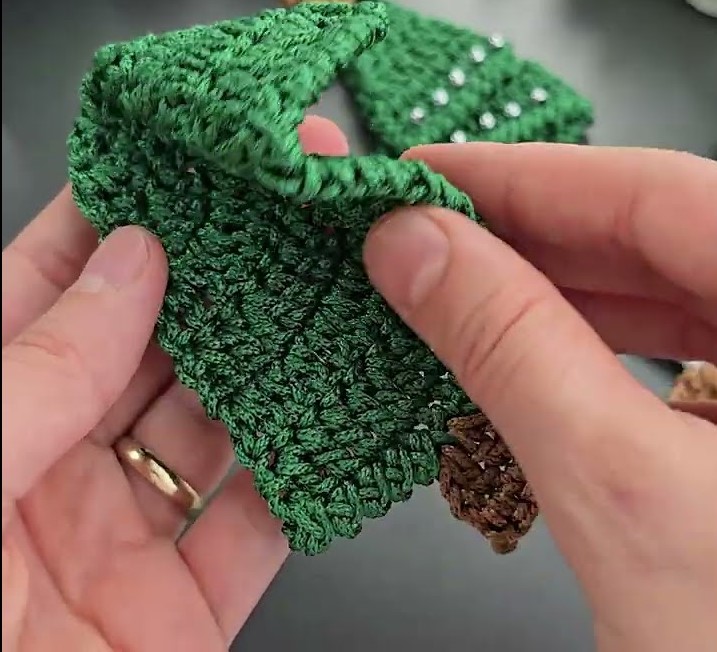
🟢 Continue working only on one side if you want a “fan” or half-leaf shape — like in the image.
Step 3: Texture Ridges
To make those raised curved lines:
- Work a row of front post double crochet (FPdc) every 2–3 rounds.
- Alternate between normal dc rounds and FPdc rounds to get the ribbed spiral look.
Example:
- Round 4: All dc.
- Round 5: (FPdc around next dc, 1 dc in next) repeat around.
- Round 6: All dc.
🟢 Each FPdc round gives the tree that ribbed, dimensional look.
Step 4: Finishing Shape
- Keep increasing slightly on the curved edge every other row to maintain the half-oval shape.
- When your piece looks like the one in the photo (around 10–12 cm long), fasten off.
- Weave in ends.
Step 5: Optional Brown Base
To make the brown “trunk” or “decorative end”:
- Join brown yarn to the short end.
- Ch 1, make 1 row of sc across bottom edge.
- For a star-like shape, you can:
- Ch 2, make 2 dc in same stitch, ch 2, sl st — repeat around (5 points).
🌟 Tips
- You can block the piece with steam or water to flatten and define the curves.
- Add beads, pearls, or gold thread for a festive touch.
- Use two shades of green for a beautiful layered effect.