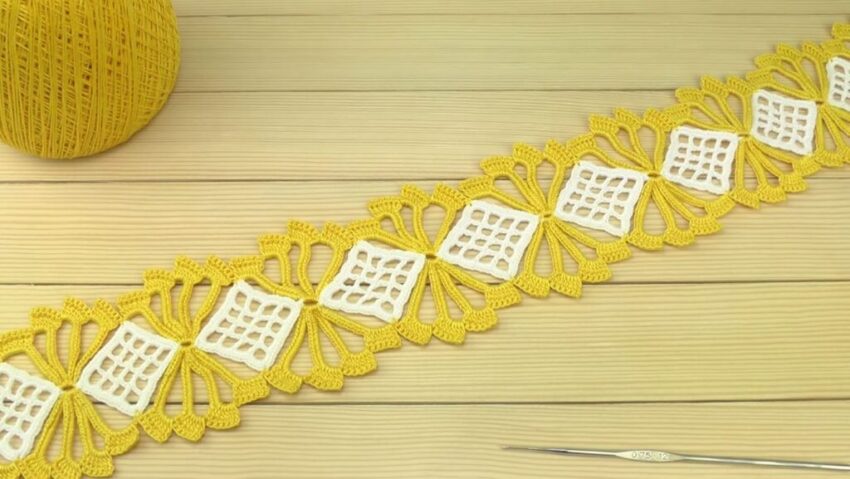
Let’s dive deeper and break this down thoroughly, step by step, so you can follow along exactly how to make this crochet tape lace design in your photo. I’ll give you the precise stitch counts, joins, and layout to replicate it.
🧵 Detailed Crochet Tape Lace Tutorial
(like in your image)
📏 Materials:
- Size 10 cotton crochet thread (white and yellow)
- Steel crochet hook size 0.75 mm
- Scissors
- Tapestry needle for weaving ends
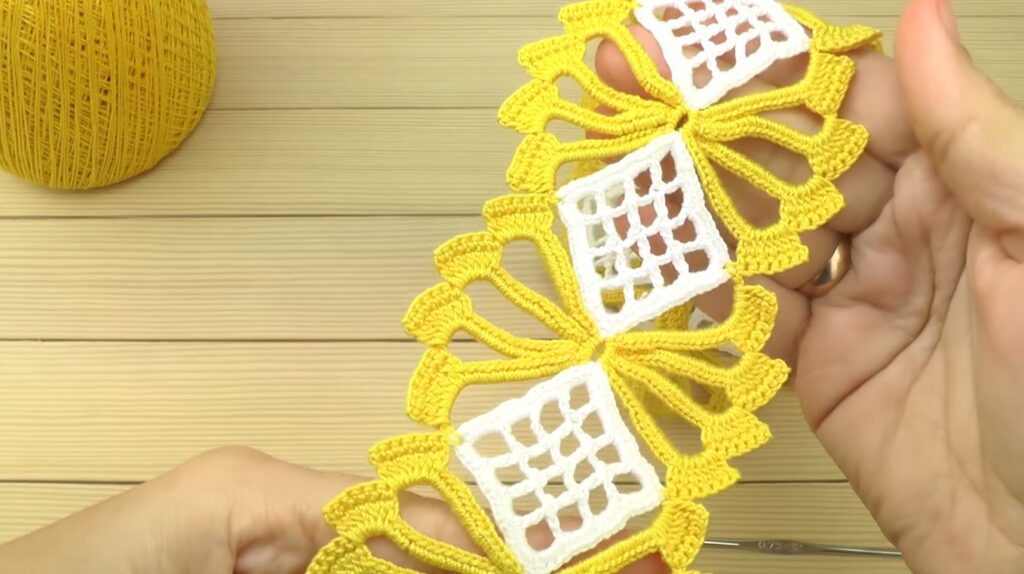
✨ Part 1: Center Mesh Square (White)
This is the white grid pattern in the center.
🔸 Make 1 Square Motif:
- Start with a slip knot, ch 10, join with sl st to form a ring.
- Round 1:
Ch 5 (counts as 1 dc + ch 2),
1 dc in ring, ch 2, repeat 7 more times (total of 8 dc, 8 ch-2 spaces).
Join with sl st to the 3rd chain of starting ch-5. - Round 2:
Sl st into first ch-2 space, ch 5 (counts as 1 dc + ch 2),
1 dc in next ch-2 space, ch 2, repeat around.
Join with sl st. - Round 3:
Repeat Round 2 for another round (for 3 mesh rows total).
Fasten off.
➡️ Make as many squares as you need for your tape.
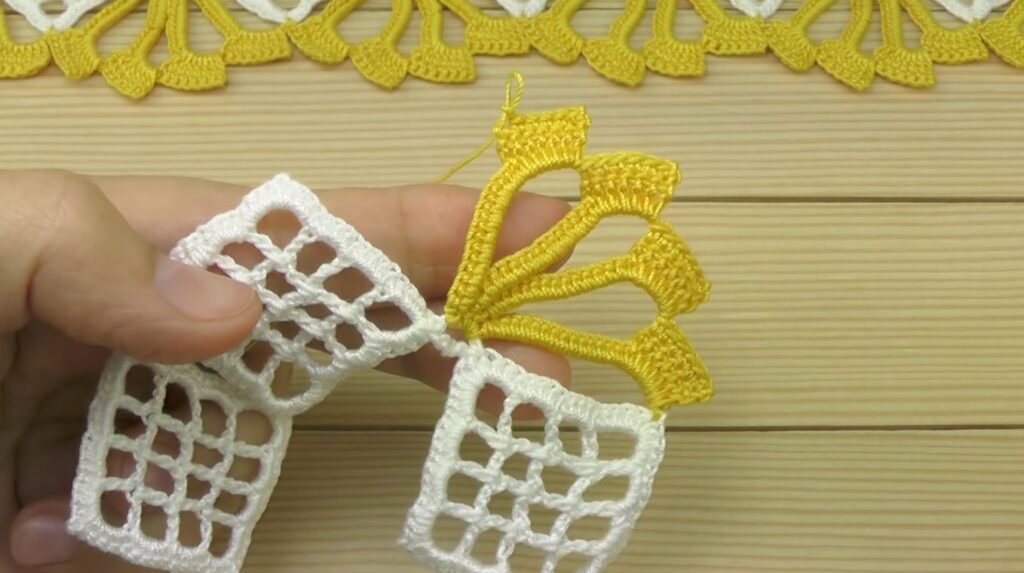
✨ Part 2: Connecting Lace Tape (Yellow)
This is the beautiful petal-like joining around the squares.
🔸 Work around one white square at a time:
- Attach yellow thread to any ch-2 space of the white square.
- Forming the long loops:
Ch 10, sc in next ch-2 space
Repeat on each side of the square:- 3 loops per side (12 loops total around one square).
- Petal Design:
Into each ch-10 loop:- 1 sc
- 1 hdc
- 6 dc
- 1 hdc
- 1 sc
(you’ll have a teardrop-shaped petal)
✨ Part 3: Connecting the Squares Together
- As you make the petal loops around one square, when you reach the side where you want to connect the next square:
- Instead of completing a loop normally:
- Ch 5
- Sl st to the corresponding ch-5 point on the adjacent yellow lace (on the petal or loop of the previous motif)
- Ch 5
- Continue forming petals as usual.
- Do this wherever motifs need to be joined.
✨ Part 4: Outer Decorative Edge
(The small loops forming the scalloped border)
- Once all motifs are joined, go around the outer edge of the whole tape.
- In each space between petals:
- Ch 5, sc in next space
(or Ch 7 for slightly larger loops)
- Ch 5, sc in next space
- Optionally add a picot in the center of each ch-5 loop:
- Ch 5, sc in same space to form a picot
📌 Final Touch
- Weave in ends carefully with a tapestry needle
- Lightly block your lace tape by dampening and pinning it to shape on a flat surface.
🎨 Optional:
Would you like me to draw up a symbol chart diagram for this pattern as well? I can do that too — it’s often helpful for visual learners with crochet patterns like this.