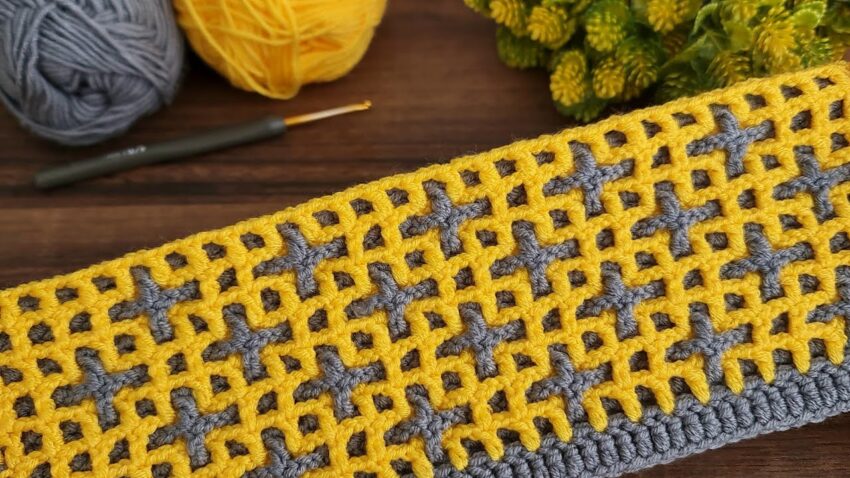
That crochet pattern is called the Cross Stitch Mosaic Crochet Pattern (sometimes also known as “X-Stitch Mosaic”). It combines two contrasting colors to create a woven or lattice look, as seen with the yellow and gray yarn in your image.
Here’s a step-by-step guide to make it:
🧶 Materials
- Yarn A (Main Color) – Yellow
- Yarn B (Contrast Color) – Gray
- Crochet hook: 3.5 mm or 4 mm (depending on yarn thickness)
- Scissors & yarn needle

🧩 Pattern Structure Overview
This pattern alternates rows of each color and builds a woven “X” (cross) effect.
Each cross is created by working front post double crochets (FPdc) that overlay stitches from previous rows.
You will mainly use double crochet (dc), single crochet (sc), and chains (ch).
🪡 Step-by-Step Tutorial
🟡 Step 1: Foundation
- With Color A (Yellow),
chain a multiple of 4 + 3 (e.g. 27, 31, 35 chains). Example: ch 31. - Row 1: Work 1 dc in 4th chain from hook (counts as 2 dc).
Continue making 1 dc in each chain across.
Turn your work.
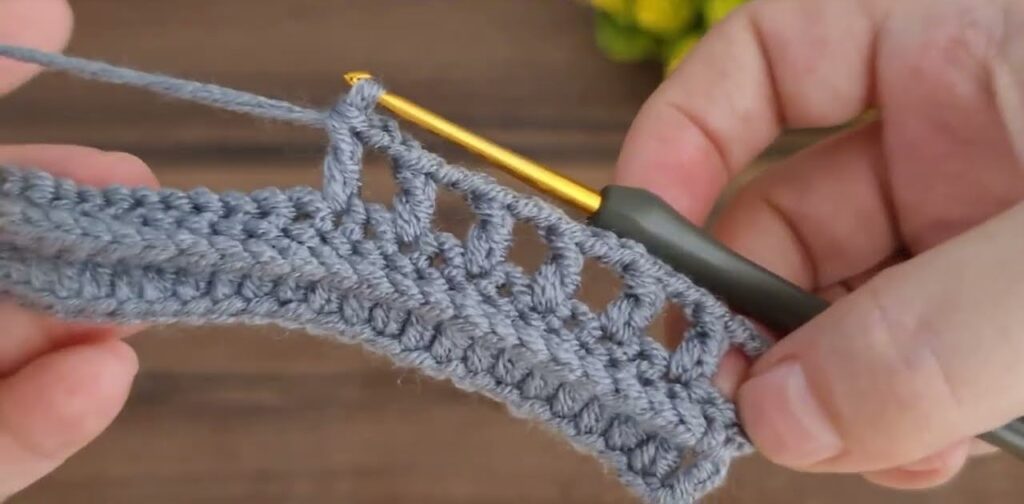
🟡 Step 2: Mesh Setup (Color A)
- Chain 1.
- Work 1 sc in first stitch, ch 2, skip 2 dc, sc in next dc.
- Repeat from * to * across.
You’ll get small open squares. - Change to Color B (Gray) at the end of the row (pull through gray in last loop of final sc).
Don’t cut the yellow yarn; carry it along the side.
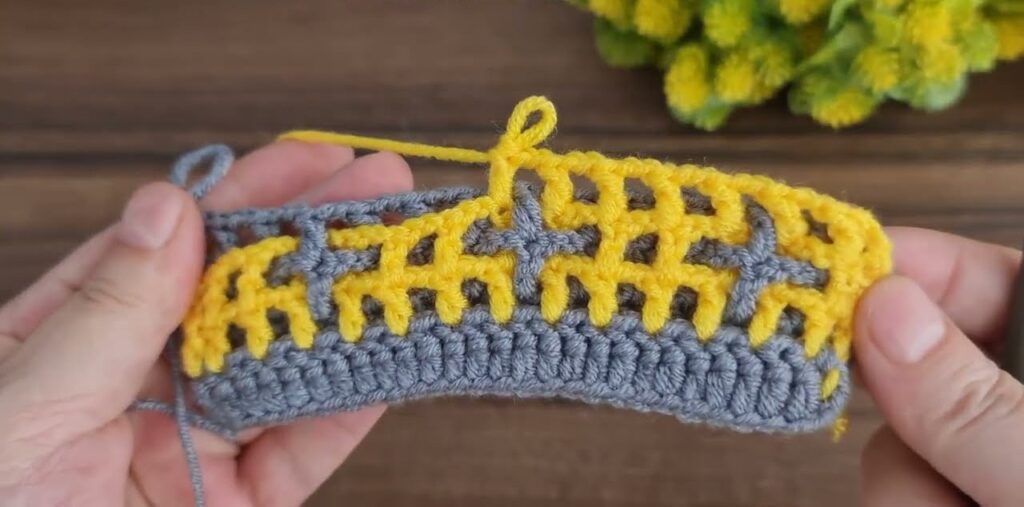
⚫ Step 3: First Cross Row (Color B)
- Chain 3 (counts as first dc).
- 1 dc in next sc, then
Front Post Double Crochet (FPdc) around the dc two rows below (the yellow dc from Row 1).
This creates the vertical part of the “X”. - Skip the next 2 ch spaces below, then dc in next sc.
- Repeat this pattern:
- dc in sc
- FPdc two rows below
- skip 2 ch spaces
- Finish the row with 1 dc in last stitch.
Turn your work. - Cut the gray yarn (optional if you want clean color rows).
🟡 Step 4: Mesh Row Again (Color A)
- Reattach yellow.
- Ch 1, sc in first dc, ch 2, skip FPdc, sc in next dc.
- Repeat to end of row.
- Turn your work.
→ You now see little gray crosses appearing.
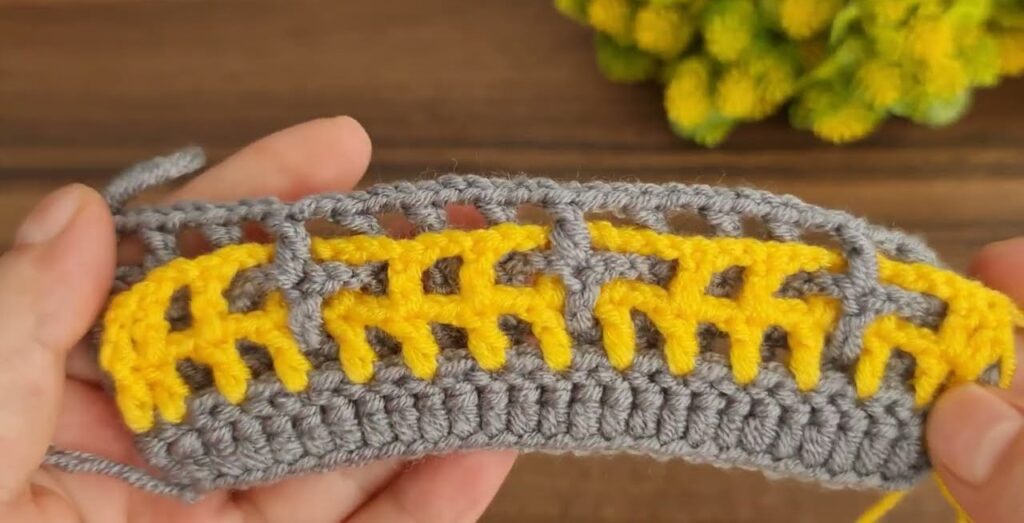
⚫ Step 5: Next Cross Row (Color B)
- Reattach gray.
- Ch 3 (counts as dc).
- FPdc around the FPdc two rows below (gray on gray),
dc in next sc. - Repeat across, forming another row of “X”s that line up perfectly.
- Continue alternating colors and rows:
- Color A rows = mesh/sc + chains
- Color B rows = dc + FPdc crosses
🟡 Step 6: Finishing Edge
Once your piece reaches the desired length:
- Finish with a Color A dc row to make a solid edge.
- Optionally, add a border:
- With gray, work 1 row of single crochet evenly around all sides.
🧠 Stitch Key
| Symbol | Meaning |
|---|---|
| ch | chain |
| sc | single crochet |
| dc | double crochet |
| FPdc | front post double crochet |
| st | stitch |
| sk | skip |
💡 Extra Tips
- Keep your tension even; if your fabric curls, use a larger hook.
- Always bring the new color yarn up along the same side to avoid tangles.
- Blocking at the end helps make the cross pattern crisp.
- Perfect for blankets, scarves, bags, or even a pillow cover!