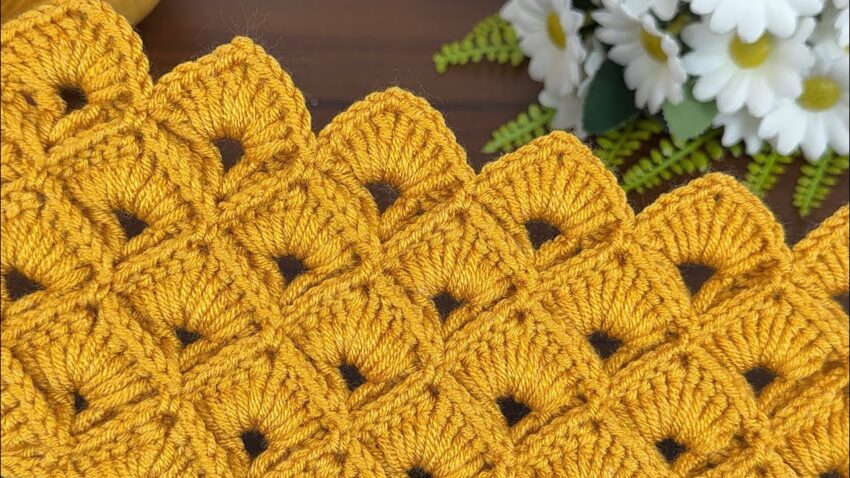
This beautiful crochet design is known as the Crocodile Stitch or sometimes the Dragon Scale Stitch. It’s a 3D textured pattern where scales overlap each other, perfect for blankets, shawls, and decorative pieces.
Here’s a step-by-step tutorial to make it:
🧶 Materials:
- Yarn: Medium-weight (like acrylic or cotton)
- Hook: Size 4.0 mm–5.0 mm (depending on your yarn)
- Scissors and yarn needle

🪡 Abbreviations (US Terms):
- ch = chain
- dc = double crochet
- sl st = slip stitch
- st(s) = stitch(es)
- V-stitch = (1 dc, ch 1, 1 dc) in the same stitch
✨ Pattern Overview:
The Crocodile Stitch is made by alternating V-stitch rows (the base) and scale rows (the 3D petals/scales).
Each scale forms around one V-stitch.
🌸 Step-by-Step Instructions:
🔹 Step 1: Foundation Chain
- Start with a multiple of 6 + 3 chains.
Example: 33 chains (30 + 3).
→ The “+3” helps you balance the ends of your pattern.
🔹 Step 2: Row 1 — Base of V-Stitches
- Dc in the 4th ch from the hook. (This counts as your first V.)
- Skip 2 ch, then work (1 dc, ch 1, 1 dc) in the next chain.
- Repeat from * to * across the row.
- You should end with one dc at the very end (to balance the edge).
👉 You now have a row full of little “V” shapes. Each will hold a crocodile scale later.
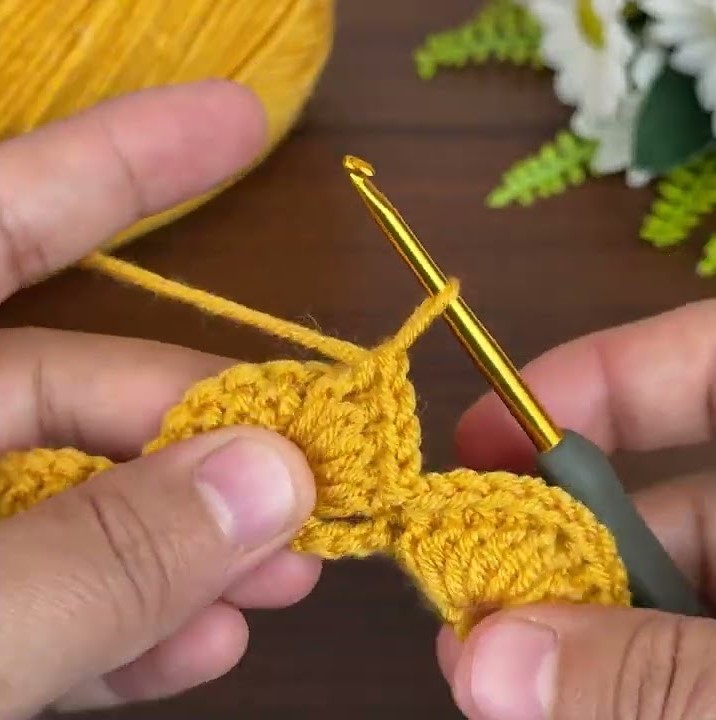
🔹 Step 3: Row 2 — First Row of Scales
Now we make the first set of 3D scales around the V-stitches.
- Turn your work, chain 3 (counts as 1 dc).
- Skip the first V-stitch.
- Around the first post (the left dc post) of the next V-stitch, work 5 dc downward.
- Chain 1 (this forms the center of the scale).
- Around the second post (the right dc post) of the same V, work 5 dc upward.
→ You now have one complete scale. - Skip the next V-stitch.
- Repeat steps 3–5 in every other V-stitch across the row.
👉 At the end, you’ll have a row of scales sitting on every second V-stitch.
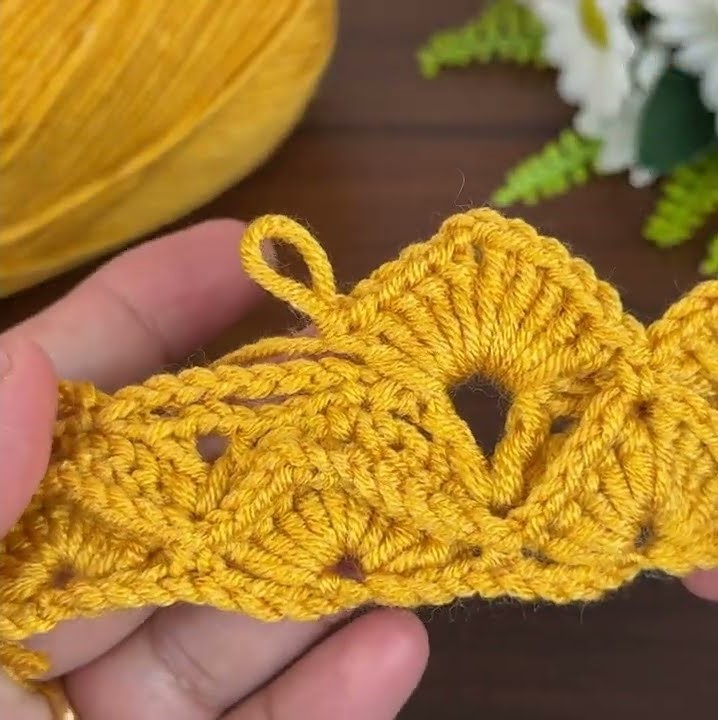
🔹 Step 4: Row 3 — Base Row (V-Stitches Again)
This row builds the base for the next scales.
- Chain 3 (counts as 1 dc), turn.
- Work 1 V-stitch (1 dc, ch 1, 1 dc)
- in the center of the scale (where you chained 1 between the two halves of the scale).
- Then work another V-stitch in the space between two scales.
- Repeat steps 2–3 all across the row.
👉 You’ll see new V’s forming both on top of scales and between scales.
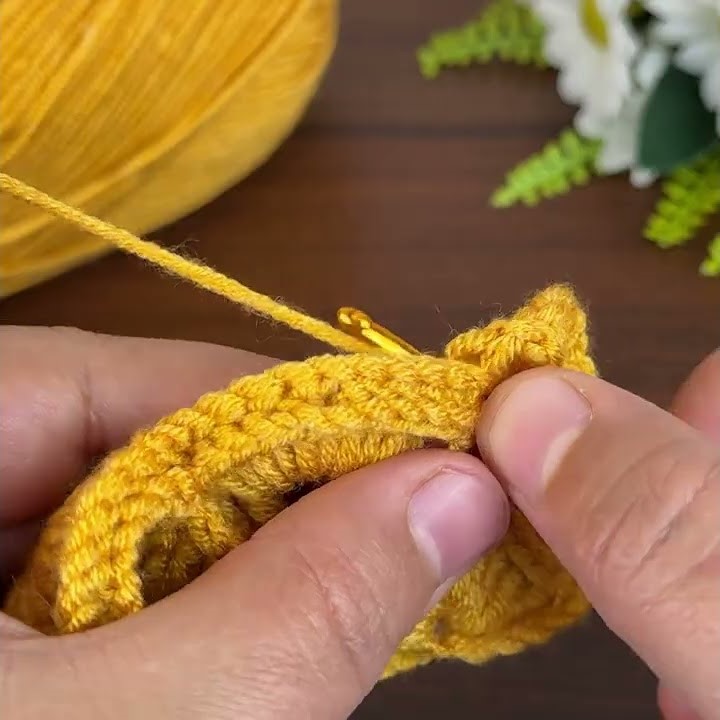
🔹 Step 5: Row 4 — Second Row of Scales (Offset)
Now we offset the scales so they fit between the ones below.
- Turn your work, chain 1.
- Skip the first V-stitch.
- Around the first post of the next V, work 5 dc downward.
- Chain 1.
- Around the second post of the same V, work 5 dc upward.
- Skip the next V, and repeat.
👉 This creates staggered scales — they fill in the spaces between the first row’s scales.
🔹 Step 6: Repeat Pattern
Repeat Rows 3 and 4:
- Row 3 = Base of V-stitches
- Row 4 = Scales
Keep repeating until your piece reaches the desired size.
🌼 Edging (Optional)
For a neat edge:
- You can finish with a row of single crochets along the top and sides.
- Or add picot edging to match the scalloped shape.
💡 Tips for Success:
- Keep tension even, or scales may curl.
- Use a yarn with good stitch definition — smooth yarns show the texture beautifully.
- Block your finished piece gently to even out scales.
- To make larger scales, use 6 or 7 dc per side instead of 5.