
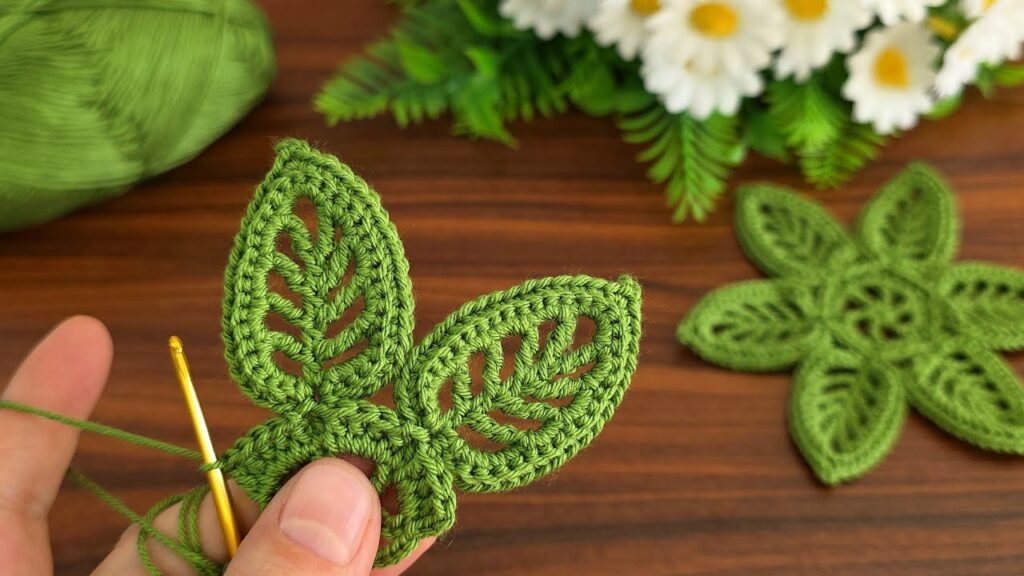
Here is a step-by-step crochet tutorial for making the leaf motif in your image. This pattern uses chains, single crochet (sc), half-double crochet (hdc), double crochet (dc), and treble crochet (tr). Beginners can follow it easily.
🌿 DETAILED CROCHET LEAF TUTORIAL (Exact Style in Your Image)
🧵 Materials
- Fine cotton yarn (size 0–2)
- 1.5 mm – 2.0 mm hook
- Scissors, tapestry needle
🌿 PART 1 — Foundation Spine
1. Make the spine
- Chain 12
This chain will be the center of your leaf.
🌿 PART 2 — First Side of the Leaf
Worked into the back bump of the chain for neat edges.
Start in 2nd chain from the hook:
- sc in next 1 ch
- hdc in next ch
- dc in next 3 ch (3 stitches)
- tr in next 3 ch (3 stitches)
- dc in next 2 ch (2 stitches)
You are now at the last chain — this is the leaf tip.
🌿 PART 3 — Make the Leaf Tip
In the last chain, work the following all in the same stitch:
- dc, tr, dc
This creates a sharp leaf point and turns your work to the other side.
🌿 PART 4 — Second Side of the Leaf
Now crochet into the unused loops of the foundation chain:
- dc in next 2 ch
- tr in next 3 ch
- dc in next 3 ch
- hdc in next ch
- sc in next ch (this is the base of the leaf)
This completes the outer shape.
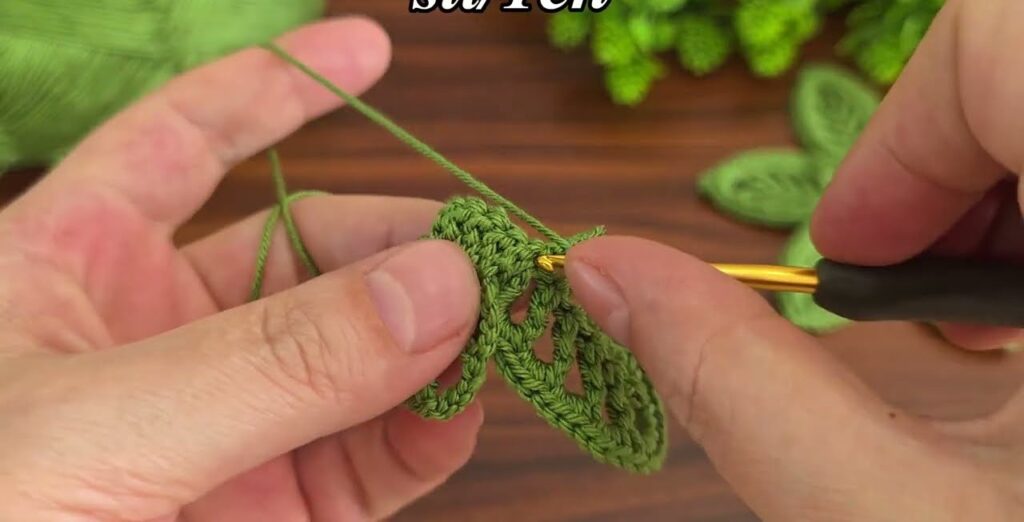
🌿 PART 5 — Outer Border (smooth edges)
To create the smooth frame you see in the photo:
- sl st into the first sc
- ch 1
- Work sc evenly around the entire leaf, one stitch per row-end
- At the top point:
- sc, ch 2, sc (in the tr stitch at the tip)
This keeps the point sharp.
- sc, ch 2, sc (in the tr stitch at the tip)
Slip stitch to the beginning to close the border.
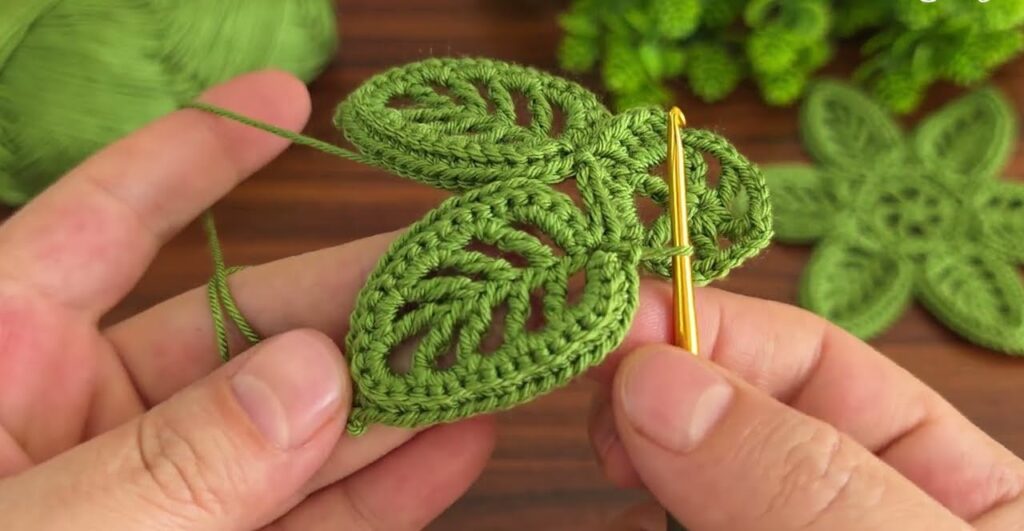
🌿 PART 6 — Lacy Inner Veins (the open “skeleton” pattern)
This is the special part!
You will work along the center of the leaf, anchoring chains into the tall stitches.
1. Insert hook at the leaf base (bottom point)
- sl st into the base
- ch 3
- Skip 1 stitch up the side
- sl st into the next tall stitch
You have created the first “vein.”
2. Continue this pattern up the left side:
Repeat:
- ch 3
- skip 1 stitch
- sl st into the next tall stitch
Stop when you reach the tip.
3. At the tip of the leaf
- ch 3, slip stitch into the center of tip (into the ch-2 space)
4. Go down the right side
Repeat the same pattern:
- ch 3
- skip 1 stitch
- sl st into next tall stitch
Continue until you reach the base again.
5. Finish
- Slip stitch to the start
- Cut yarn and weave ends
Your leaf should now look exactly like the one in your picture:
✔ open lace veins
✔ smooth border
✔ pointed top
✔ strong center spine
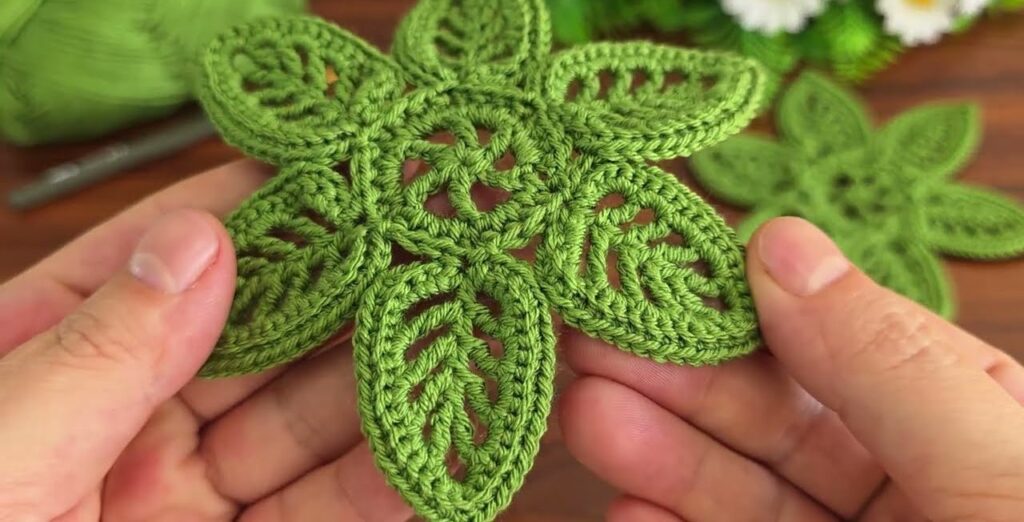
🌿 PART 7 — Making the Multi-Leaf Flower (as in the background)
Make 7 leaves.
To join:
- Place two leaves side by side at their base.
- Slip stitch or sew through the bottom 2 stitches of each leaf.
- Add the next leaf on top of the joined base.
- Continue until you have a 7-leaf star shape.