Sure! Here is a step-by-step tutorial so you can make the exact jasmine chain shown in your picture.
I’ll break it into (A) Jasmine Bud, (B) Green Leaf Section, and (C) Joining/Repeating.
⭐ A. JASMINE BUD (WHITE PART) – SUPER DETAILED
Each jasmine = 4 big puff stitches worked in a row.
1. Start
- With white yarn, make a slip knot.
- Ch 4.
2. Puff Stitch #1
Work into the first chain you made:
A puff stitch (in this design) is:
(Yarn over → insert hook → pull up long loop) × 6 times
→ You will have many loops on hook (usually 13 loops).
Yarn over, pull through all loops,
Ch 1 to lock the puff.
This makes 1 fat puff stitch.

3. Puff Stitch #2
- Ch 2
- In the same base stitch, repeat the same 6-loop puff stitch.
- Ch 1 to close.
4. Puff Stitch #3
- Ch 2
- Repeat the puff again (6 pull-ups).
- Ch 1 to close.
5. Puff Stitch #4
- Ch 2
- Repeat the puff one more time.
- Ch 1 to close.
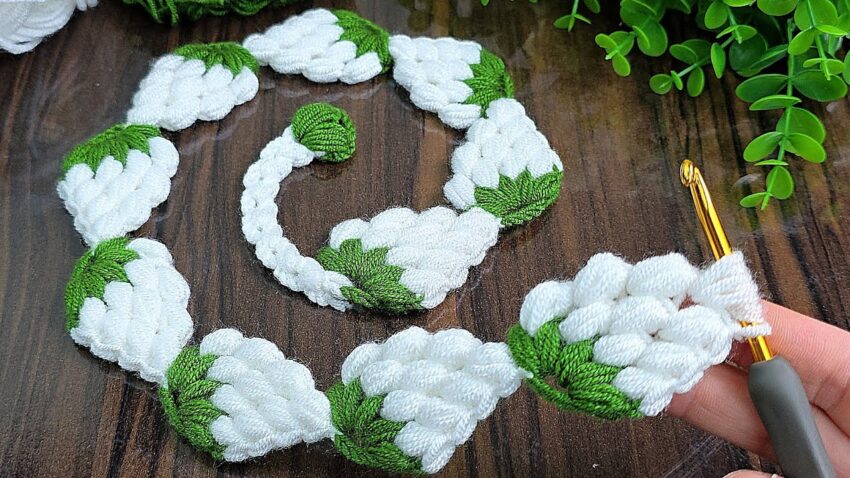
Now you have 4 puff stitches arranged in a curved line — this is one jasmine bud.
It should look like a small “banana shape”.
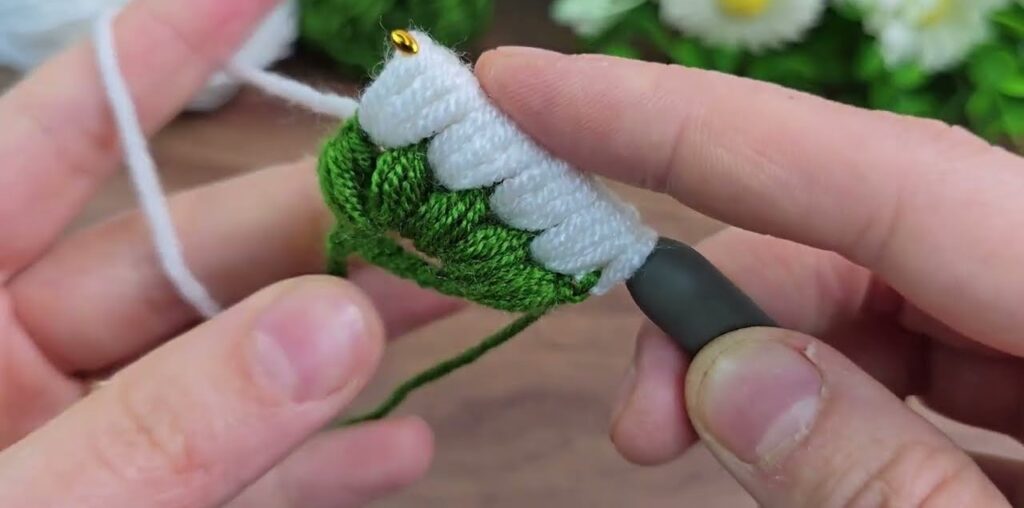
⭐ B. GREEN LEAVES SECTION – SUPER DETAILED
Attach green yarn at the last puff.
1. Insert hook at the top of last puff
Find the chain 2 gap between the puff stitches — this is where we make the leaves.
2. Leaf pattern
In the same space:
(Ch 3 → 3 DC → Ch 3 → Slip stitch)
This forms 1 leaf.
3. Make 3 leaves
Repeat the leaf pattern 3 times in the same area:
1st leaf
2nd leaf
3rd leaf
The leaves automatically wrap around the puff cluster.
Cut green yarn or leave attached (if using the same ball).

⭐ C. MAKE NEXT JASMINE — HOW TO CONTINUE CHAIN
1. With white yarn
Attach white yarn at the last leaf.
2. Form connection
Ch 4, same as start of first jasmine.
3. Repeat entire jasmine
Make 4 big puff stitches again separated by Ch 2.
4. Add green leaves
Repeat the 3-leaf cluster.

⭐ D. REPEAT
Repeat:
Jasmine (4 puff stitches) → 3 green leaves → Jasmine → 3 green leaves …
The chain becomes long and flexible, just like your picture.
⭐ EXTRA TIPS FOR PERFECT LOOK
✔ Use soft cotton yarn
It makes puff stitches thick and smooth.
✔ Pull loops long when making puffs
This creates that plump, rounded look.
✔ Keep your tension a bit loose
Puffs will look bigger and more even.
✔ Shape each puff with your fingers
Push each puff forward to make the “jasmine bud” shape.