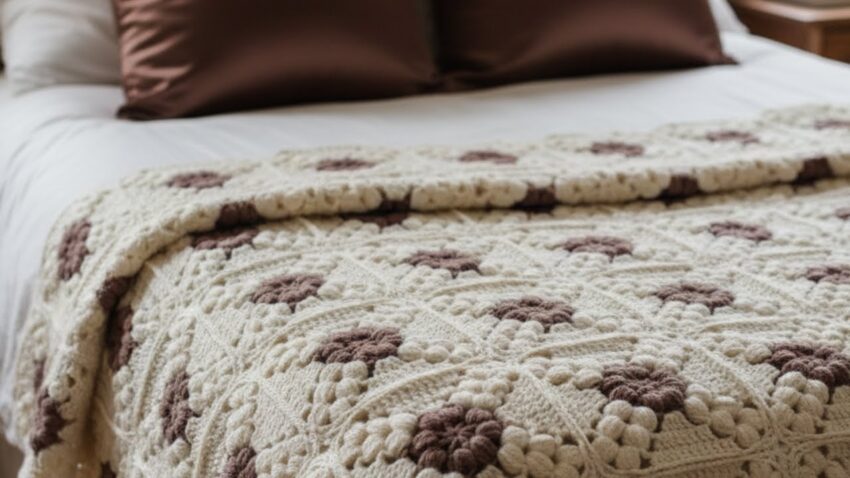
This looks like a crocheted bobble (popcorn) granny-square blanket, made from individual textured squares joined together, then finished with a border. I’ll explain it clearly step by step so you can recreate it 😊
This is a bobble-flower textured granny square blanket.
MATERIALS (IMPORTANT)
- Yarn: Medium weight (4 / worsted)
- Color A: Cream / Off-white (main)
- Color B: Brown (flower)
- Hook: 5.0–5.5 mm
- Scissors
- Yarn needle

CROCHET STITCHES YOU MUST KNOW
- ch = chain
- sl st = slip stitch
- sc = single crochet
- dc = double crochet
- bobble stitch (explained below)
HOW TO MAKE ONE SQUARE (FULL STEP-BY-STEP)
✿ ROUND 1 – BOBBLE FLOWER CENTER (Brown yarn)
Bobble stitch (very important):
- Yarn over (yo)
- Insert hook into stitch
- Pull up a loop
- Yo, pull through 2 loops
👉 Repeat steps 1–4 4 times in the same stitch - Yo, pull through all loops on hook
This makes 1 bobble
Round 1 steps:
- Make a magic ring
- Ch 2 (does NOT count as stitch)
- Make 6 bobble stitches into the ring
- After each bobble, ch 1
- Join with sl st
- Pull ring tight
- Cut yarn, fasten off
✔ You should see a small puffy flower

✿ ROUND 2 – FORM THE SQUARE (Cream yarn)
- Attach cream yarn in any ch-1 space
- Ch 3 (counts as first dc)
- 2 dc in same space
- Ch 2 → corner
- 3 dc, ch 2 in next ch-1 space
- Repeat step 5 3 times
- Join with sl st
✔ Now you have a square with 4 corners

✿ ROUND 3 – TEXTURE & BOBBLES
- Sl st into corner space
- Ch 2
- In corner:
- (2 dc, ch 2, 2 dc)
- On each side space:
- (1 bobble, ch 2, 1 bobble)
- Repeat all around
- Join with sl st
✔ This creates the raised dots texture seen in the blanket
✿ ROUND 4 – SOLID FRAME
- Ch 3
- Dc in every stitch around
- Corners:
- (2 dc, ch 2, 2 dc)
- Join with sl st
- Fasten off
📏 Square size: 20–22 cm (8–9 inches)

HOW MANY SQUARES YOU NEED
Approximate numbers:
- Baby blanket: 25–36 squares
- Throw blanket: 48–64 squares
- Bed blanket: 80+ squares
JOINING THE SQUARES (VERY IMPORTANT LOOK)
Best joining method for this style:
Slip Stitch Join (flat & neat)
- Place squares right side up
- Insert hook through both squares
- Sl st across
- Do not pull too tight
This keeps the texture visible like the photo.
BORDER (MATCHES PHOTO STYLE)
Border Round 1
- Attach cream yarn
- Sc evenly around
- Corners: (3 sc)
Border Round 2
- Dc around
- Corners: (2 dc, ch 2, 2 dc)
Optional Final Round (Luxury Finish)
- Crab stitch (reverse sc)
PRO TIPS FOR PERFECT RESULT
✔ Keep bobbles tight
✔ Block squares before joining
✔ Use stitch markers on corners
✔ Count stitches every round