
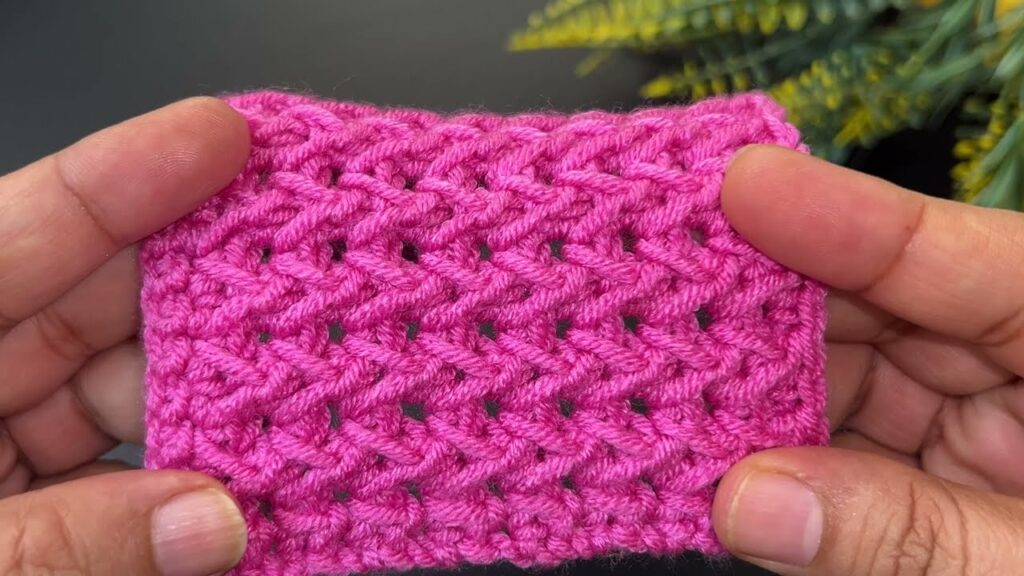
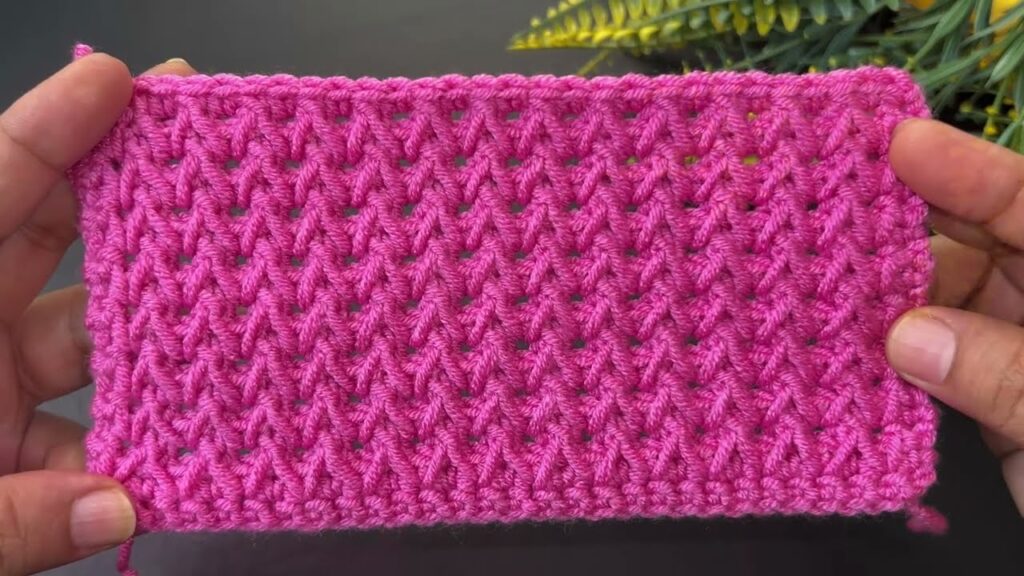
That’s a crochet V-stitch variation — sometimes called the Diagonal Spike Stitch or Slanted V Stitch. It creates a lovely textured and stretchy pattern, perfect for scarves, blankets, or sweaters. Here’s how to make it step-by-step 👇
🧶 Crochet Diagonal V Texture Stitch (Detailed Tutorial)
✨ What You’ll Need:
- Yarn: Any medium-weight (category 4) yarn. Acrylic or cotton works great.
- Hook: Use the size recommended for your yarn (for example, 4 mm or 5 mm).
- Scissors & yarn needle for finishing.

🔤 Abbreviations (US terms)
| Symbol | Meaning |
|---|---|
| ch | chain |
| dc | double crochet |
| fpdc | front post double crochet |
| st | stitch |
| yo | yarn over |
🧩 Step-by-Step Instructions
1️⃣ Foundation
Make a multiple of 2 + 1 chains (for example, 31, 41, 51…).
Example:
ch 31
2️⃣ Row 1: Base Row
- Yarn over, insert hook in 4th ch from the hook.
- Work 1 dc in that chain.
- Continue working 1 dc in each chain across.
- Turn your work.
👉 You now have a flat dc base row.
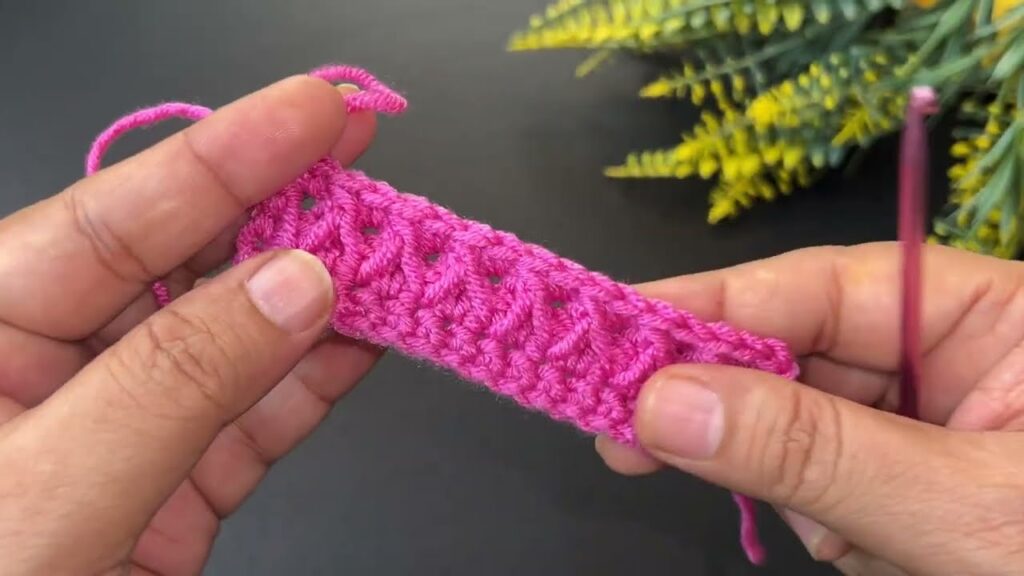
3️⃣ Row 2: Start the Texture Pattern
- Ch 2 (counts as 1 dc).
- fpdc around next dc:
- Yarn over, insert hook from front to back to front around the post of the dc below (not into the top loops).
- Yarn over, pull up a loop (you now have 3 loops on hook).
- Yarn over, pull through 2 loops.
- Yarn over again, pull through the last 2 loops.
- 1 dc in the next stitch (top of the dc).
- Repeat (fpdc, dc) sequence across the row.
- End with 1 dc in the top of turning chain.
- Turn.
Now your “V” lines will start to appear diagonally.
4️⃣ Row 3 and Beyond
Repeat Row 2 for all following rows.
Each new row should line up the fpdc with the previous fpdc below it.
This keeps the diagonal pattern continuous.
5️⃣ Optional Finishing (for a neat edge)
Once you reach the desired size:
- Work one final row of dc across.
- Fasten off and weave in ends.
🌸 Extra Tips for a Perfect Texture
- Tension: Keep stitches loose enough so fpdc loops don’t pull too tight.
- Texture Control: The fpdc rows create raised diagonal ridges; if your stitches twist, make sure you’re inserting your hook around the post from right to left (if right-handed).
- Edge Alignment: Always end each row with a dc in the turning chain to keep edges straight.
💡 Pattern Example (Swatch)
If you want a small sample like the image:
Foundation: ch 31
Row 1: dc in 4th ch from hook, dc in each ch across, turn.
Row 2: ch 2, fpdc around next dc, dc in next st; repeat across, dc in top of turning ch, turn.
Rows 3–20: repeat Row 2.
Finish: dc row, cut yarn, weave ends.