
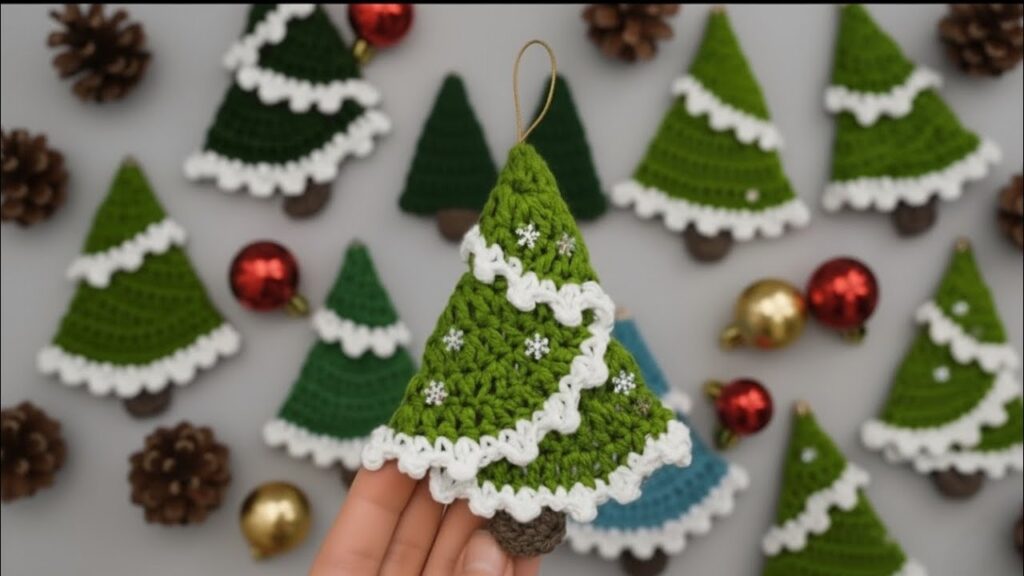
Great! Here is a row-by-row pattern that will help you recreate the exact crochet Christmas tree in the photo, including shaping, ruffles, assembly, and decorations.
🎄 FULL DETAILED CROCHET PATTERN
This pattern creates three layered triangles that overlap in a spiral to look realistic—just like the photo.
🧶 Materials
- Green yarn (DK or worsted)
- White yarn (for snow edge)
- Brown yarn (tree trunk)
- 3.0–3.5 mm hook (for neat stitches)
- Yarn needle
- Small beads/snowflakes (optional)
- Light stuffing (optional)
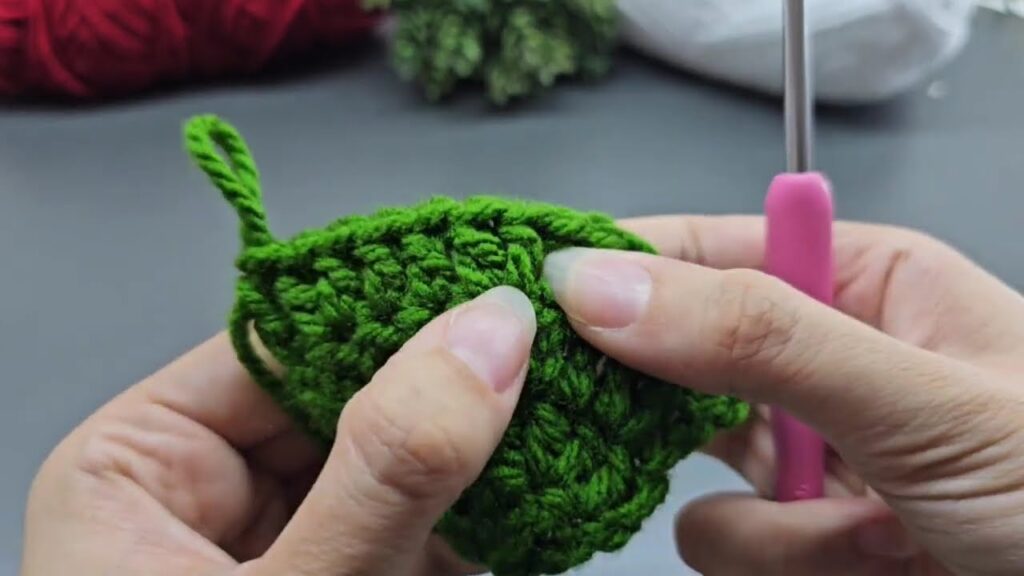
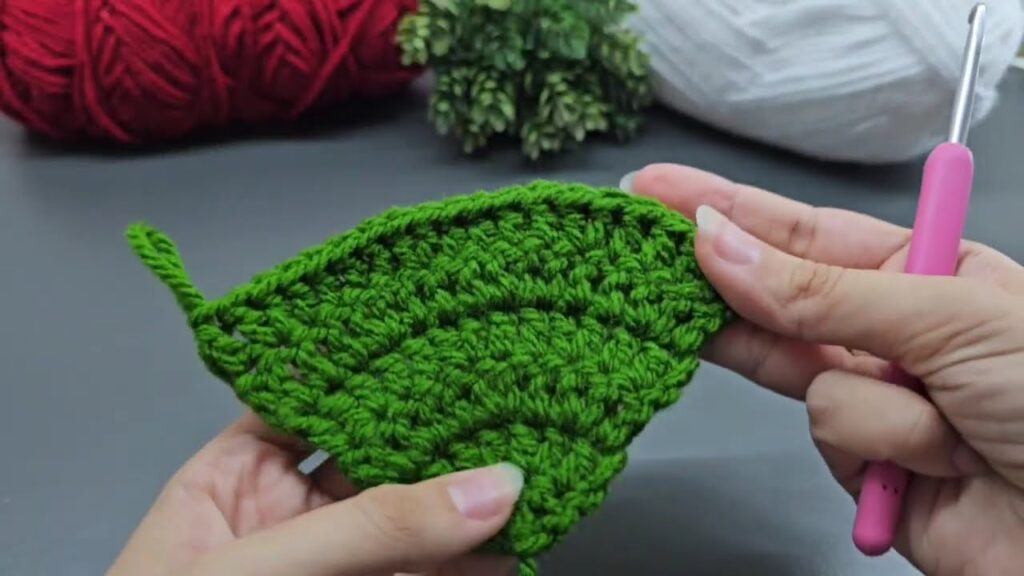
🌲 PART 1 — TRIANGLE LAYERS
Each tree layer is crocheted top-down using double crochet (dc) for the texture seen in the photo.
Stitches used:
- ch = chain
- sc = single crochet
- dc = double crochet
- inc = increase
- sl st = slip stitch
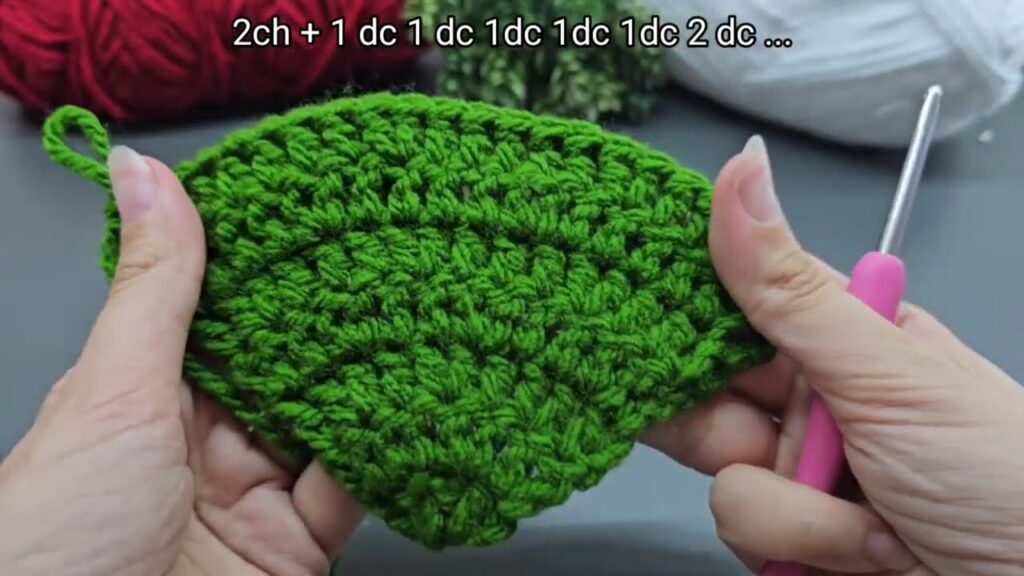
⭐ TOP TRIANGLE (SMALL)
With green yarn:
Row 1
- Ch 3 (counts as dc)
- 2 dc in 3rd ch from hook
(3 dc total)
Row 2
- Ch 3, turn
- 2 dc in first st, dc in next, 2 dc in last
(5 dc)
Row 3
- Ch 3, turn
- 2 dc in first st, dc in next 3, 2 dc in last
(7 dc)
Row 4
- Ch 3, turn
- 2 dc in first st, dc in next 5, 2 dc in last
(9 dc)
Fasten off.
🌲 MIDDLE TRIANGLE
Repeat the same pattern but continue until 13 or 15 dc across.
(You can adjust size to match your small triangle.)
Pattern:
Row 1 – 3 dc
Row 2 – 5 dc
Row 3 – 7 dc
Row 4 – 9 dc
Row 5 – 11 dc
Row 6 – 13 dc
Stop at the width you like.
Fasten off.
🎄 BOTTOM TRIANGLE (LARGEST)
Repeat same method, but continue until 17–19 dc across.
Pattern:
Row 1 – 3 dc
Row 2 – 5 dc
Row 3 – 7 dc
Row 4 – 9 dc
Row 5 – 11 dc
Row 6 – 13 dc
Row 7 – 15 dc
Row 8 – 17 dc
Fasten off.
❄️ PART 2 — WHITE SNOW RUFFLE
Work on the bottom edge of each triangle.
With white yarn:
- Attach yarn in left corner.
- sc, ch 3, skip 1 stitch. (makes a nice wave)
- Repeat across.
- At the last stitch: sc, ch 3.
This creates the bouncy snow trim just like in the picture.
Do this for all 3 triangles.
🌳 PART 3 — TREE TRUNK
Using brown yarn:
Row 1
- Ch 4
- sc in 2nd ch from hook and each ch across (3 sc)
Rows 2–5
- Ch 1, turn, sc in each (3)
Fasten off, leave tail for sewing.
🌲 PART 4 — ASSEMBLY (SPIRAL LAYER LOOK)
This is the part that gives the tree its shape like the one you’re holding.
- Lay the largest triangle flat.
- Place the middle triangle slightly to the right, covering about 1/3 of the large triangle.
- Place the small triangle slightly further right, overlapping the middle triangle.
- Sew them down the center only—this allows the sides to flare out.
- (Optional) Add a tiny bit of stuffing between layers to make it puffy.
- Sew the brown trunk to the bottom center.
⭐ OPTIONAL — HANGING LOOP
- Use gold or green thread
- Ch 20
- Sew to the top of the tree.
❄️ OPTIONAL DECORATIONS
To match the photo:
- Sew on mini snowflake sequins
- Add small white or silver beads randomly
- Add glitter yarn touches if you want sparkle