
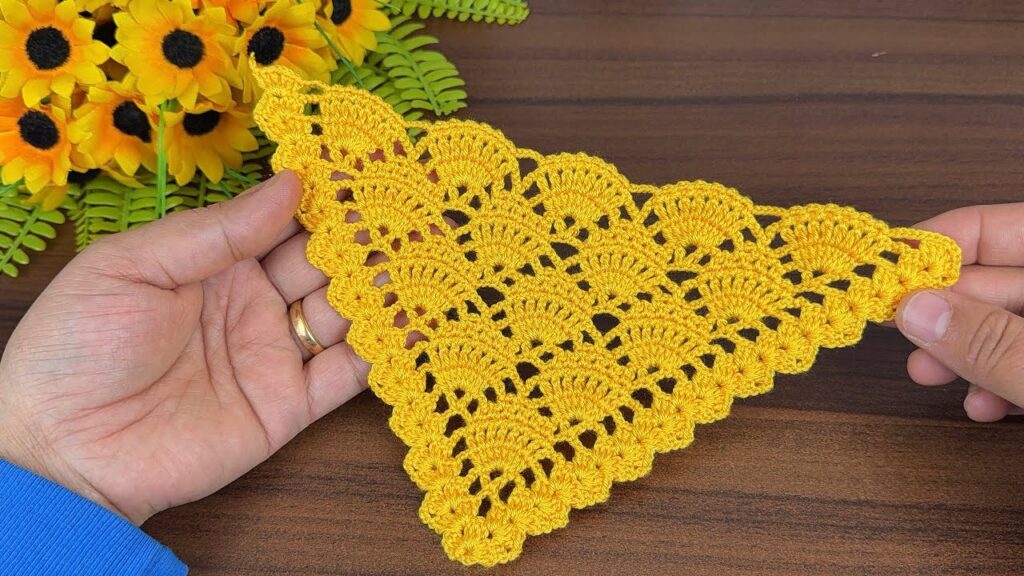
This is a crochet lacy shell / fan stitch triangle motif, often used for shawls, corners, or decorative panels. I’ll explain step by step in English, clearly and in detail, based on the structure shown in the photo.
🌻 MATERIALS
- Yarn: cotton or acrylic (size 3 or 4 is perfect)
- Hook: 3.0 mm (use 3.5 mm if you crochet tight)
- Scissors
- Needle
🌻 CROCHET TERMS (US)
- ch = chain
- sl st = slip stitch
- sc = single crochet
- dc = double crochet
- sp = space
- st = stitch
👉 Shell (fan) = 5 dc in the same space
🟡 START – TOP POINT
Step 1: Make the center
- Make a magic ring
(or ch 4, sl st into first chain to form a ring) - Ch 3 (counts as first dc)
- Crochet 4 dc into the ring
→ You now have 5 dc = 1 shell - Ch 2 (center gap)
- Crochet 5 dc into the ring
→ This is the second shell
✅ Row 1 finished
- 2 shells
- 1 ch-2 space in the middle

🟡 ROW 2
Edge increase starts here
- Ch 3, turn
- In the same stitch, make 2 dc
→ This makes the left edge straight - Find the ch-2 space in the center
- Crochet 5 dc into that space
- Ch 2
- Crochet 5 dc again into the same space
- In the last stitch, crochet 3 dc
✅ Row 2 result
- 3 shells total
- Wider triangle shape
🟡 ROW 3
- Ch 3, turn
- In same stitch, crochet 2 dc
- Find the space between shells
- Crochet 5 dc into that space
- Find the center ch-2 space
- Crochet 5 dc
- Ch 2
- Crochet 5 dc into the same space
- Find the next space between shells
- Crochet 5 dc
- In the last stitch, crochet 3 dc
✅ Row 3 result
- 4 shells
- Triangle clearly visible

🟡 ROW 4 AND ABOVE (REPEAT LOGIC)
Every row follows the same rule:
At the start
- Ch 3
- 2 dc in first stitch
In the middle
- 5 dc in each space between shells
- In the center space only:
- 5 dc
- ch 2
- 5 dc
At the end
- 3 dc in last stitch
👉 Each row adds 1 new shell

🟡 HOW BIG SHOULD IT BE?
- Small corner: 6–7 rows
- Shawl / panel: 12–18 rows
- Stop when it matches the photo size
🌼 SCALLOPED BORDER (VERY IMPORTANT FOR THE LOOK)
Round 1 – single crochet base
- Ch 1
- Work sc evenly along all edges
- At corners, put 2 sc in one space
Round 2 – shell edge
- Sl st into next st
- Ch 2
- Sl st into same st
👉 This creates a tiny picot - Skip 2 stitches
- Repeat all around
Fasten off and weave in ends.
💡 TIPS FOR PERFECT RESULT
- Use loose tension so shells open nicely
- Blocking makes a BIG difference
- Cotton yarn shows the stitch best
- If curling happens → go up 0.5 mm hook size