
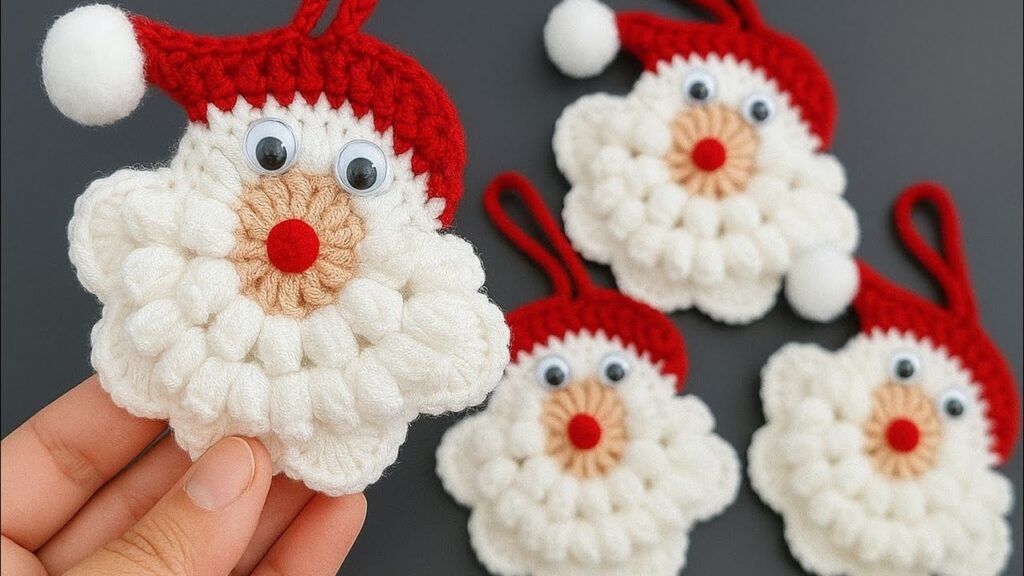
These cute Santa face ornaments are crocheted — perfect for Christmas decorations! Here’s a simple step-by-step guide on how you can make one like in your image:
🎅 Crochet Santa Ornament (Detailed Pattern)
🧵 Materials:
- Yarn:
- White (for beard and hat trim)
- Red (for hat)
- Beige, cream, or light pink (for face)
- Small piece of red (for nose)
- Hook: 3.0–4.0 mm crochet hook
- Eyes: 2 googly eyes or black yarn for embroidery
- Small white pompom for hat tip (optional)
- Yarn needle for sewing
- Scissors
🪡 Abbreviations:
| Abbrev | Meaning |
|---|---|
| ch | chain |
| sl st | slip stitch |
| sc | single crochet |
| hdc | half double crochet |
| dc | double crochet |
| tr | treble crochet |
| st | stitch |
| MR | magic ring |
| puff | puff stitch (see below) |
👉 Puff stitch: Yarn over, insert hook into st, yarn over and pull up loop (3 loops on hook). Repeat this 4 more times (you’ll have 11 loops). Yarn over and pull through all loops. Ch 1 to close the puff.
🧶 Instructions
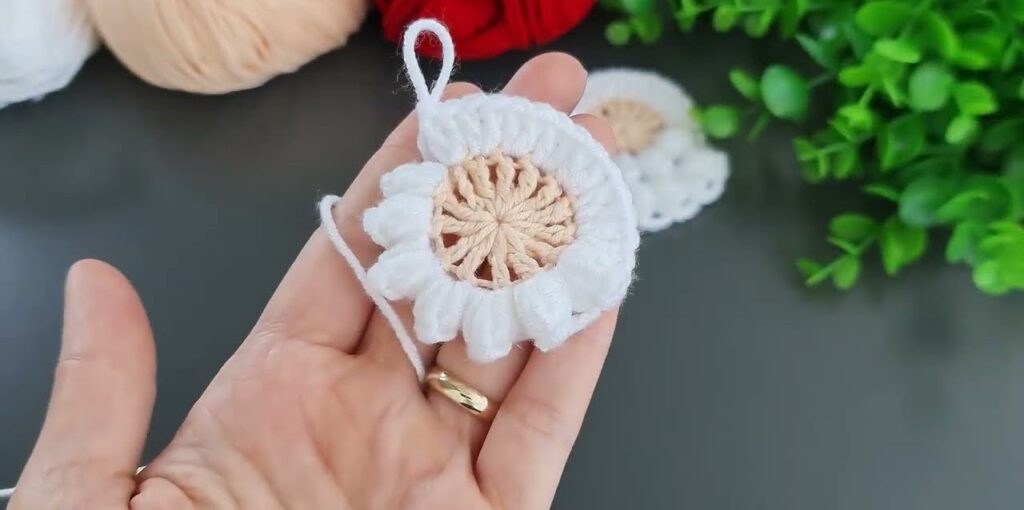
1️⃣ Face (Beige or Skin-Tone Yarn)
- Begin with MR.
- Ch 2 (counts as first dc).
- Work 11 dc into the MR (total 12 dc).
- Pull ring tight.
- Join with sl st to top of first dc.
- Fasten off and weave in the end.
👉 You now have a small beige circle — Santa’s face base.
2️⃣ Beard (White Yarn)
- Attach white yarn into any st of the beige circle.
- Ch 1, and in the same st, work 1 puff stitch (see definition above).
- Continue making 1 puff stitch in each dc around (12 total).
- Join with a sl st to the top of the first puff.
- Fasten off and weave in ends.
🎨 Optional: For a fuller beard, you can do a second round of puff stitches by working 2 puff stitches in every other st (total 18).
3️⃣ Hat (Red Yarn)
- Attach red yarn near the top of Santa’s head (between puff stitches).
- Row 1: Ch 12 (this will form the curved edge of the hat).
- Starting from 2nd ch from hook, work 1 sc in each chain (11 total).
- Sl st into the next stitch on the white beard edge to anchor it.
- Turn, and work back up the sc row, decreasing 1 sc each row to make the triangle hat shape:
- Row 2: Ch 1, sc 10, sl st to beard edge.
- Row 3: Ch 1, sc 9, sl st to beard edge.
- Continue until you have 1 sc left — the tip of the hat.
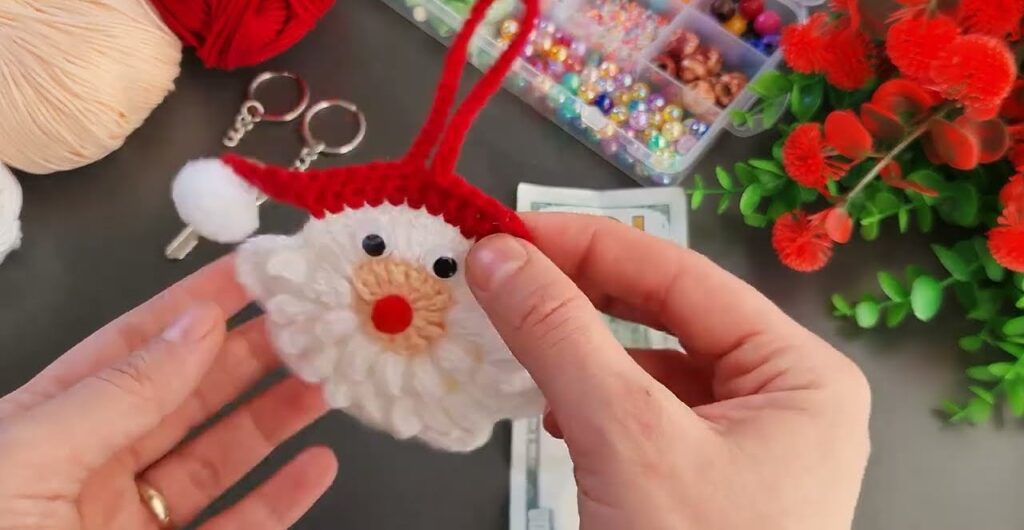
- Ch 10–15 at the tip to create a loop for hanging, and join with sl st.
- Fasten off.
4️⃣ Pom-pom and Hat Trim
- Sew or glue a white pompom to the hat tip.
- Optionally, crochet a small white border at the hat edge:
- Attach white yarn, ch 1, sc across the bottom of the hat for a fluffy trim.
5️⃣ Nose
- With red yarn: MR, 4 sc, join with sl st, fasten off, leave a long tail.
- Sew nose to the center of Santa’s face.
6️⃣ Eyes
- Attach googly eyes using glue, or embroider small black eyes with yarn or thread.

7️⃣ Finishing
- Weave in all yarn ends neatly with a needle.
- Lightly steam block or shape with your hands.
- Hang it on your tree, wreath, or as a gift tag! 🎁
🌟 Optional Variations
- Add a little blush with pink thread or fabric paint.
- Make different sizes using thinner or thicker yarn.
- Add a tiny smile using a short piece of black yarn.