
Great! I can show you how to make this. This is a crochet bag/leaf keychain holder made using two metal rings and single crochet worked in a V shape with increases in the center.
✅ MATERIALS
- Yarn: Medium weight (No. 3 or No. 4)
- Hook: 3.0 mm – 4.0 mm (choose based on yarn)
- 2 metal rings (keychain rings or curtain rings)
- Scissors
- Yarn needle

✅ STEP-BY-STEP INSTRUCTIONS
STEP 1: Cover the First Ring
- Hold the first ring in your left hand.
- Make a slip knot on your hook.
- Insert your hook under the ring, yarn over, pull through → you catch the yarn on the ring.
- Chain 1 to secure.
- Now work Single Crochet (SC) around the ring:
- Insert hook under the ring,
- Yarn over,
- Pull up a loop,
- Yarn over,
- Pull through both loops → SC made.
- Repeat until the ring is full and the stitches are tight and close together.
You should have about 20–25 SC around the ring (number is not important).
STEP 2: Start the First Row
- Turn your work.
- Chain 1.
- SC in each stitch across.
- Turn.
STEP 3: Begin the V Shape (Center Increase Every Row)
You must find the center stitch every row.
Example:
If you have 21 stitches, the center stitch is number 11.
Now follow this pattern for each row:
Row Pattern:
SC in each stitch until you reach the center stitch.
In the center stitch: make 3 SC in the same stitch.  (This creates the V shape.)
Continue SC to the end.
Chain 1 and turn.
TIP:
To easily find center stitch:
Put a stitch marker in the center increase every row.
Each row, move the marker into the new center stitch of the 3-SC group.
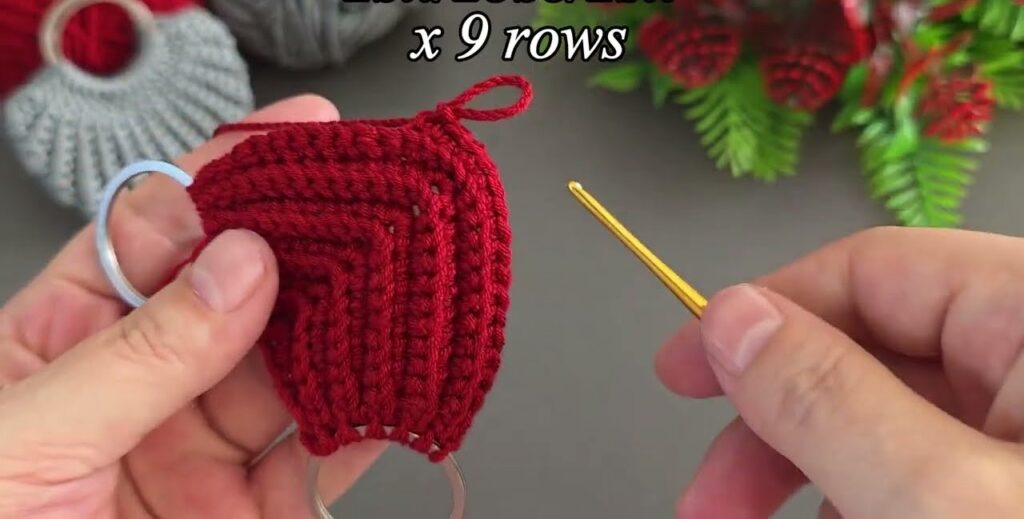
Repeat Step 3
Work about 12–15 rows, or until your triangle looks like the red one in the picture.
Your work will look like this:
⟙ ← V shape growing because of 3 SC in the center
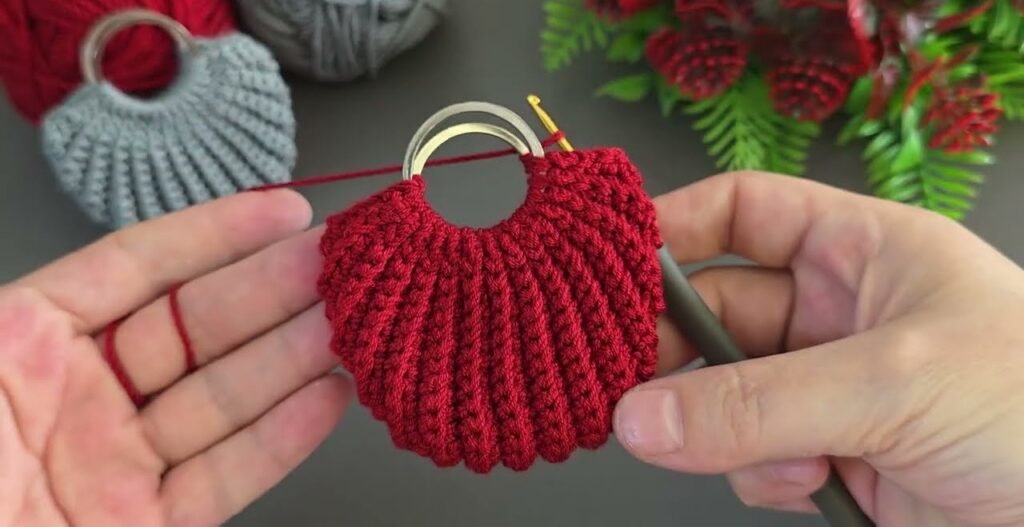
STEP 4: Attach to Second Ring
- When finished with the last row, do not cut yarn.
- Hold the second ring next to the last row edge.
- Insert hook under the ring, yarn over, pull up loop, yarn over, pull through both loops → SC on the ring.
- Continue making SC around the ring, working evenly.
- Each stitch on the edge corresponds to one SC on the ring.
- Make sure the stitches are close together and firm.
STEP 5: Finish
- Cut yarn.
- Pull tail through stitch to lock.
- Use yarn needle to weave in ends.
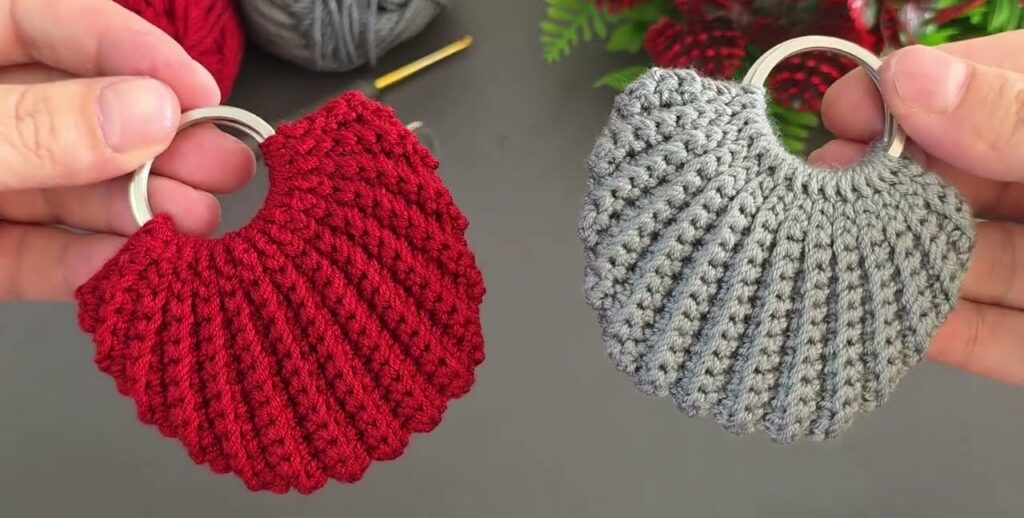
✅ NOW: Make the Shell Shape (Like the Gray Example)
The red piece is flat. To create the shell or fan texture:
- Fold the triangle slightly at the center crease.
- Match the two sides.
- Stitch the edges together from ring to ring using whip stitch or slip stitch.
- Do not tighten too much—keep the shape puffed.
This creates the rounded ribbed shell shape.
⭐ OPTIONAL IMPROVEMENT FOR BEAUTIFUL RIB TEXTURE
To get deeper lines like the picture:
Work your stitches IN THE BACK LOOP ONLY starting from Row 2.
So your row becomes:
SC in Back Loop Only (BLO) until center.
3 SC in BLO in center.
SC in BLO to end.
Ch1, turn.
This is what gives the ribbed shell effect.