
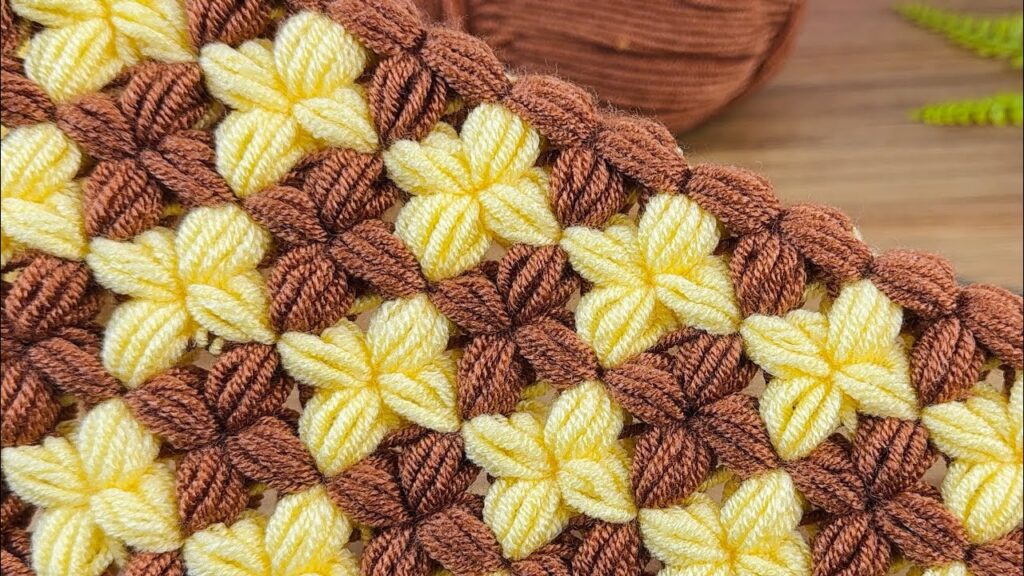
Here is a beginner-friendly, step-by-step tutorial for making the exact stitch in the photo.
This is the 2-Color Puffy Flower Stitch (each flower has 4 petals/puffs).
I will explain EXACT positions to insert your hook, how many loops to pull, and how to build each row.
🔶 WHAT YOU WILL LEARN
- How to start foundation chain
- How to make puff stitches correctly
- How 4 puffs form 1 flower
- How to place puffs on the next row to form new flowers
- How to switch colors cleanly
🧶 STITCHES USED
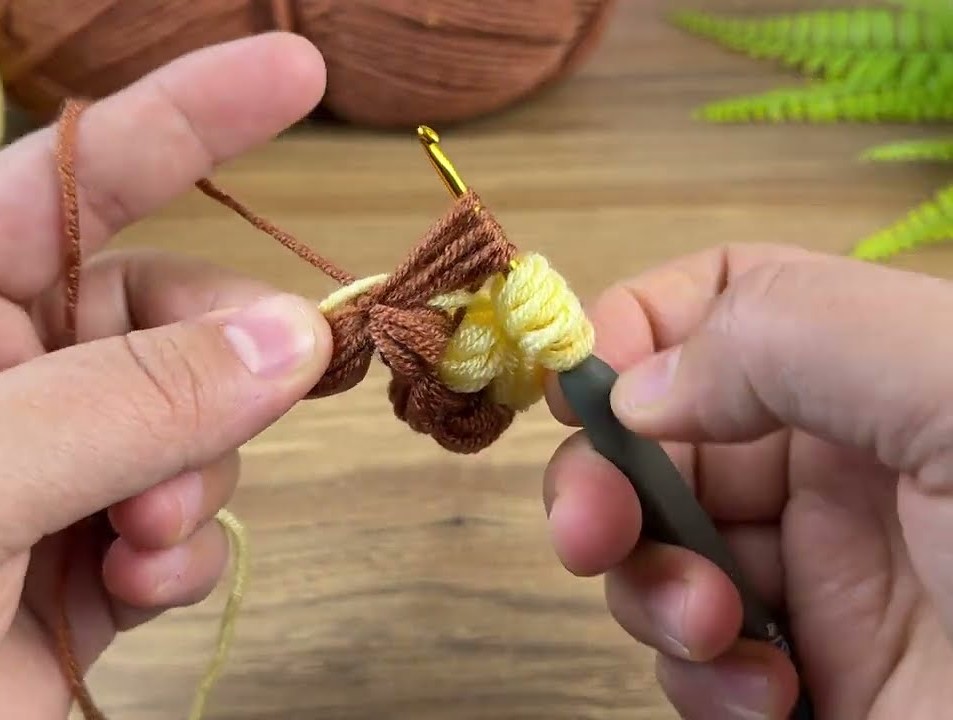
✔ Puff Stitch (4-pull puff)
- Yarn over
- Insert hook
- Pull up a loop (tall)
→ Repeat 4 times (you will have 9 loops on your hook) - Yarn over, pull through all loops
- Chain 1 to close the puff
🟤🟡 COLOR NAMES (for clarity)
- Color A = Brown
- Color B = Yellow
⭐ STEP 1 — Foundation Chain
Make a chain in multiples of 4 + 2.
Example:
4 + 4 + 4 + 4 + 2 = 18 chains
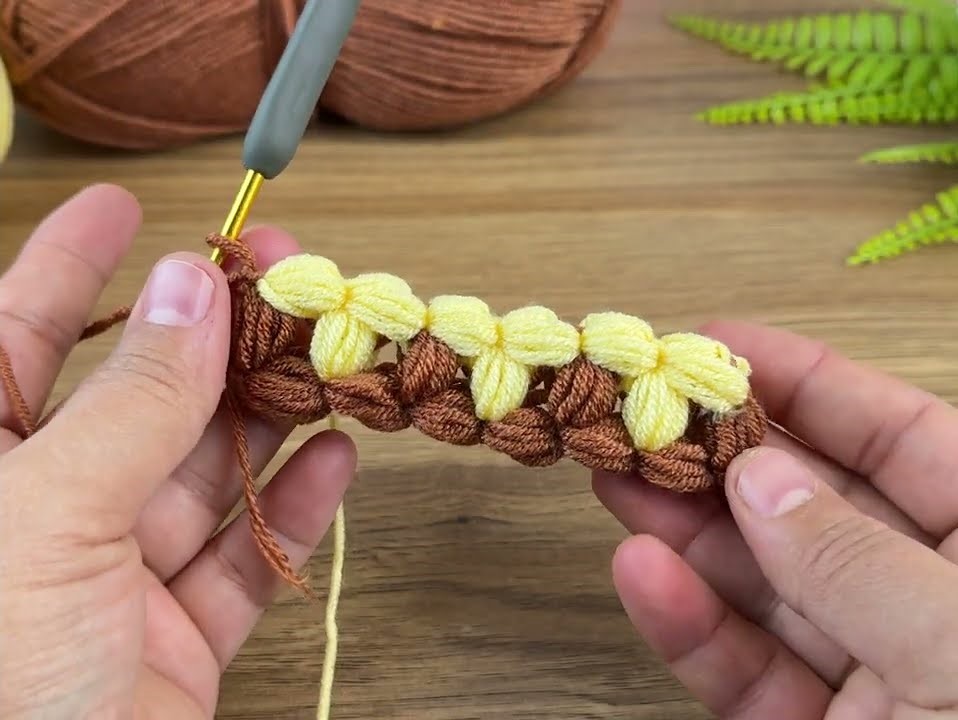
⭐ STEP 2 — Row 1 (Brown Flowers Base Row)
🔸 Start First Flower
- Skip 2 chains
- In 3rd chain → make puff stitch
- Chain 1
- In next chain → puff
- Chain 1
- In next chain → puff
- Chain 1
- In next chain → puff
👉 These 4 puffs = 1 flower
🔸 Continue to Next Flower
You now repeat this set:
(ch 1) + puff in next chain
(ch 1) + puff in next chain
(ch 1) + puff in next chain
(ch 1) + puff in next chain
Repeat all the way across Row 1.
Cut yarn. Switch to yellow.
⭐ STEP 3 — Row 2 (Yellow Flowers on Top)
Turn your work.
🔸 Where to insert your hook:
In Row 2 you do NOT work into the chains anymore.
Instead, you work into the spaces BETWEEN the puff stitches (also called “puff gaps”).
Each previous flower has 4 gaps around it, like this:
  (gap1)   (gap2)
   [puff][puff]
   [puff][puff]
  (gap4)   (gap3)
🔸 Start Row 2
Attach yellow yarn into the first gap between 1st and 2nd puff of Row 1.
- Chain 2 (just to get height)
- Yarn over → insert hook into Gap 1 → make puff
- Chain 1
- Into Gap 2 → puff
- Chain 1
- Into Gap 3 → puff
- Chain 1
- Into Gap 4 → puff
👉 You now have 1 yellow flower sitting on top of the brown ones.
🔸 Continue Across
Each new flower uses the 4 gaps around one old flower.
Repeat:
puff (gap1)
ch 1
puff (gap2)
ch 1
puff (gap3)
ch 1
puff (gap4)
Continue until end of row.
Cut yarn.
⭐ STEP 4 — Row 3 (Brown Again)
Turn your work.
Repeat exactly Row 2 instructions:
- Insert hook into gaps between yellow puffs
- Make 4 puff stitches → 1 brown flower
- Work across the row
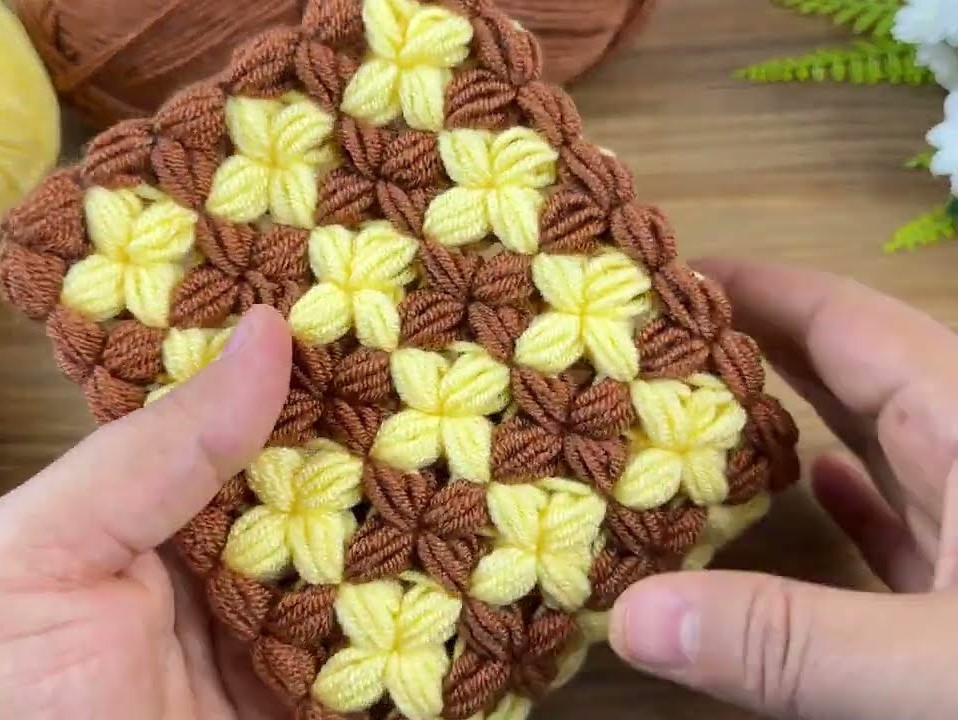
🔁 Repeat Rows
Row 4 = Yellow
Row 5 = Brown
Row 6 = Yellow
… and so on.
The pattern will naturally build a checkerboard of flowers exactly like your picture.
⭐ HOW TO KEEP PERFECT FLOWER SHAPE
✔ Make puffs tall (pull loops up evenly)
✔ Don’t tighten the ch-1 too much
✔ Keep puff size consistent
✔ Use medium-weight yarn (4ply) with 3.5–4.5 mm hook