
Perfect 🌸 instructions so you can easily crochet the exact ruffle pattern in the image.
This will include: base setup, stitch counts, color changes, and shaping tips.
🧶 Crochet Ruffle Border Tutorial (Step-by-Step)
💡 What You’ll Need:
- Yarn: 3 or more colors (in the image: white base, pink, red, and green)
- Hook: Use the size recommended for your yarn (commonly 3.0–4.0 mm)
- Scissors & yarn needle
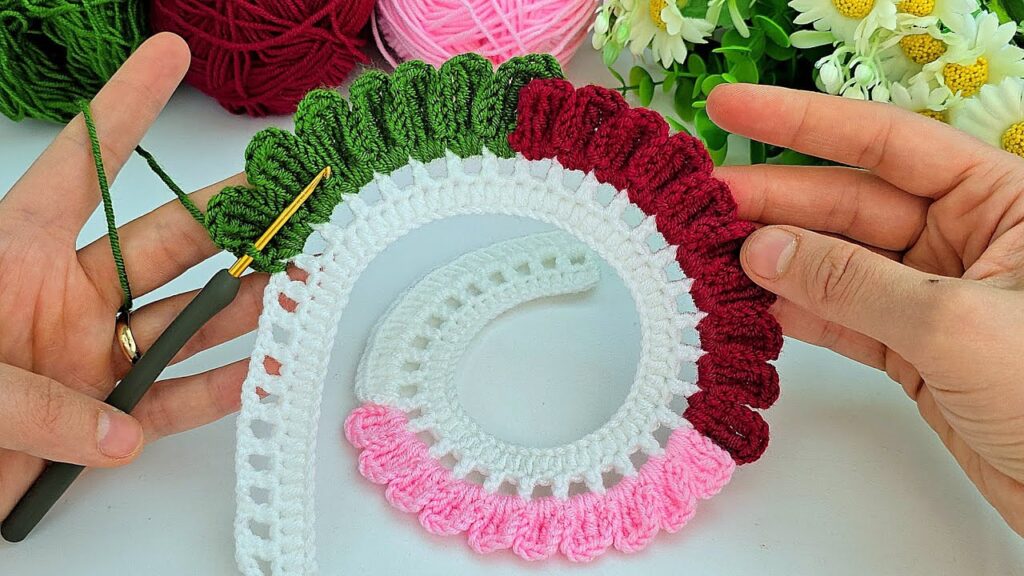
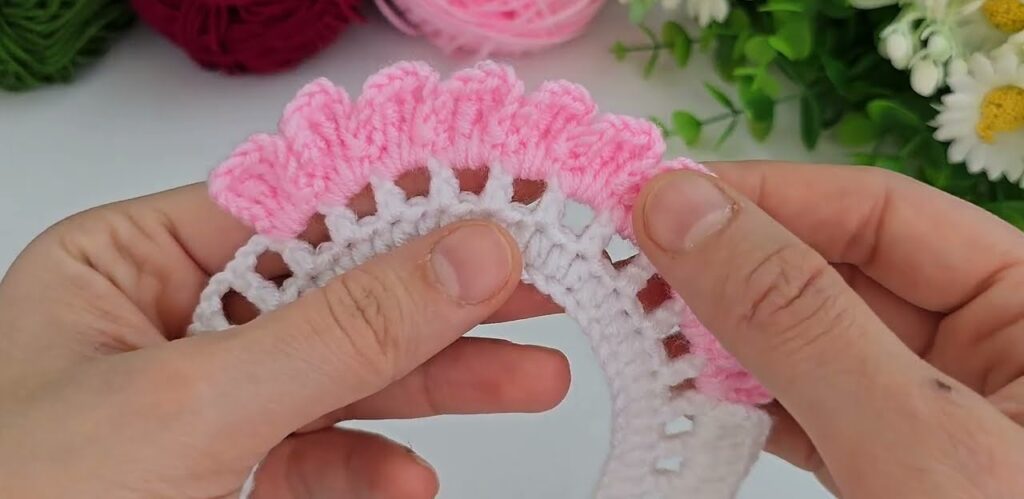
🪡 Part 1: Crochet the White Base
Step 1. Foundation Chain
- Chain 60 + 3 extra (for turning).
👉 Example: Chain 63.
Step 2. Row 1 – Double Crochet Row
- Start in the 4th chain from your hook.
- Make 1 double crochet (dc) into that stitch.
- Continue making 1 dc in each chain until the end.
- At the end, chain 3 and turn your work.
➡️ You now have one row of double crochets.
Step 3. Row 2 – Mesh Row (for ruffles to attach)
- Chain 3 (counts as first dc).
- Skip the next stitch, dc in the next stitch, chain 1.
Repeat this pattern across the row.
It will look like this:dc, ch 1, skip 1, dc, ch 1, skip 1...
- Finish the row with a dc in the last stitch.
- Chain 3 and turn.
➡️ This creates the little “holes” you’ll use to crochet the ruffle petals.
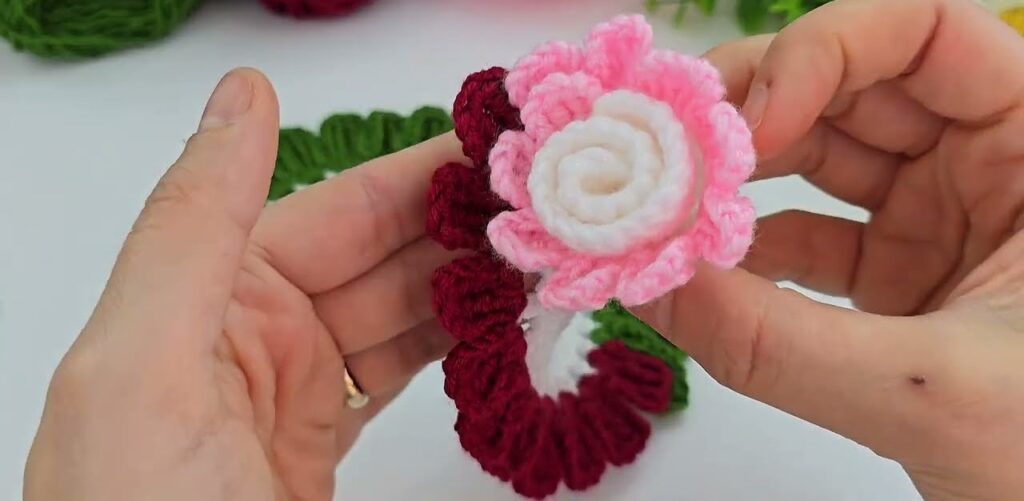
🌸 Part 2: First Ruffle (Pink Layer)
Step 4. Join pink yarn
- Turn your work so the right side faces you.
- Insert hook into the first chain-1 space.
- Pull in pink yarn and secure with a slip stitch.
Step 5. Crochet Ruffle
In each chain-1 space:
- Make 5 double crochets (dc) into the same space.
- Skip the next chain space, then slip stitch (sl st) into the next chain space.
Repeat this pattern across:
(5 dc in one space, skip one space, sl st in next space)
- Continue to the end of the row.
- Fasten off and weave in ends.
✅ This forms the first ruffled row (pink).
🌹 Part 3: Second Ruffle (Red Layer)
Step 6. Join red yarn
- Turn your work again so the base holes are at the top.
- Insert hook into a new row of spaces above or slightly behind the pink row.
Step 7. Crochet Ruffle
In each available space:
(5 dc in same space, skip next space, sl st in next space)
- Keep repeating until the end.
- Fasten off.
✅ Now you’ll have two layers of ruffles (pink + red).
🍃 Part 4: Third Ruffle (Green Layer)
Step 8. Join green yarn
- Insert hook in the next available row of chain-1 spaces on top of the white base.
- Pull in green yarn.
Step 9. Repeat same pattern:
(5 dc in same space, skip next space, sl st in next space)
Continue to the end.
Fasten off and weave in ends.
✅ You now have three rows of layered ruffles — pink, red, and green.
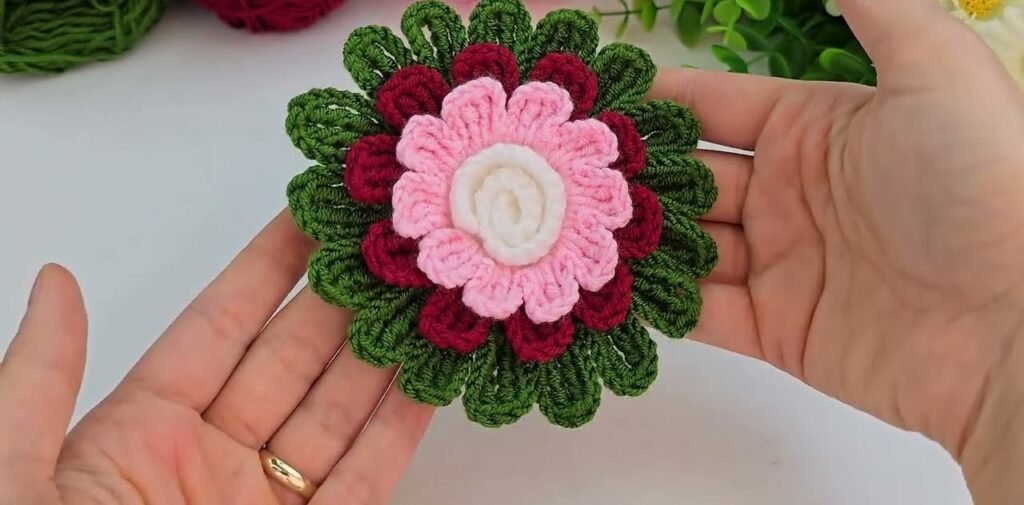
✨ Optional: Finishing Touch
- You can add more ruffle layers in different colors.
- For a denser ruffle, use 6 or 7 dc per group instead of 5.
- For lighter ruffles, use 4 dc per group.
🧵 Stitch Summary (for reference)
| Symbol | Stitch Name | How to Make |
|---|---|---|
| ch | Chain | Yarn over, pull through loop |
| dc | Double Crochet | Yarn over, insert hook, pull up loop, yarn over, pull through 2 loops twice |
| sl st | Slip Stitch | Insert hook, yarn over, pull through all loops |