
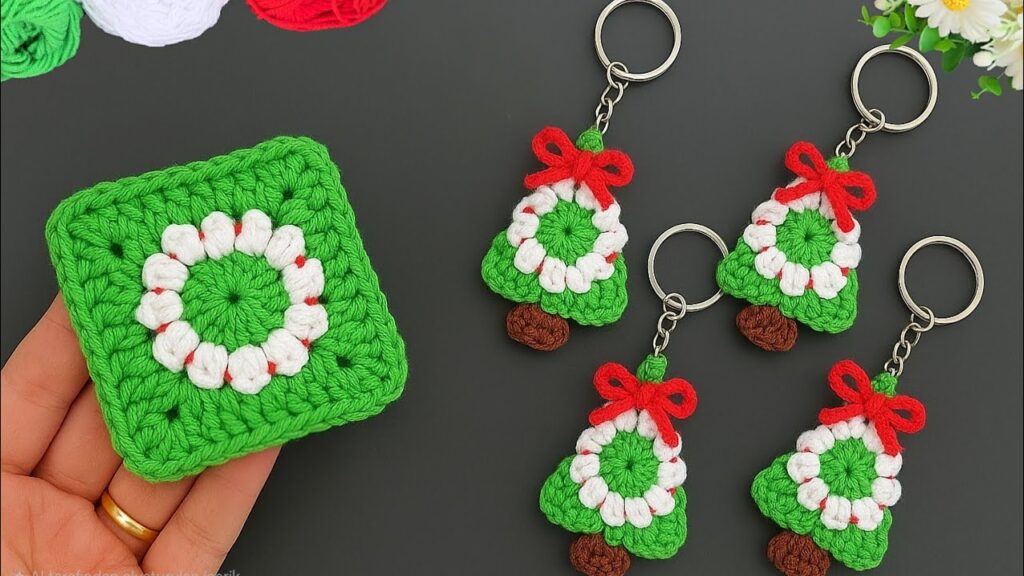
That’s a lovely crochet Christmas tree keychain made from a granny square wreath base! 🎄✨
Here’s a detailed tutorial on how to make it:
🎄 CROCHET CHRISTMAS TREE KEYCHAIN TUTORIAL (Detailed)
🧶 Materials
- Yarn:
- Green (main color – tree and square)
- White (for wreath)
- Red (for bow + accents)
- Brown (for trunk)
- Hook: 2.5 mm or 3 mm
- Accessories:
- Yarn needle
- Keyring
- Scissors
🌸 PART 1: Make the White Wreath Center
Step 1: Start with a Magic Ring
- Wrap the yarn around your fingers to form a loop.
- Insert the hook, pull up a loop, and chain 1.
Step 2: Crochet Puff Stitches
We’ll make 12 puff stitches into the ring.
Each puff stitch:
- Yarn over, insert hook into the ring, yarn over, pull up a loop → repeat 3 times (you’ll have 7 loops on hook).
- Yarn over and pull through all loops.
- Chain 1 to close the puff.
Optional (for red dots):
After every puff, carry a small strand of red yarn and slip it under the closing chain to create a tiny red accent between puffs.
Step 3: Close the Circle
- When you have 12 puffs, pull the magic ring tight.
- Slip stitch into the first puff to close the round.
- Cut yarn and fasten off.

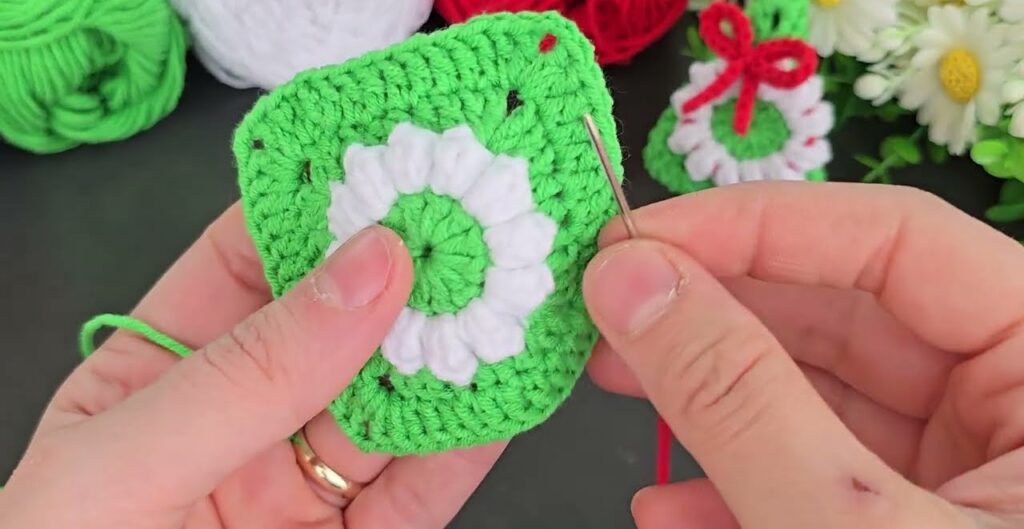
🍃 PART 2: Make the Green Granny Square Base
Step 1: Attach Green Yarn
- Join green yarn into any ch-1 space between puffs.
Step 2: Round 1 (Square Foundation)
(We’ll turn the circle into a square.)
- Chain 3 (counts as 1 dc).
- 2 dc in the same space, chain 1.
- In next space: 3 dc, ch 1.
- Repeat around 12 spaces.
- On 4th, 8th, and 12th clusters — add (3 dc, ch 2, 3 dc) to form corners.
- Slip stitch to the top of chain-3 to join.
Now you have a green granny square with a white wreath center!
Step 3: Fasten Off
- Cut yarn and weave in ends.
🎄 PART 3: Shape It into a Tree
Now we’ll fold the granny square to make the tree shape.
- Fold the square diagonally into a triangle (corner to corner).
- The white wreath will now sit in the middle, forming a pretty tree decoration.
- Stitch or crochet along the fold (inside) using green yarn so it holds its shape but doesn’t show from the front.
🟫 PART 4: Add the Brown Trunk
- Attach brown yarn at the bottom center of the folded triangle.
- Chain 1.
- Make 3 single crochets (sc) in a row.
- Turn, chain 1, make 3 sc again.
- Fasten off and weave in ends.
You now have a little brown trunk at the bottom of the tree.
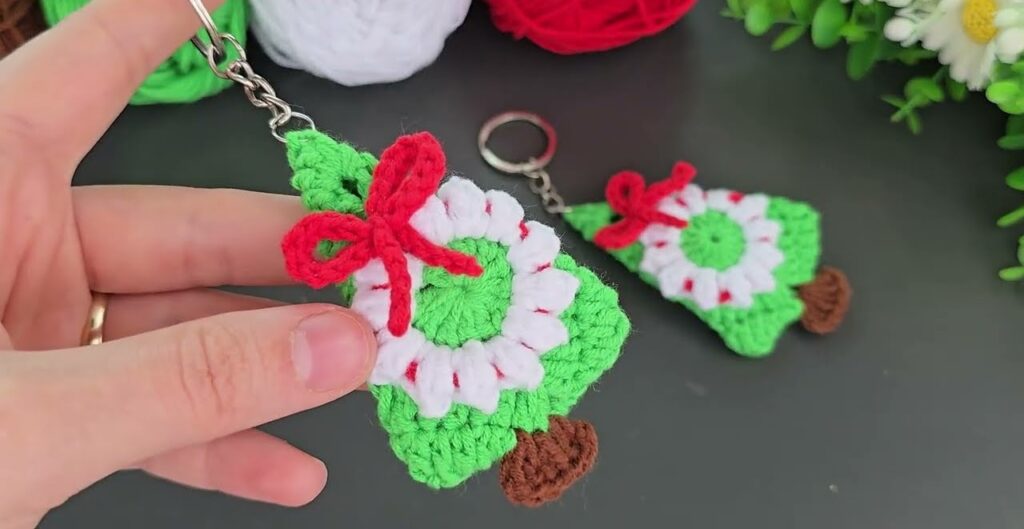
🎀 PART 5: Crochet the Red Bow
- With red yarn, chain 20.
- Bring the two ends together to form a bow shape.
- Tie or wrap a few times in the middle with the same red yarn tail.
- Secure tightly.
- Sew the bow onto the top of the tree.
🔗 PART 6: Add Keyring
- Take a metal keyring and open the small jump ring (the connecting ring).
- Insert through the top stitch of your tree or loop it through the red bow’s knot.
- Close tightly.
🌟 Optional Decoration Ideas
- Add mini beads for ornaments.
- Use metallic gold yarn for edging.
- Lightly spray with fabric stiffener if you want it to hold shape better.
- You can also crochet a tiny star on top instead of a bow.
🧩 Finished Size (approx.)
- Height: 6–7 cm
- Width: 5 cm
- Perfect for keychains or gift toppers 🎁