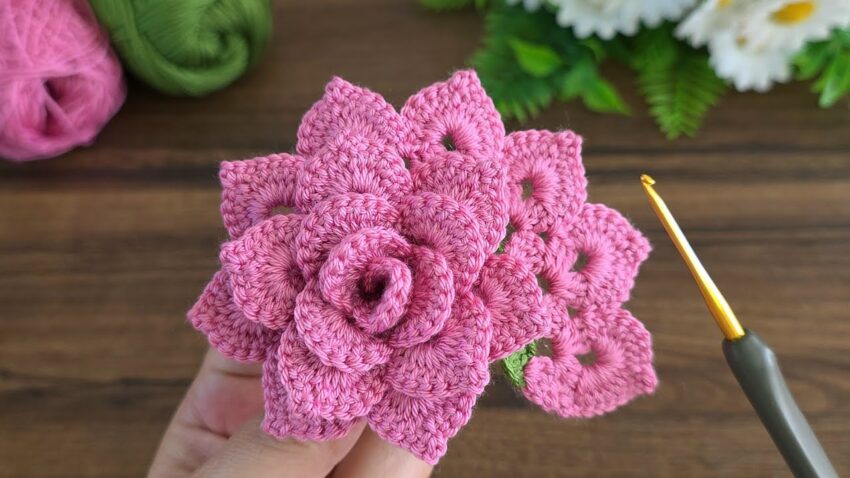
This is a crochet flower, specifically a layered 3D crochet rose. It appears to be hand-crafted with pink yarn using a crochet hook, which is also visible in the image. These types of crochet flowers are often used for decorations, embellishments on clothing, accessories, or home decor projects like wreaths or table centerpieces.

Absolutely! Here’s a more detailed, step-by-step guide for making a realistic, layered 3D crochet rose flower, like the one in this video :
🌹 Detailed Crochet 3D Rose Flower Tutorial
Materials Needed
✔ Cotton or Acrylic Yarn (Color of your choice for the flower)
✔ Crochet Hook (2.5mm – 3.5mm recommended for tighter stitches)
✔ Yarn Needle
✔ Scissors
PART 1: Petal Strip Base
- Foundation Chain:
Chain 66 chains — this gives you 11 petals (each petal takes 6 chains). - Row 1 (Petal Bases):
- Start in the 6th chain from the hook (counts as your first space).
- In this chain: Work (2 Double Crochet (DC), Chain 2, 2 DC) — Petal base complete.
- Skip 2 chains, then in the next chain: (2 DC, Ch 2, 2 DC).
- Repeat this pattern: Skip 2 chains, (2 DC, Ch 2, 2 DC) in next chain, across to the end.
- You will now have little “V” spaces — these are your petal bases.
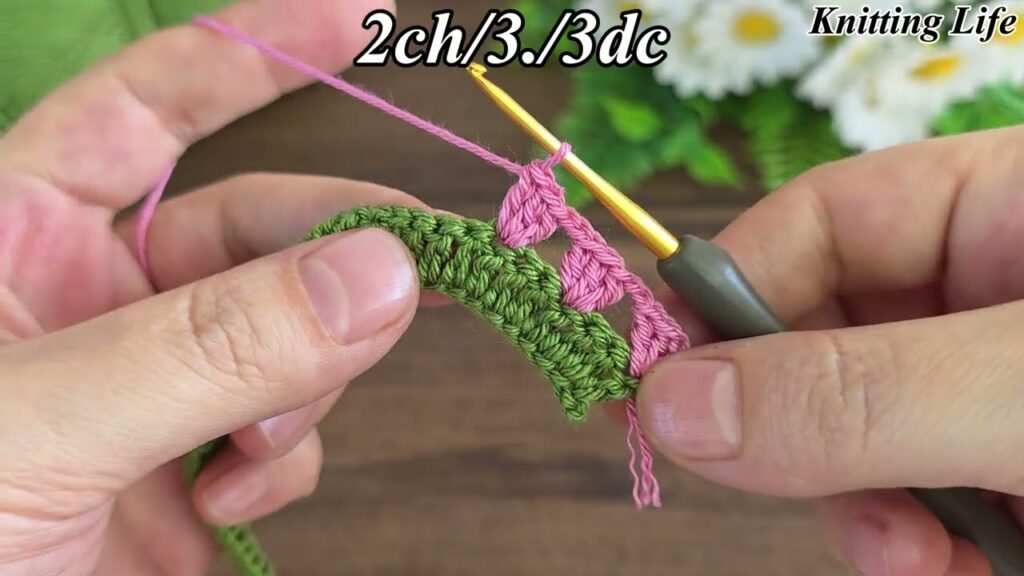
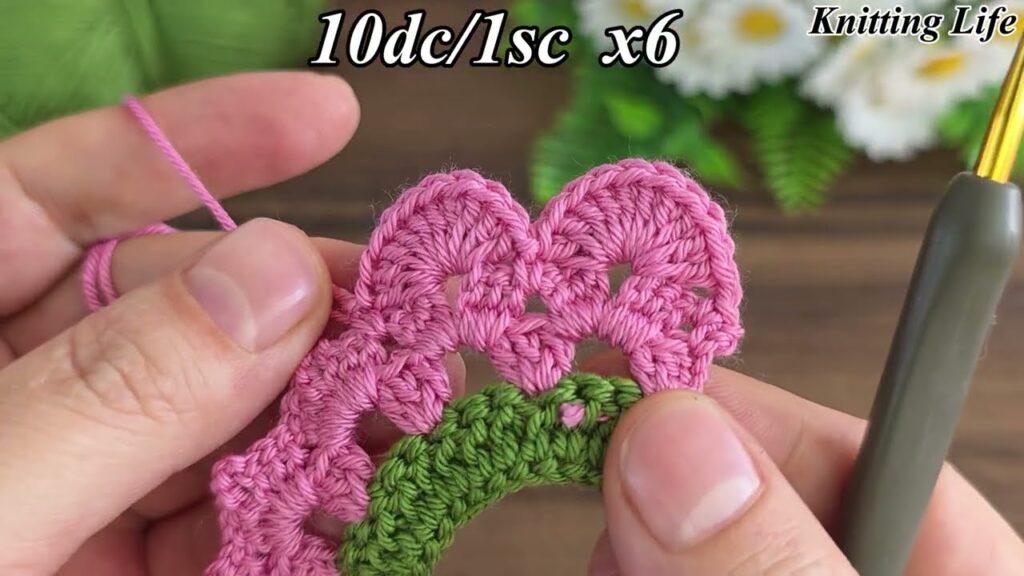
PART 2: Building the Petals
- Row 2 (Petals):
- Turn your work.
- Into the first Ch 2 space, work:
(3 DC, 3 Treble Crochet (TR), 3 DC) — This forms a full petal. - Move to next Ch 2 space, repeat: (3 DC, 3 TR, 3 DC).
- Continue this across, creating one large petal in each space.
PART 3: Shaping the Rose
- Rolling the Rose:
- Start at the beginning of your strip.
- Roll the strip tightly to form the center bud.
- Continue rolling, allowing the petals to flare naturally outward.
- Adjust positioning as needed for a layered look.
- Securing the Flower:
- Using your yarn needle and leftover yarn, sew through the base of the rose to secure all layers in place.
- Weave in all loose ends.
PART 4: Adding Extra Layers (Optional for Full Look)
To get a fuller, multi-layered rose like in your image:
- Make multiple strips of different lengths:
- Small strip: 6 petals for the tight center.
- Medium strip: 9-11 petals for the second layer.
- Large strip: 12-15 petals for the outer layer.
- Assemble them by:
- Rolling the smallest strip tightly for the center.
- Attach the medium strip around the center, sewing it in place.
- Add the large strip as the outer layer for volume.
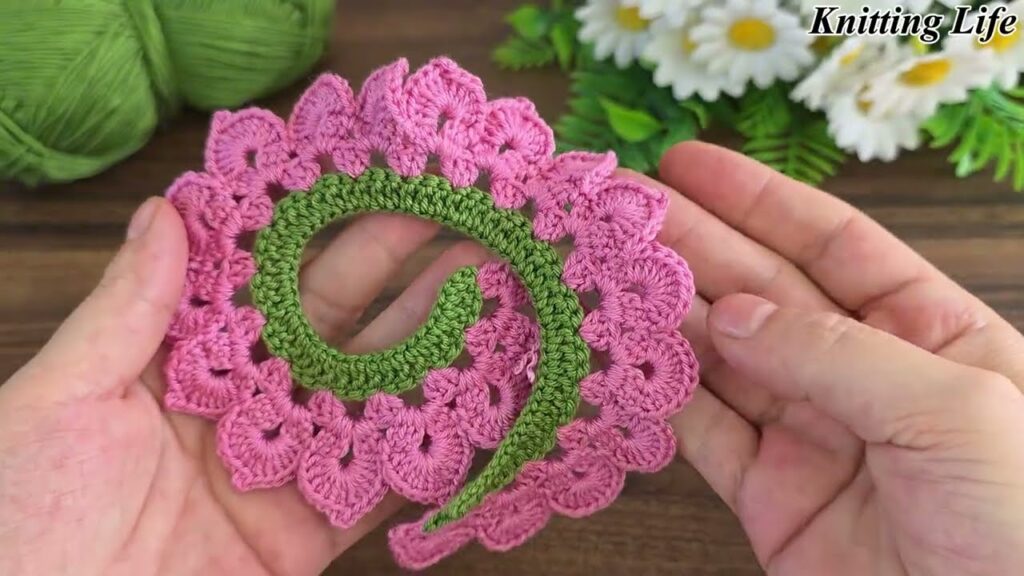
Leaf (Optional)
- Chain 10.
- Work into the chain:
- 1 SC, 1 HDC, 2 DC, 2 TR, 2 DC, 1 HDC, 1 SC.
- Turn and work back along the other side of the chain with the same stitches.
- Fasten off and sew to the rose base.
Summary
✔ Easy repeating petal structure.
✔ Can adjust size by increasing the foundation chain.
✔ Add layers for a realistic 3D effect.
✔ Use contrasting green for leaves.