
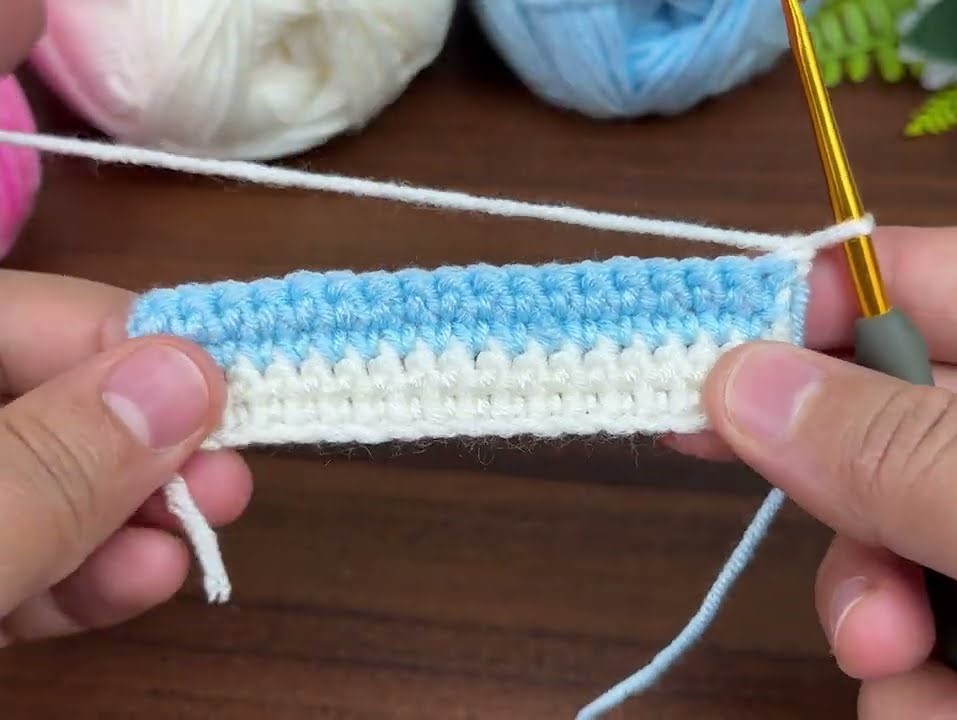
Here is a step-by-step tutorial for the stitch shown in your image — this is a Mosaic / Overlay Crochet Pattern made with front-post double crochets (FPDC) to create the vertical bars.
I’ll explain it in a simple way so you can follow easily.
🌈 DETAILED MOSAIC / OVERLAY FPDC STITCH TUTORIAL
(Using 3 colors: White, Pink, Blue)
This pattern repeats every 6 rows, and the effect comes from making front-post double crochets (FPDC) into stitches 2 rows below.

🧶 What You Need
- Color A = White
- Color B = Pink
- Color C = Blue
- Any hook size that matches your yarn
- Scissors
- Tapestry needle (optional)
🪢 Abbreviations
- CH – Chain
- SC – Single Crochet
- DC – Double Crochet
- FPDC – Front Post Double Crochet
- ST – Stitch
- YO – Yarn Over
⭐ Important Notes
- Every color is used for two rows.
- The first row of each color = all SC.
- The second row of each color = SC + FPDC, where FPDC is made around the post of the stitch 2 rows below.
- FPDC stitches form the long vertical lines you see in the picture.
🧵 FOUNDATION
Row 0 — Foundation Chain
- Chain an even number (example: CH 30)
Row 1 — Color A (White)
- SC in each stitch across.
- Turn.
(This is your base row.)

🌸 COLOR B (Pink)
Row 2 — Pink (SC row)
- Attach Pink.
- CH 1.
- SC in every stitch across.
- Turn.
Row 3 — Pink (FPDC row)
Repeat the following sequence across the row:
- SC in first stitch
- FPDC around the white stitch two rows below
- SC in next stitch
- FPDC around the next white stitch two rows below
➡️ Important:
FPDC goes AROUND the POST of the stitch (not into the top loop).
Work this repeat until the end of the row.
Cut or carry yarn.
Turn.
💙 COLOR C (Blue)
Row 4 — Blue (SC row)
- Attach Blue.
- CH 1.
- SC in each stitch.
- Turn.
Row 5 — Blue (FPDC row)
Repeat across:
- SC 1
- FPDC around the pink stitch two rows below
- SC 1
- FPDC around the next pink stitch two rows below
This creates blue vertical bars.
Turn.
🤍 COLOR A (White) — returns for next stripe
Row 6 — White (SC row)
- Attach White.
- CH 1.
- SC across.
- Turn.
Row 7 — White (FPDC row)
Same repeat as before:
- SC
- FPDC around the blue stitch two rows below
- SC
- FPDC around the next
Turn.

🔁 REPEAT PATTERN
Repeat Rows 2–7 as many times as you want.
This will continue building the pink–blue–white sections exactly like your photo.
📌 STITCH REPEAT VISUALIZED
Row 1 – White SC
Row 2 – Pink SC
Row 3 – Pink FPDC row
Row 4 – Blue SC
Row 5 – Blue FPDC row
Row 6 – White SC
Row 7 – White FPDC row
(Repeat from Row 2)
🧩 HOW YOUR STITCHES SHOULD LOOK
- Pink FPDC bars sit over white.
- Blue FPDC bars sit over pink.
- White FPDC bars sit over blue.
- The SC rows between each FPDC row create the “stepped” look.
💡 EXTRA TIPS FOR PERFECTION
✔ Keep FPDC tension slightly loose so bars don’t pull fabric.
✔ Always check that FPDC goes straight downward into the correct stitch.
✔ Carry yarn up the edges to avoid too many ends.
✔ Block the finished piece for perfect straight edges.