
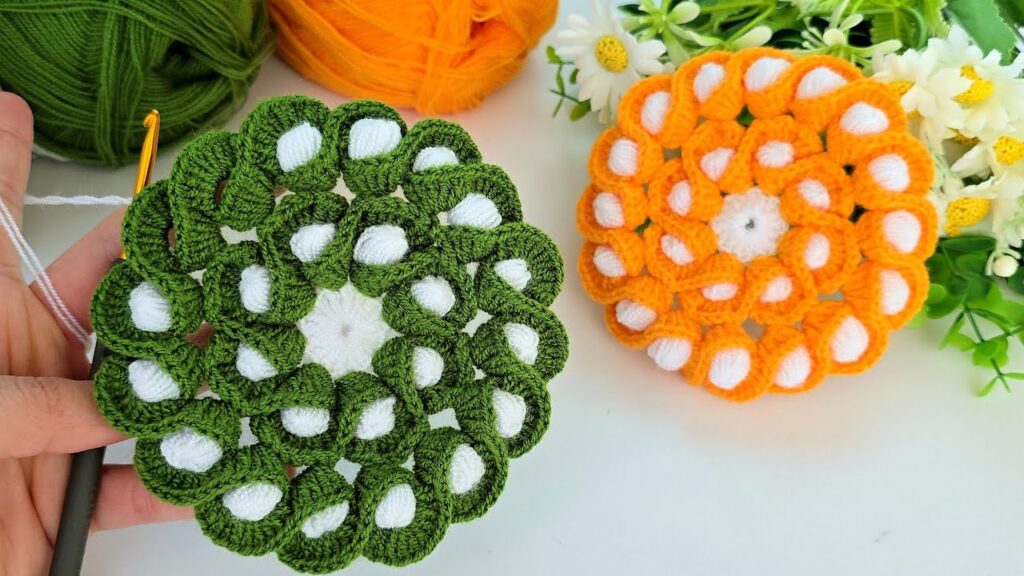
Here is a step-by-step tutorial for making the crochet motif shown in your picture — a 3D looped petal flower motif (often called popcorn loops or layered bubble petals).
🌼 3D Looped Petal Motif — FULL DETAILED TUTORIAL
🧶 YARN & HOOK
- Inner color = white
- Outer loops = green or orange
- Hook = 2.0–3.5 mm
⭐ ROUND 1 — CENTER BASE (WHITE)
We will create a normal flat circle.
- Make a magic ring.
- Ch 2 (counts as first hdc).
- Work 11 hdc into the ring.
- Pull ring closed.
- Join with slip stitch to top of ch-2.
✔ You now have 12 stitches total.
⭐ ROUND 2 — WHITE PUFF BALLS
This makes the small white bumps inside each petal.
Repeat the steps below in every stitch (12 times):
- Insert hook into next stitch.
- Make 1 puff stitch:
- Yarn over
- Insert hook, pull up a loop
- Repeat 4 times (total 5 loops on hook)
- Yarn over, pull through all loops
- Ch 1 to lock puff.
- Move to next stitch.
✔ You will now see 12 white puff balls forming a ring.
⭐ ROUND 3 — FIRST LAYER OF LOOPS (GREEN/ORANGE)
Cut white yarn & attach green/orange into any ch-1 space between two white puffs.
For each ch-1 space (12 spaces):
- Insert hook into space.
- Ch 6
- Slip stitch into next ch-1 space.
- Repeat around.
✔ Now you have 12 loops, evenly spaced.
These loops sit above the white puff balls.
⭐ ROUND 4 — SECOND LAYER OF LOOPS (BEHIND FIRST)
This round creates the 3D effect.
Important:
Work behind the first row of loops, in the SAME ch-1 spaces between puffs.
In every space:
- Insert hook behind the green loop.
- Ch 8 (longer loop).
- Slip stitch into next space (behind next loop).
Repeat 12 times.
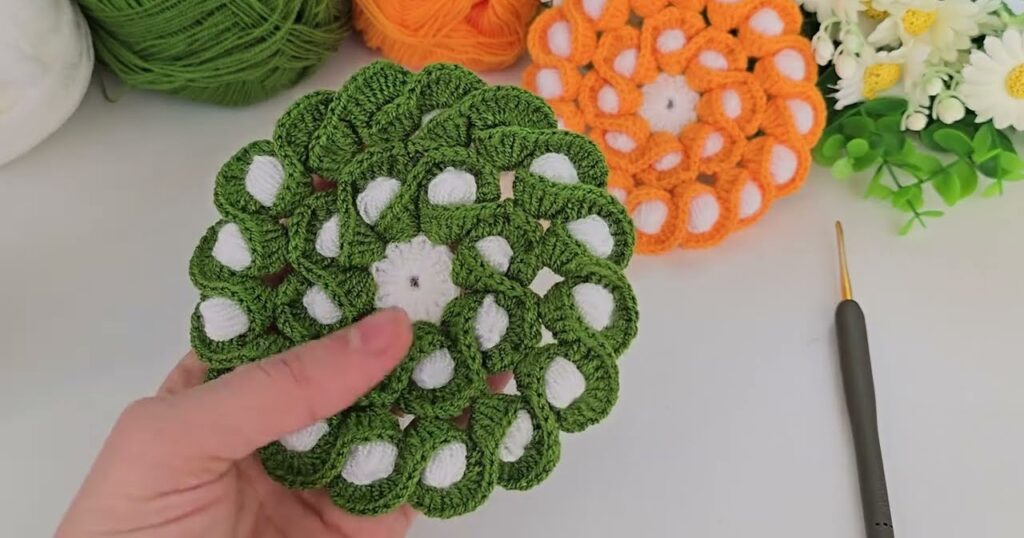
✔ Now you have 24 loops total:
- 12 front loops (shorter)
- 12 back loops (longer)
This gives the “flower petal” shape.
⭐ ROUND 5 — THIRD LAYER (BIGGER LOOP PETALS)
(You only do this if you want the motif the size of the orange one.)
Still working behind the previous loops:
- Insert hook behind the 2nd green loop row.
- Ch 10
- Slip stitch into next space.
Repeat 12 times.
✔ Now you have 36 loops (3 rows × 12 each).
This forms a large, round, 3D layered flower.
⭐ FINISHING
- Fasten off.
- Weave ends tightly behind loops.
- Shape loops with your fingers.
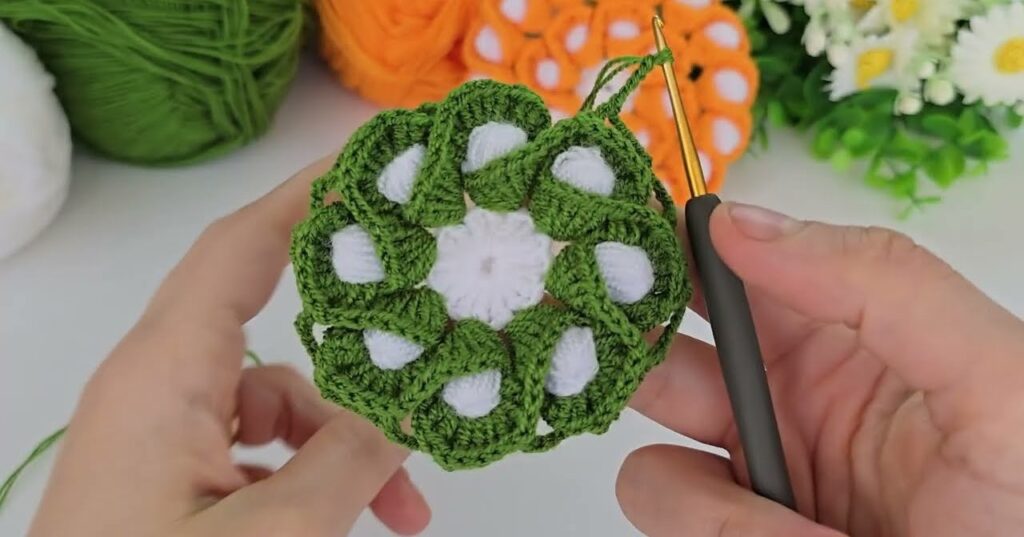
🌼 WHAT YOUR WORK SHOULD LOOK LIKE AFTER EACH ROUND
Round 2:
White center with 12 small puff bumps.
Round 3:
Green circle of 12 small loops around the puffs.
Round 4:
A larger second set of loops behind the first.
Round 5:
Outer large loops forming the full circular flower (like the orange example).