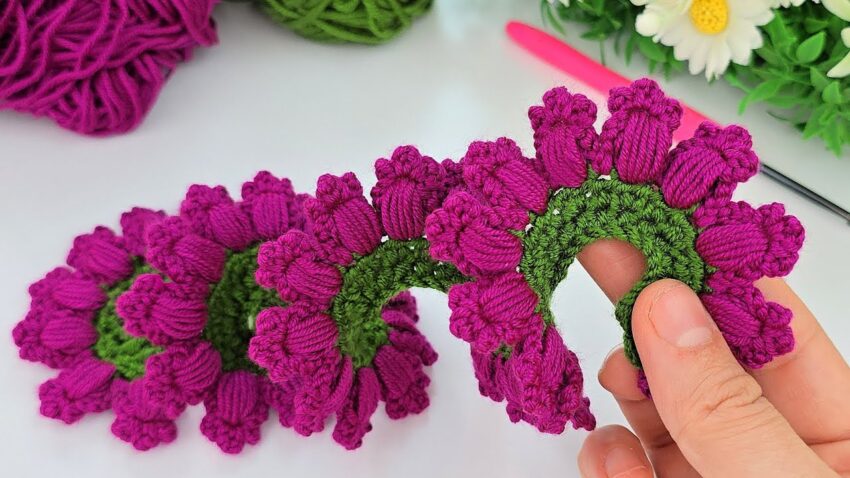
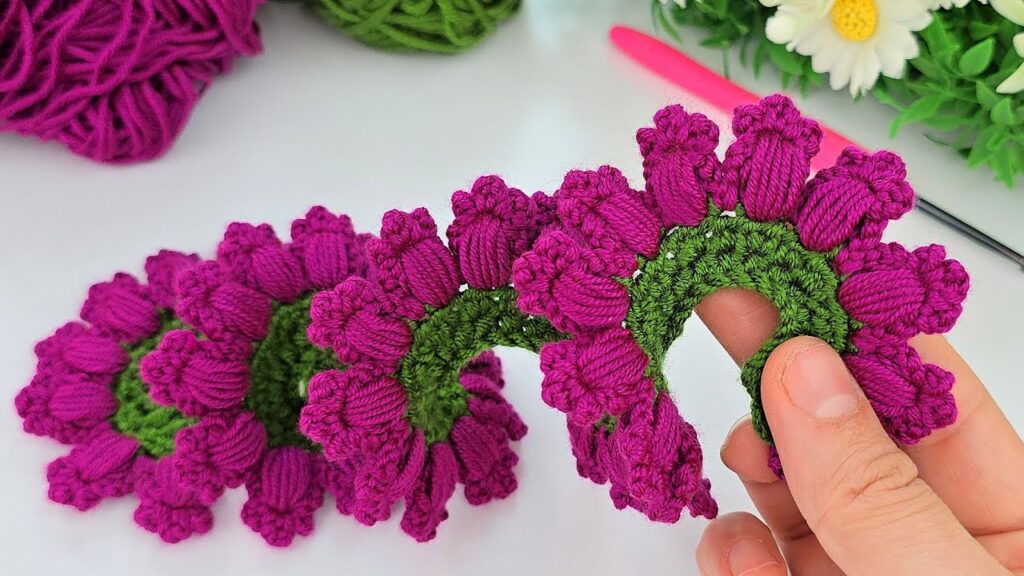
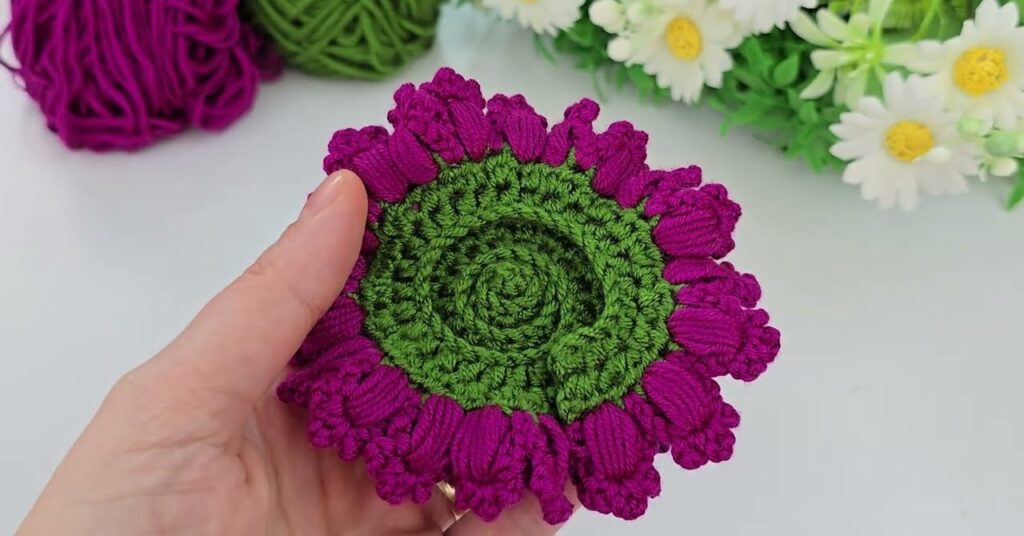
Here is a clear, step-by-step tutorial for making the beautiful 3D puff-flower crochet motif shown in the image.
(You only need basic stitches + puff stitch.)
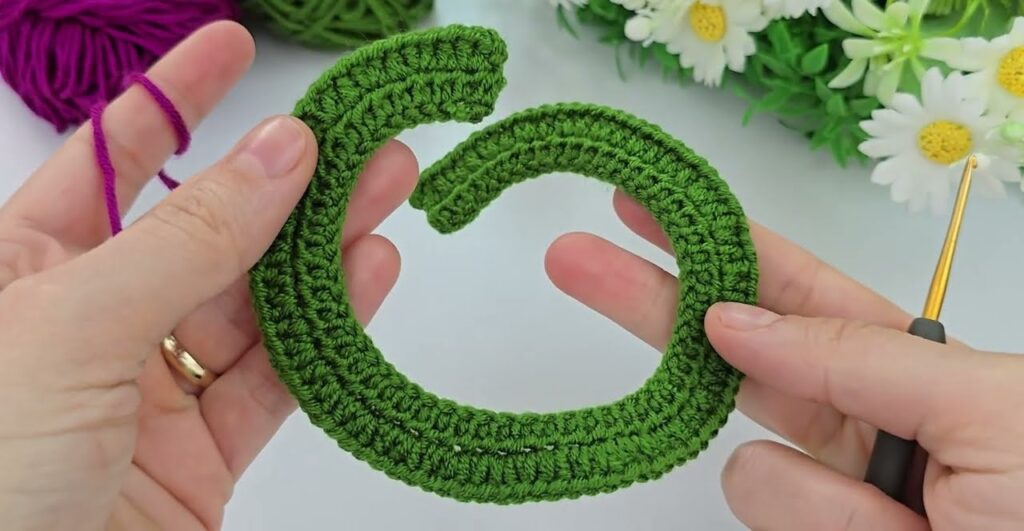
🌿 PART 1 — GREEN BASE (CURVED FOUNDATION)
This base makes the ring/arch shape.
🔰 Row 0 — Foundation Chain
- Chain 32 (you can do 30–36; more chains = larger arch).
🔰 Row 1 — Single Crochet Base
- Starting in 2nd ch from hook: 1 sc in each stitch across.
- Turn.
(You now have ~31 sc)
🔰 Row 2 — Increasing to Create Curve
To shape the arch, you increase in every stitch.
- In each stitch: work 2 sc
- Repeat until end.
- Turn.
You should now have ~62 stitches.
This row is what makes the base curve.
🔰 Row 3 — Creating Spaces for Flowers
You are now making loops for each flower.
Repeat the following to end of row:
- 1 sc
- ch 3
- skip 1 stitch
If you started with 62 stitches, you’ll get about 30 spaces.
Turn.
These ch-3 spaces = where each puff flower will sit.
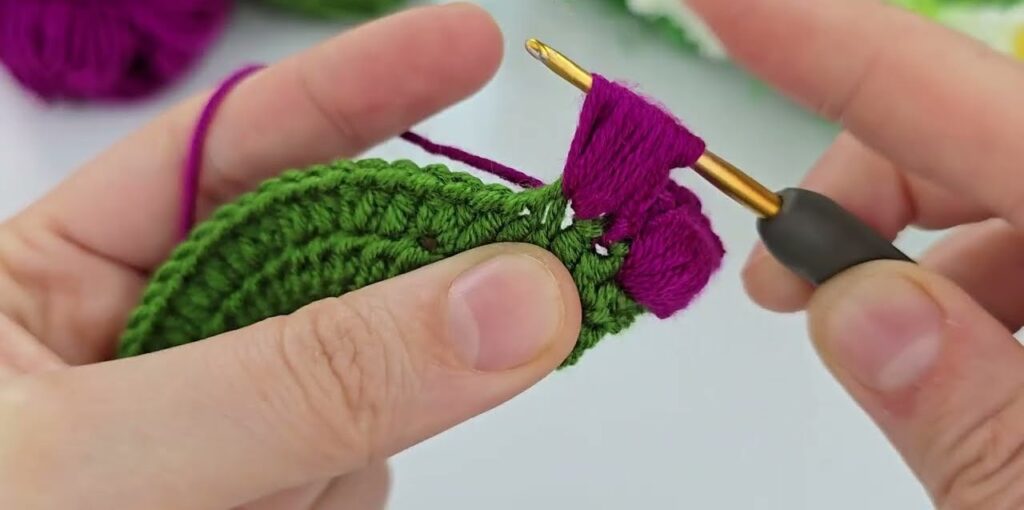
🌸 PART 2 — PURPLE 3D PUFF FLOWERS
Each flower is made in one ch-3 space of the green row.
🔗 Attach Purple Yarn
- Insert hook into first ch-3 space.
- Pull up purple yarn and ch 1 to secure.
🌸 ONE FLOWER (FULL DETAILS)
Each flower cluster =
⭐ 1 big puff (center)
⭐ 3 small puffs (petals around)
🔴 Step 1 — Make the Big Center Puff
All inside the same ch-3 space:
- Yarn over → Pull up a long loop
- Repeat 7 times (you will have 15–17 loops on hook)
- Yarn over → pull through ALL loops
- ch 2 to lock
This creates the large middle “bulb”.
🔴 Step 2 — Make Petal Puff #1
Still in the same space:
- Yarn over, pull up loop 5 times
- Yarn over, pull through all loops
- ch 1
🔴 Step 3 — Make Petal Puff #2
- Puff (5 pulls)
- ch 1
🔴 Step 4 — Make Petal Puff #3
- Puff (5 pulls)
- ch 2 at the end (this securing chain makes petals stand up)
🎉 You now have 1 full flower!
🌸 PART 3 — MOVE TO THE NEXT FLOWER
- Slip stitch into the next green ch-3 space
- Repeat the full flower:
- 1 big puff
- 3 small puff petals
Continue this until all green spaces are filled.
You should end up with about 30 puffy flowers forming a curved ring.
🌸 PART 4 — FINISHING
- Cut purple yarn, weave ends.
- Cut green yarn, weave ends.
- Shape gently with fingers.
The arch will naturally form the shape shown in the photo.