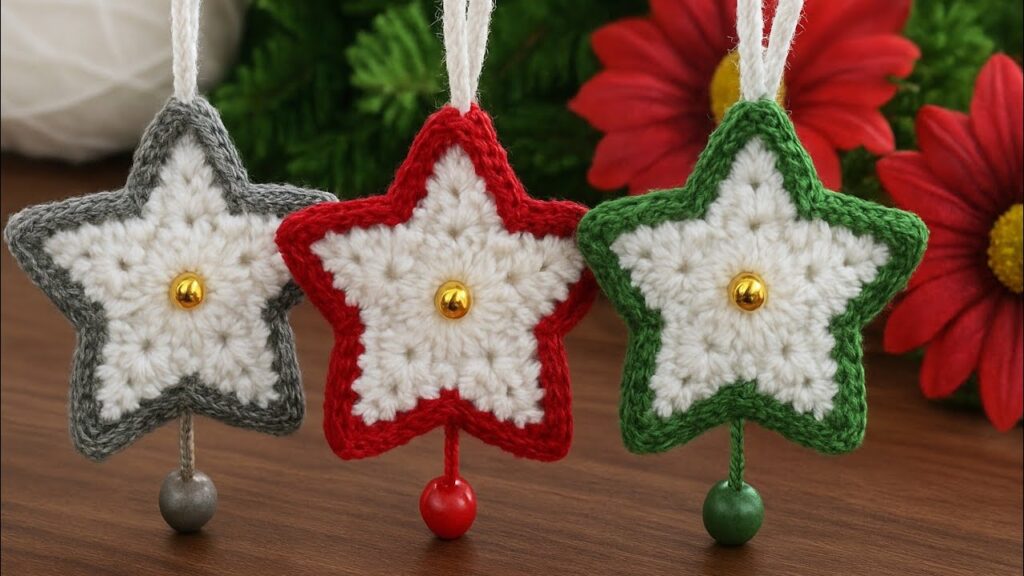
Here is a crochet tutorial for making the star ornaments shown in your picture. They are two-color puffy stars with a border, a hanging loop, a bead at the bottom, and a small bell/button in the center.
⭐ CROCHET STAR ORNAMENT – EXTRA DETAILED TUTORIAL
📌 Size:
Using 3.0–3.5 mm hook → star about 8–10 cm tall (same as picture)
📌 You Will Need
- White yarn – for inner star
- Colored yarn – for border (grey, red, or green)
- Crochet hook 3.0–4.0 mm
- Yarn needle
- Fiber filling (very little)
- Golden bead for center
- Wooden bead for bottom
- Scissors
⭐ PART 1 — Make the White Inner Star (make 2)
We will make two identical white stars → then crochet them together.
⭐ Round 1: Center Circle
- Make a magic ring.
- Ch 1 (not a stitch).
- Work 10 sc inside the ring.
- Pull tight.
- Sl st into first sc.
You should have: 10 stitches
⭐ Round 2: Increase Round
We need 20 stitches.
- Ch 1.
- In every stitch: 2 sc in each stitch × 10 times.
(Because 2 sc × 10 = 20)
Sl st to first sc.
You should now have: 20 stitches
⭐ Round 3: Shape the 5 Star Points
We will use the 20 stitches to make 5 points.
Each point takes 4 stitches.
👉 Point instructions (Repeat 5 times):
Use the next 4 stitches for one point:
Point Steps (DO SLOWLY):
- sc in first stitch
- hdc in next stitch
- dc in next stitch
- In next stitch:
- tr
- ch 2
- sl st in 1st ch (makes the little picot peak tip)
- tr again in SAME stitch
- Next stitch: dc
- Next stitch: hdc
- Next stitch: sc
👉 That makes one point.
Continue until you have 5 points total.
Fasten off white yarn.

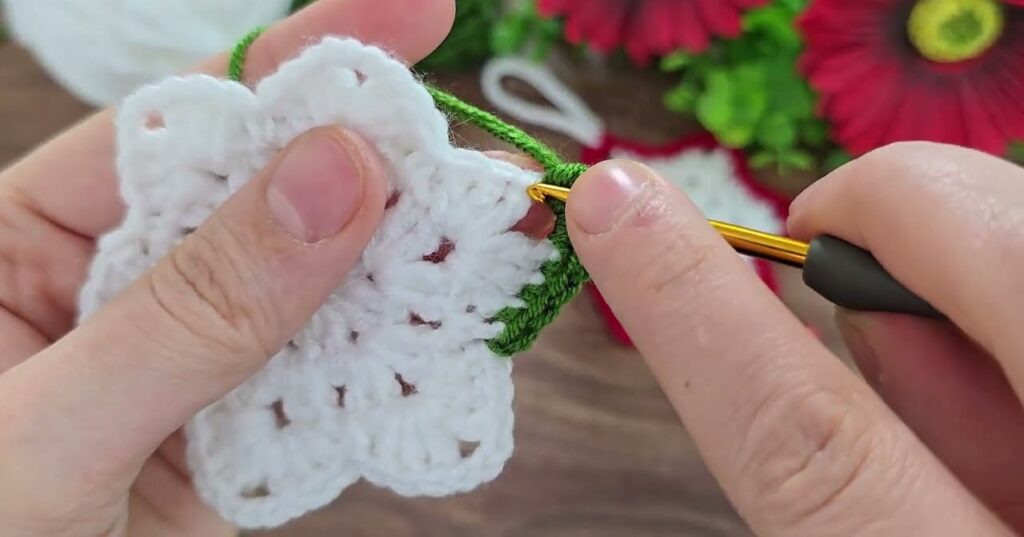
⭐ PART 2 — Add the Colored Border to Each Star
You now have two identical white stars.
Take Color B (grey, red, or green).
Join yarn at the tip of any point.
⭐ Border Round (go around whole star)
On each point:
At the point tip:
- sc
- ch 2
- sc
Going down the side:
Work 1 sc in every stitch until you reach the valley between points.
At the valley between two points:
→ Just sc once in the lowest stitch.
Continue until you’re back at the starting point.
Sl st.
Fasten off.
Now you have two full stars with border.
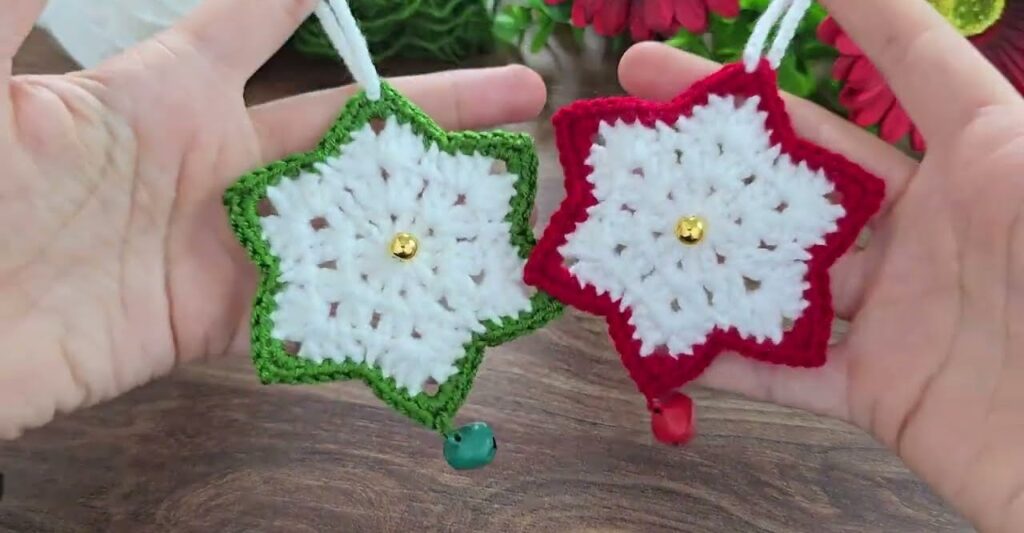
⭐ PART 3 — Join the Two Stars Together
Place the two stars back-to-back
(front sides facing out).
Use border yarn color.
- Insert hook through BOTH layers.
- Work sc through both layers all around the star.
- When you reach about 80% finished →
pause and add stuffing (fiber).
👉 Only a little stuffing, just to make it puffy.
- Continue sc around.
- Sl st to finish.
- Fasten off and hide tail.
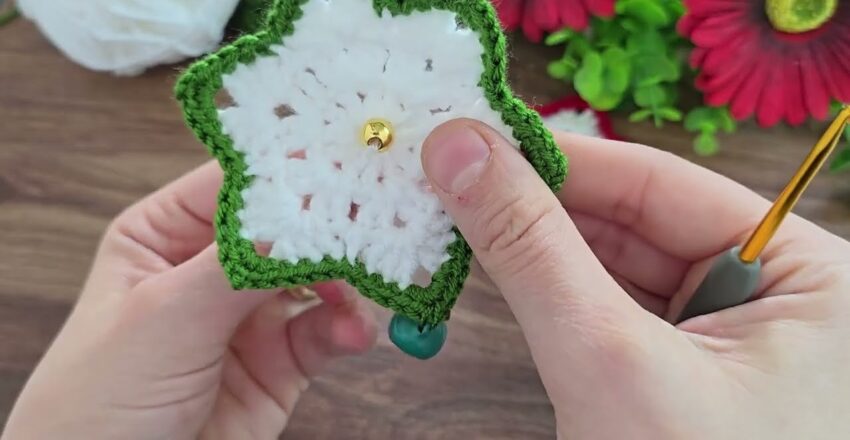
⭐ PART 4 — Add the Golden Center Bead
- Thread needle with matching yarn.
- Insert needle through the center of both stars.
- Add golden bead.
- Secure firmly with 3–4 knots.
- Hide ends inside star.
⭐ PART 5 — Attach Hanging Loop
Use white yarn:
- Ch 25–30 (depends how long you want).
- Sl st into first chain.
- Tie onto the top point of the star.
- Hide yarn ends.
⭐ PART 6 — Bottom Wooden Bead
Use border yarn color:
- Ch 8–10.
- At the end of chain → slide wooden bead on.
- Make a big knot so bead cannot fall out.
- Sew chain beginning into bottom point of star.
- Secure and hide ends.
⭐ DONE!
You now have an exact replica of the star ornaments in the picture.