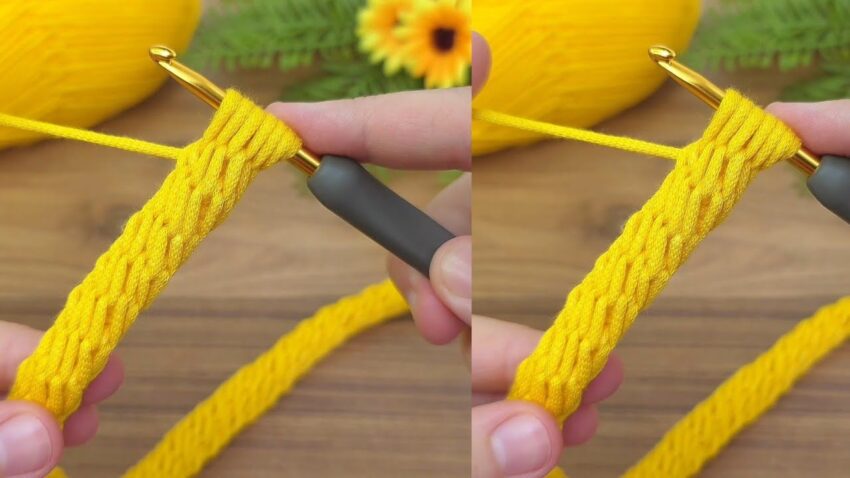
This image shows a crochet stitch pattern that looks like a “braided cord” or “Romanian cord”, often used for bag straps, handles, belts, or decorative trims. Here’s how to make it:
🧶 What You’ll Need
- Yarn: medium-weight (cotton, acrylic, or cord yarn)
- Hook: one size smaller than usual (so the stitches are tight)
- Scissors

🪡 Step-by-Step Instructions
🔹 Step 1: Make a Slip Knot
- Wrap the yarn around your fingers and pull up a loop to make a slip knot.
- Place it on your hook and tighten slightly — not too tight.
🔹 Step 2: Chain 2
Make 2 chain stitches (ch 2).
- You’ll have your working loop on the hook and two chains underneath it.
- These two chains form the base of your cord.

🔹 Step 3: Pull Up a Loop
Insert your hook into the first chain you made (the one farthest from the hook).
- Yarn over (wrap the yarn over your hook) and pull up a loop.
- Now you have 2 loops on your hook.
🔹 Step 4: The Twist Step
This step gives the cord its braided texture:
- Yarn over and pull through the first loop only.
→ This creates a small twist on the cord edge. - Yarn over again and pull through both loops.
→ That completes one stitch of the cord.
🔹 Step 5: Continue the Cord
Now, the trick:
- Turn your work slightly toward you — you’ll see a small loop (a side bump) formed on the edge of your last stitch.
- Insert your hook into that side loop.
- Yarn over and pull up a loop → (2 loops on the hook)
- Yarn over and pull through the first loop only → make the twist.
- Yarn over again and pull through both loops → complete the stitch.
Repeat this again and again!

🔹 Step 6: Keep Going
Each time:
- You insert your hook into the side loop of the last stitch.
- Yarn over → pull up a loop.
- Yarn over → pull through first loop only.
- Yarn over → pull through both loops.
Keep repeating until you reach your desired length.
🔹 Step 7: Finish Off
When you’re done:
- Cut the yarn, leaving a few inches tail.
- Pull the yarn tail through the last loop on the hook to secure it.
- You can weave in the ends with a yarn needle.

🧩 Tips for Best Results
✨ Tension: Keep it even — not too tight or loose.
✨ Consistency: Always use the same “side loop” when inserting your hook.
✨ Thicker Cord: Use 2 strands of yarn together or thicker yarn.
✨ Smoother Finish: Block it lightly with steam or iron (through a towel).
🌸 Uses for This Cord
- Bag handles or straps
- Drawstrings for hoodies or pouches
- Keychains or bracelets
- Decorative borders on crochet projects