
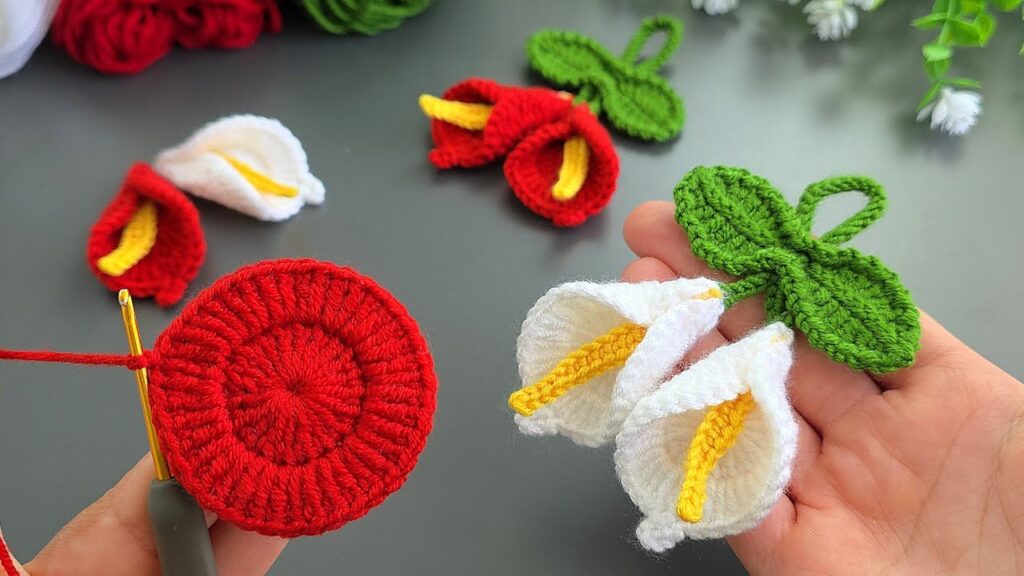
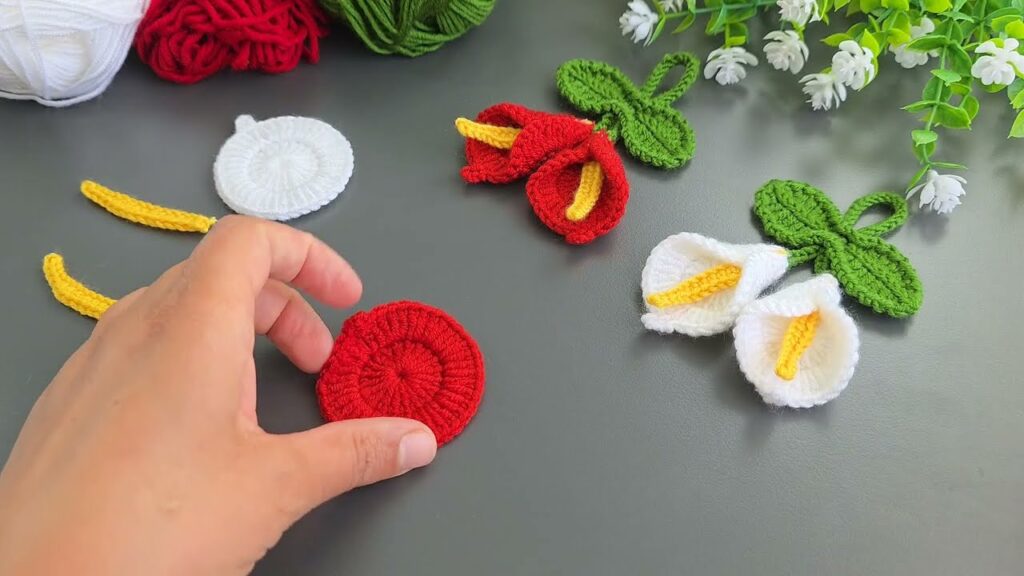
This image shows crocheted calla lilies (arum lilies) — beautiful and simple flowers made from yarn. Here’s a step-by-step guide to make them like in the picture:
🧶 Crochet Calla Lily – Detailed Tutorial
🌼 Materials:
- Yarn:
- White (or red) – for petals
- Yellow – for flower center (spadix)
- Green – for leaves
- Hook: 2.5 mm–3.0 mm crochet hook
- Scissors
- Yarn needle for sewing
🌸 Part 1: Petal (White or Red)
Abbreviations used:
- ch = chain
- sl st = slip stitch
- sc = single crochet
- dc = double crochet
- inc = increase (2 dc in same stitch)
🪷 Step 1: Make the base circle
- Start with a magic ring.
Ch 2 (counts as first dc). - Make 11 dc into the ring, join with sl st to the top of the starting ch-2.
→ (12 dc total) - Round 2:
Ch 2, dc inc in each stitch around.
Join with sl st.
→ (24 dc) - Round 3:
Ch 2, (1 dc in next st, 2 dc in next st) repeat around.
Join.
→ (36 dc) - Round 4 (optional, for bigger flower):
Ch 2, (1 dc in next 2 sts, 2 dc in next) repeat around.
Join.
→ (48 dc)
You now have a flat circle like in the photo.
🪷 Step 2: Shape the petal
- Fold the circle in half so the right side faces out.
- Choose one side of the fold — this will be the flower’s edge.
- Sew or sl st along one side (not all the way) so it forms a cone or funnel shape, leaving the upper edge open and curled.
- The top edge should curve slightly like a calla lily petal.
- You can gently roll one side more to give it a natural look.
Now your petal should look like a curved funnel.
🌼 Part 2: Yellow Center (Spadix)
- With yellow yarn, ch 8.
- Starting in the second ch from hook, work 1 sc in each stitch across. (7 sc)
- Turn, ch 1, and make 1 sc in each stitch again (for thickness).
- Fasten off, leaving a long tail.
- Roll it tightly into a small cylinder (like a stem) and sew the base to hold.
Tip: If you want it longer or thicker, just chain more (10–12) or add extra rows.
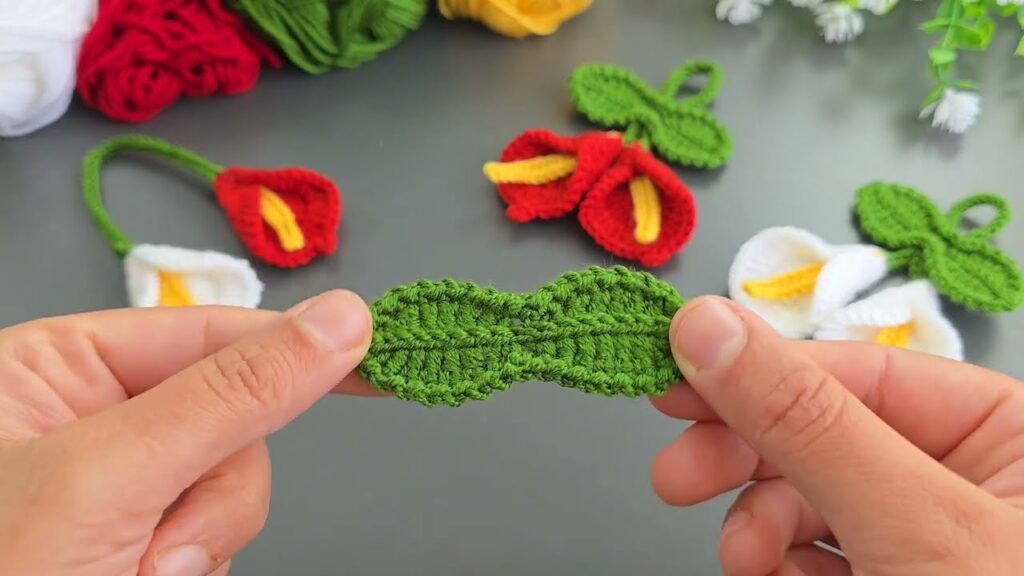
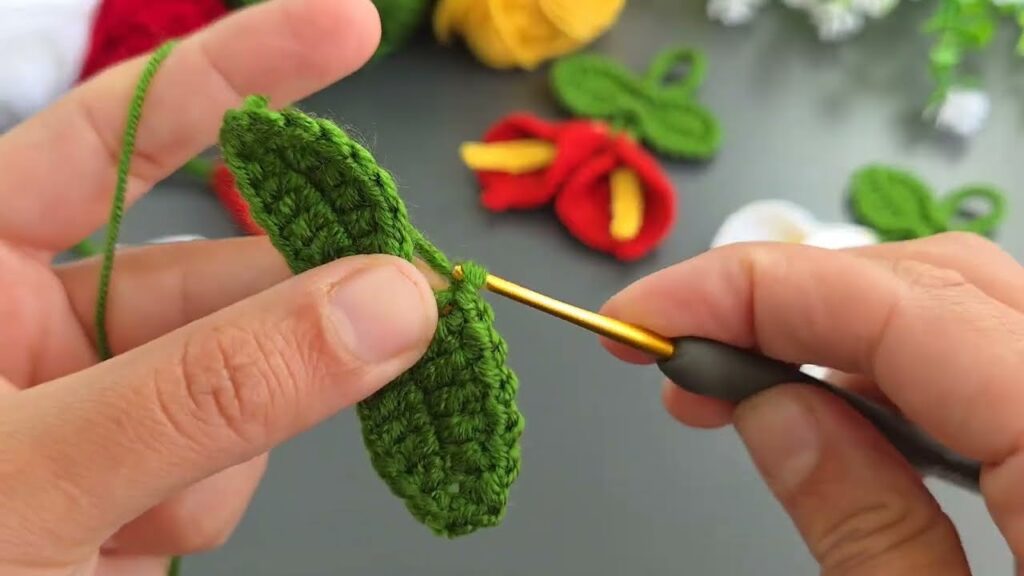
🍃 Part 3: Leaf & Loop (Green)
Leaf:
- Ch 10.
- In 2nd ch from hook: sc.
Then work along the chain:- hdc in next st
- dc in next 3 sts
- hdc in next
- sc in next
- Ch 1, rotate your work, and crochet along the other side of the chain in reverse:
- sc, hdc, dc ×3, hdc, sc
- Sl st to the first sc to close.
- Fasten off.
Repeat 2–3 times for multiple leaves.
Loop (optional for hanging)
- Ch 12–15 (depending on size you want).
- Join both ends with a sl st to make a ring.
- Sew this to the back of your leaves.
🌺 Part 4: Assembly
- Insert the yellow spadix into the center of the white/red cone.
- Sew the base tightly so the yellow piece stays upright.
- Attach the green leaves at the bottom of the flower with the yarn needle.
- Add the green loop behind the leaves if you want it to hang (as in the photo).
🌹 Optional:
- Use a wire stem if you want to make it stand in a vase.
- You can also add a touch of glitter yarn to the petal edge for decoration.
- Mix colors (red, white, or pink) for a bouquet look.