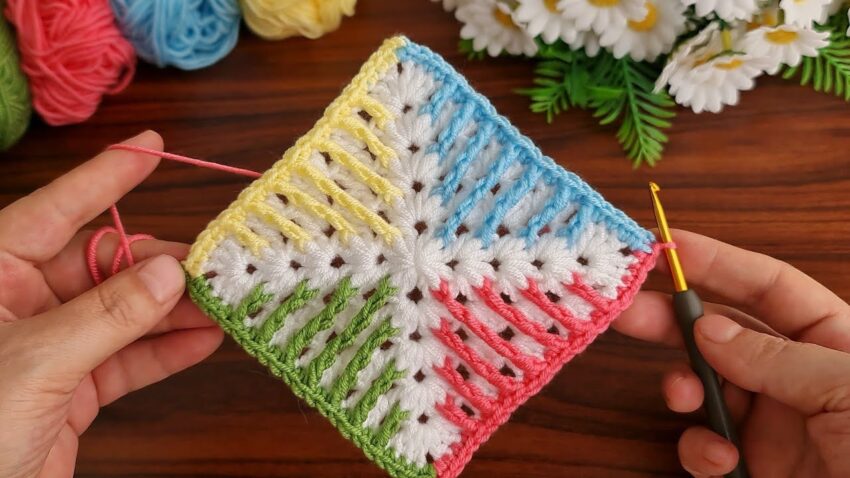
multicolor diagonal granny square (sometimes called a “corner-to-corner flower stitch square”). It’s created using basic crochet stitches with color changes for each section. Here’s how to make it step by step:
🧶 Materials Needed
- Yarn: 5 colors of DK or worsted weight yarn
- White (main/base color)
- Green, Yellow, Blue, Pink (contrast colors for each corner)
- Crochet hook: 3.5 mm – 4 mm (depending on yarn)
- Scissors
- Yarn needle

🪡 Crochet Abbreviations
| Symbol | Meaning |
|---|---|
| ch | chain |
| sl st | slip stitch |
| sc | single crochet |
| dc | double crochet |
| FPdc | front post double crochet |
| sp | space |
| st | stitch |
| rep | repeat |
🌸 Step-by-Step Crochet Pattern
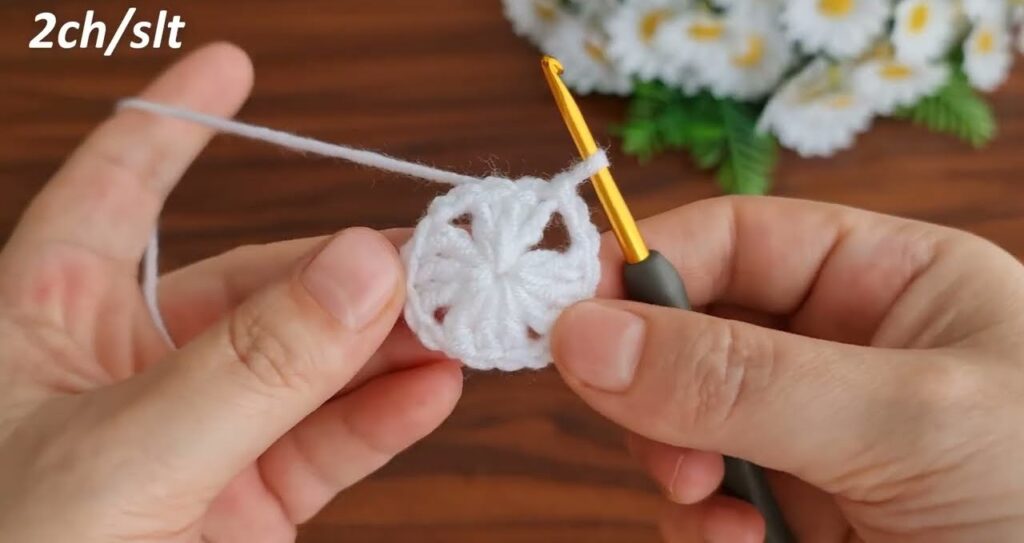
🔹 Round 1 – Center Flower
- Start with white yarn. Make a magic ring (or ch 5 and sl st to form a ring).
- Ch 3 (counts as first dc).
- Work 2 dc, ch 2, (3 dc, ch 2) 3 times.
- Join with sl st to top of beginning ch-3.
→ You’ll have 4 groups of 3 dc (clusters), each separated by ch-2 corners.
(Looks like a tiny square.)
🔹 Round 2 – Expanding the White Base
- Sl st into next 2 dc and into corner ch-2 sp.
- Ch 3 (counts as dc), 2 dc, ch 2, 3 dc in same corner.
- (Ch 1, 3 dc in next corner, ch 2, 3 dc in same corner) repeat around.
- Join with sl st to top of beginning ch-3.
→ Now your square is growing — 2 white rounds complete.
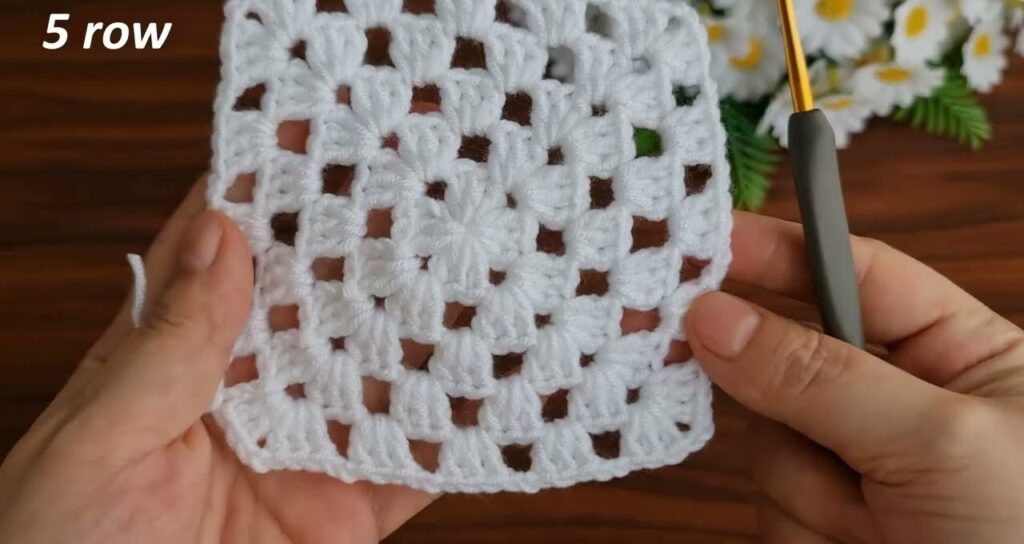
🔹 Round 3 – Final White Round
Repeat the same pattern for one more round:
- In each corner: (3 dc, ch 2, 3 dc)
- Between corners: (3 dc, ch 1)
- Join with sl st and fasten off white yarn.
Your white flower base is ready 🌼
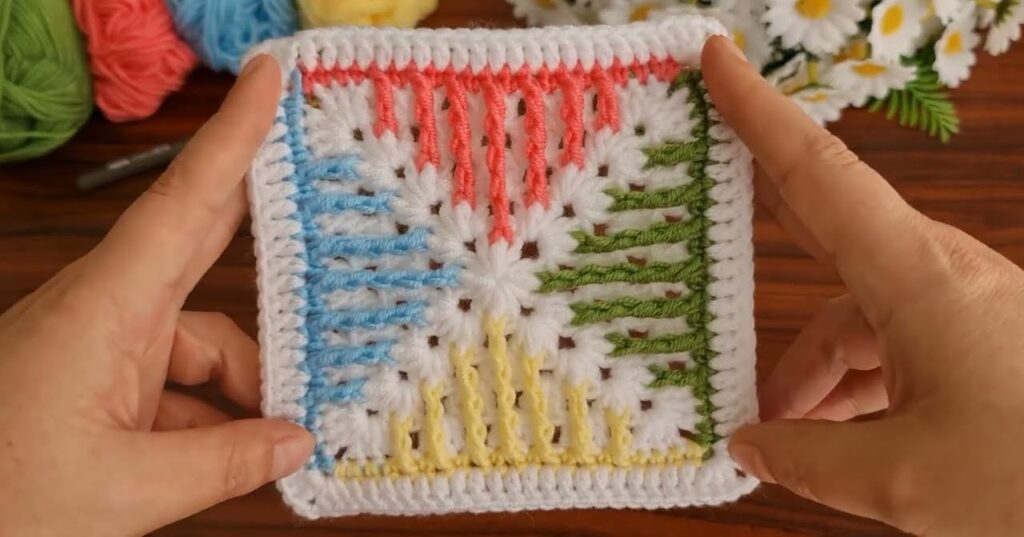
🪄 Adding the Colorful Stripes (Diagonal Quadrants)
Now comes the fun part — adding each of the 4 colors separately.
🔸 Section 1 – Green Corner
- Attach green yarn in any corner space.
- Ch 3 (counts as dc), work 2 dc in the same sp, ch 1.
- FPdc around the dc posts from the white row below.
(This creates that beautiful raised line effect!) - Continue working FPdc stitches across this quadrant’s rows.
- In corners, always do (3 dc, ch 2, 3 dc).
- Stop halfway across the square (you’re only doing one-quarter diagonal).
Fasten off and weave ends.
🔸 Section 2 – Yellow Corner
- Attach yellow yarn in the next corner (clockwise).
- Work the same way as green: FPdc over white stitches below.
- Keep the tension even so stripes stay neat.
- Stop at the diagonal meeting point. Fasten off.
🔸 Section 3 – Blue Corner
- Attach blue yarn to the next white corner.
- FPdc across that quadrant, stopping at the center.
- Work corners (3 dc, ch 2, 3 dc).
This quadrant should meet neatly at the center cross.
🔸 Section 4 – Pink Corner
- Attach pink yarn in the last remaining corner.
- Work FPdc stitches across white rows just like before.
- Once all sides meet in the middle, fasten off.
✨ Optional Finishing Border
To give it a neat edge:
- Join white yarn anywhere.
- Ch 1, sc around entire square, placing (sc, ch 2, sc) in each corner.
- Sl st to join and fasten off.
🧷 Helpful Tips
- Keep your FPdc stitches loose — if they’re too tight, the fabric will curl.
- Use a blocking mat to square it up after finishing.
- You can make many squares and join them for a baby blanket, pillow cover, or table runner.
- To make larger squares, just keep adding more white rounds before starting the colors.