Absolutely! Here’s a more detailed step-by-step breakdown to help you make this beautiful woven crochet basket with ribbon exactly like in this image:
🧺 Detailed Crochet Basket with Ribbon Tutorial
✅ Materials Checklist
- Yarn: 3 colors (Pink, Yellow, Purple – or any colors you prefer)
- Flat Ribbon or Cord: Light pink, approx. 1 cm wide
- Crochet Hook: Size suitable for your yarn (commonly 3.0mm to 4.0mm)
- Scissors
- Yarn needle
🎯 Step-by-Step Instructions
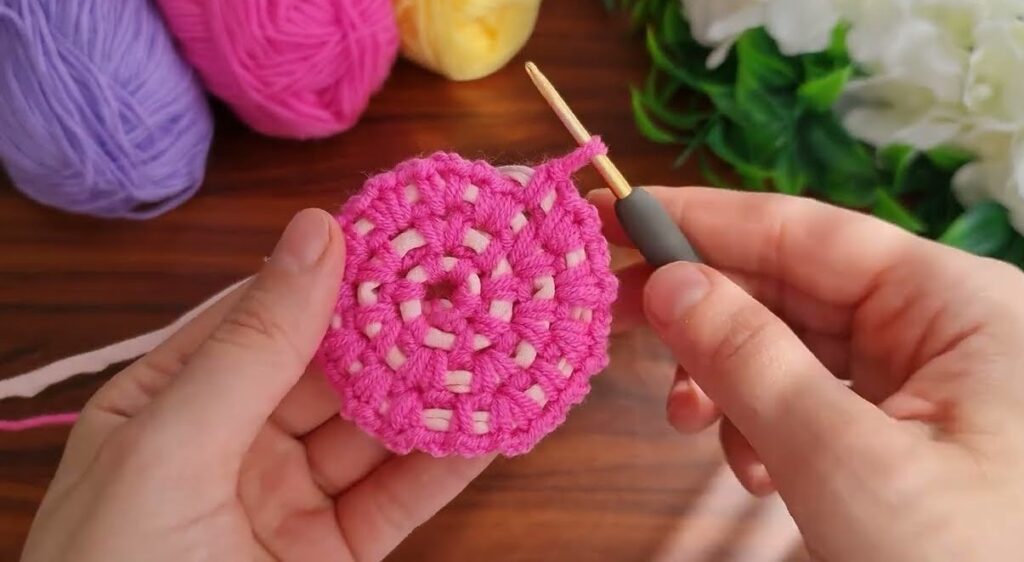
1. Crochet the Basket Base (Flat Circle)
This forms the bottom of your basket:
With Pink Yarn:
- Start with a Magic Ring (or ch 4, join with sl st to form ring)
- Round 1: Ch 1, 6 single crochet (sc) into the ring. Join with sl st. (6 stitches)
- Round 2: Ch 1, 2 sc in each stitch around. Join. (12 stitches)
- Round 3: Ch 1, 1 sc in next stitch, 2 sc in next, repeat around. Join. (18 stitches)
- Round 4: Ch 1, 1 sc in next 2 stitches, 2 sc in next, repeat around. Join. (24 stitches)
- Continue increasing like this:
- Add 6 stitches per round
- Keep going until your circle is the desired base size (typically 10-15cm diameter)
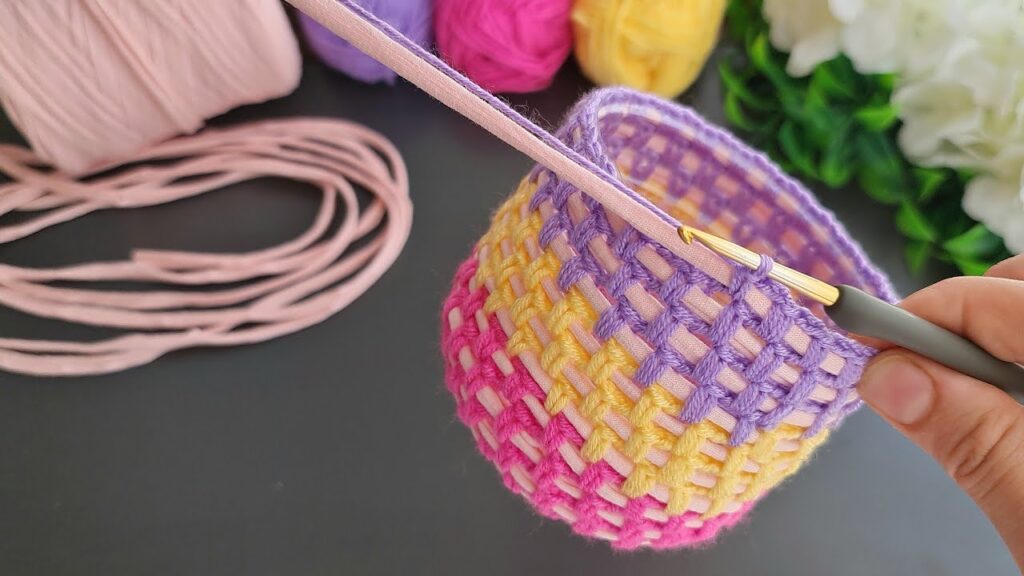
2. Build Up the Basket Sides
Once the base is done:
- First Round of Sides: Work in the back loops only to create a sharp edge:
- Ch 1, 1 sc in each stitch around. Join.
Continue Rounds:
- Keep working in standard single crochet (through both loops)
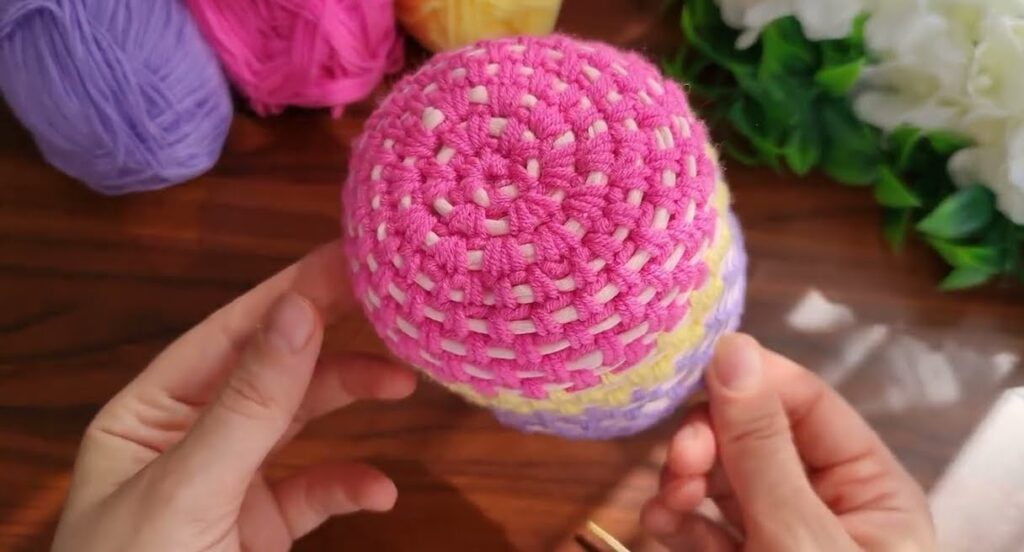
- Change colors every few rows for the striped effect:
- Pink (bottom), then Yellow, then Purple as shown in the image
- Total height: about 10-12cm or as you desire
3. Ribbon Weaving (Key Decorative Step)
After crocheting the sides:
- Cut long strips of your flat ribbon (approx. 1 cm wide)
- Start from the bottom of the basket:
- Weave the ribbon over and under the vertical gaps between stitches
- Each row of ribbon should be evenly spaced (about every 2-3 crochet rounds)
- Wrap around the basket, keeping tension even
Repeat:
- Pink ribbon woven through Pink section
- Yellow ribbon woven through Yellow section
- Purple ribbon woven through Purple section
You can see in the image the weaving follows the colors for a neat finish.
4. Final Top Edge
Once the weaving is complete:
- Do 1-2 rounds of single crochet at the top using your last yarn color
- You can also add:
- Crab stitch (reverse single crochet) for decorative edging
- Slip stitch for a clean look