
Perfect 👍 I will explain everything in step-by-step instructions with exact stitch counts and shaping tips. No pictures.
This is made in 2 parts:
- Deep round bowl
- Separate 3D leaf petals sewn around the rim
🧶 MATERIALS
- Cotton yarn (medium / worsted weight is best)
- 3.0–3.5 mm hook (smaller hook = firmer bowl)
- Stitch marker
- Yarn needle
- Scissors
✨ PART 1: CROCHET THE ROUND BOWL BASE
We work in continuous rounds (do not join unless stated).
Mark the first stitch of each round.
Round 1
Magic ring
8 sc inside ring
Pull tight
= 8 stitches
Round 2
Inc in every stitch
(2 sc in each stitch around)
= 16 stitches
Round 3
(1 sc, inc) repeat around
= 24 stitches
Round 4
(2 sc, inc) repeat around
= 32 stitches
Round 5
(3 sc, inc) repeat around
= 40 stitches
Round 6
(4 sc, inc) repeat around
= 48 stitches
Round 7
(5 sc, inc) repeat around
= 56 stitches
Stop here for medium bowl size (about 14–16 cm wide).
If you want larger, continue increasing with the pattern:
(6 sc, inc) = 64
(7 sc, inc) = 72
etc.
Your circle must lie completely flat.
🔺 Create the Bowl Edge
Next Round (Important Fold Round)
Work sc in BLO (back loop only) around.
Do NOT increase.
This creates a sharp 90° corner so the sides stand up.
🧺 Build the Bowl Sides
Work 6–10 rounds of:
sc in each stitch around (no increases)
The more rounds you make, the deeper the bowl.
Tip:
If bowl starts flaring outward → use smaller hook
If bowl curves inward too much → loosen tension
Fasten off and weave in ends.
The bowl is finished.
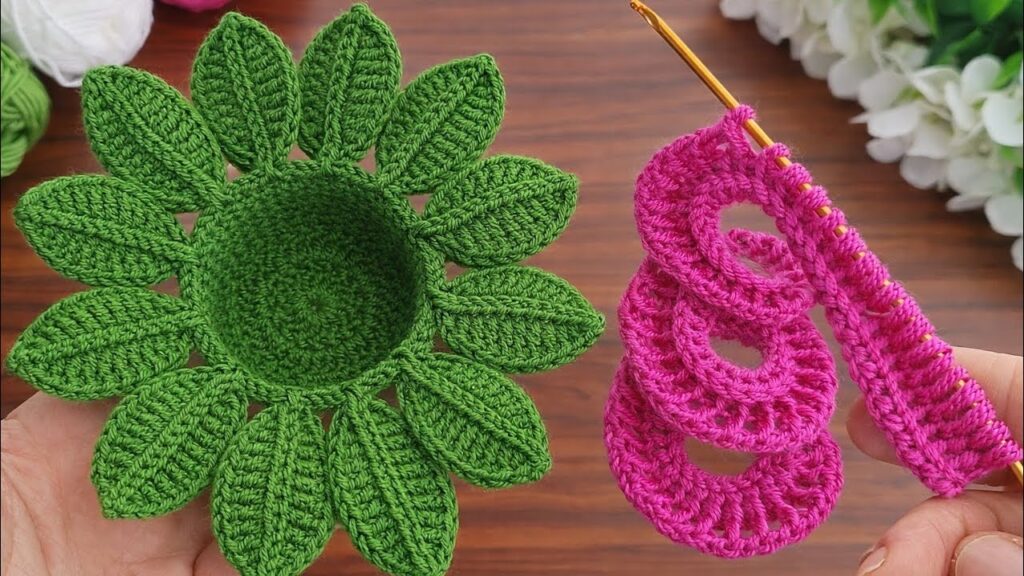
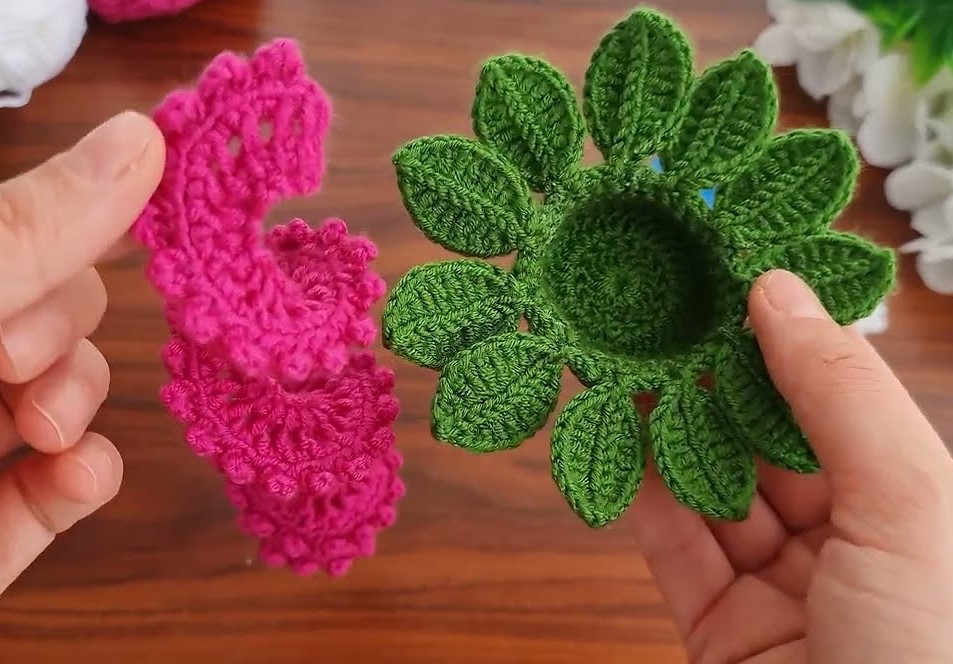
🌿 PART 2: MAKE THE LEAF PETALS
Make 12–14 petals depending on bowl size.
Each petal is worked in rows.
🍃 PETAL PATTERN (Detailed)
Row 1
Ch 13
Sc in 2nd chain from hook
Sc across
= 12 stitches
Row 2
Ch 1, turn
Inc in first stitch
Sc across until last stitch
Inc in last stitch
= 14 stitches
Row 3
Ch 1, turn
Inc
Sc across
Inc
= 16 stitches
Row 4
Ch 1, turn
Inc
Sc across
Inc
= 18 stitches
Row 5
Ch 1, turn
Sc in each stitch across
= 18 stitches
Now leaf is wide enough.
🔻 Shape the Leaf Tip
Row 6
Ch 1, turn
Sc2tog (decrease)
Sc across until last 2 stitches
Sc2tog
= 16 stitches
Row 7
Ch 1, turn
Sc2tog
Sc across
Sc2tog
= 14 stitches
Row 8
Repeat same decrease
= 12 stitches
Continue decreasing like this every row until 4 stitches remain.
Final Tip Row
Sc2tog twice
= 2 stitches
Fasten off.
Leave long tail for sewing.
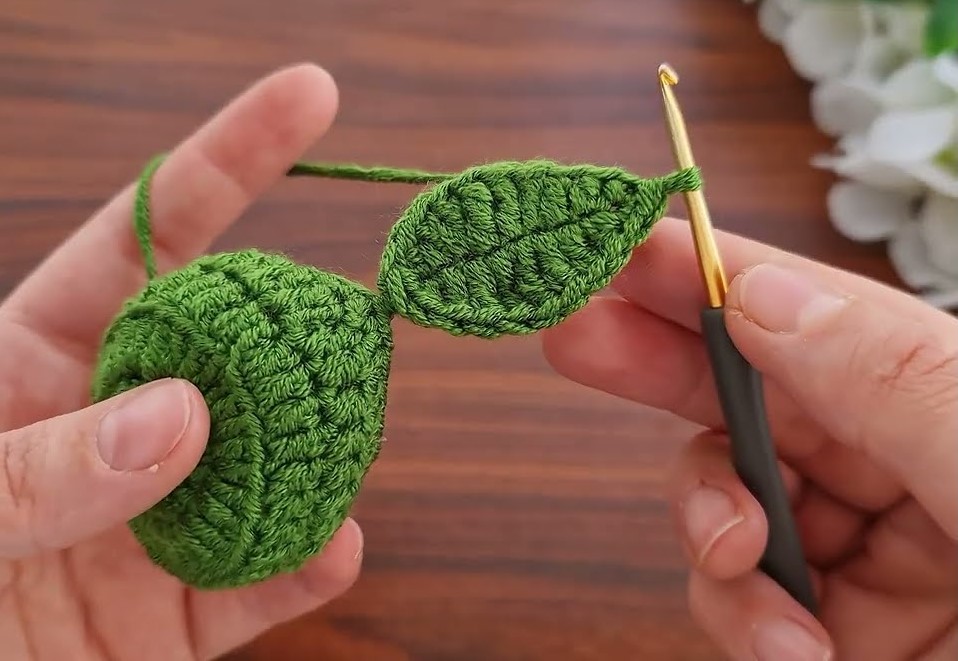
🌿 Add Raised Center Vein (Very Important Detail)
Attach yarn at bottom center of leaf.
Surface slip stitch straight up through middle stitches.
Keep tension slightly tight so vein raises.
Fasten off.
This gives the beautiful 3D realistic look.
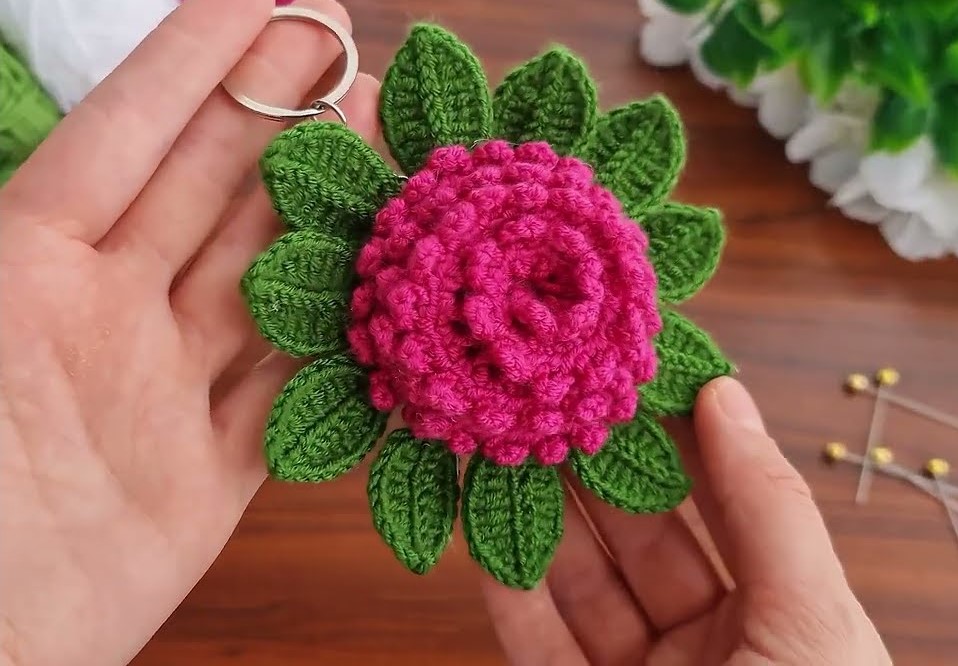
🪡 ASSEMBLY
- Count total stitches on bowl edge.
- Divide evenly by number of petals.
Example:
56 stitches ÷ 14 petals = attach every 4 stitches.
- Overlap petal bases slightly.
- Sew only bottom 1–2 cm of each petal.
- Keep petals slightly angled outward.
Important:
Do NOT sew too high or they won’t stand nicely.
🌟 Optional: Make It More Structured
If you want very firm shape:
Option 1: Use smaller hook
Option 2: Crochet with tight tension
Option 3: Spray starch and shape while damp
Option 4: Insert plastic canvas circle inside bottom
📏 Adjusting Size
Smaller bowl:
Stop increasing earlier.
Bigger bowl:
Add more increase rounds and make more petals.
More dramatic petals:
Make starting chain longer (ch 15–17).