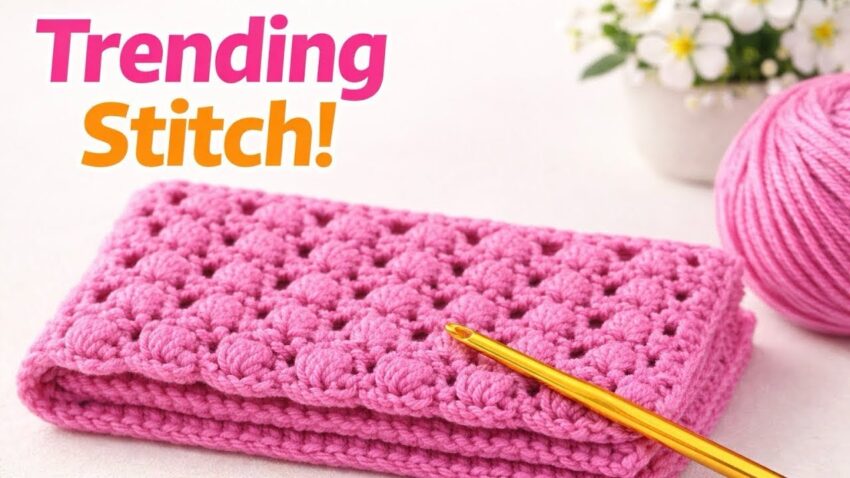
😍 This is a bobble / puff texture crochet stitch that’s very trendy right now. I’ll explain it step by step, beginner-friendly, so you can recreate the same look as the picture.
🧶 MATERIALS (EXACT SETUP)
- Yarn: Medium / Worsted (#4)
- Hook: 5.0 mm (use 4.5 mm if you crochet loose)
- Scissors
- Yarn needle (optional)
👉 Use lighter colors (like the pink in the photo) so the texture really shows.

🪢 STEP 1: FOUNDATION CHAIN
- Make a slip knot
- Chain 24
(You can do any even number: 20, 22, 26, etc.)
👉 Don’t chain too tight — relaxed chains = nicer fabric.
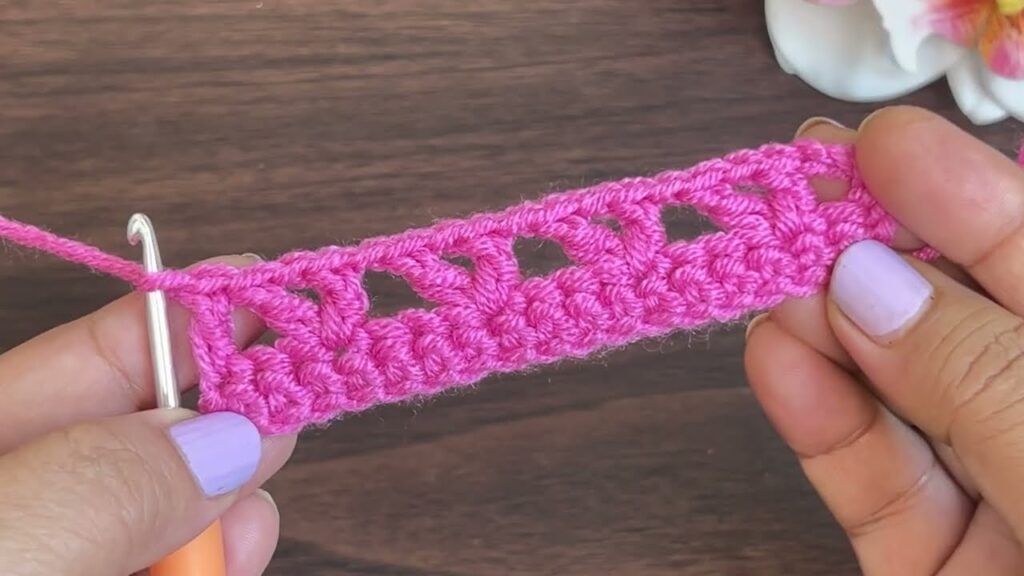
🧵 STEP 2: ROW 1 (BASE ROW – SINGLE CROCHET)
- Insert hook into 2nd chain from hook
- Yarn over, pull up loop
- Yarn over, pull through both loops → 1 sc
- sc in every chain
- At the end:
- ch 1
- turn
📌 Purpose: This row gives a strong base so bobbles look neat.
🫧 STEP 3: BOBBLE STITCH (VERY DETAILED)
How to make 1 Bobble (BO):
- Yarn over
- Insert hook into stitch
- Pull up loop (3 loops on hook)
- Yarn over, pull through 2 loops (2 loops left)
- Repeat steps 1–4 four more times
→ You will have 6 loops on hook - Yarn over, pull through all loops
- Chain 1 to lock the bobble
👉 Push the bobble to the front with your finger.
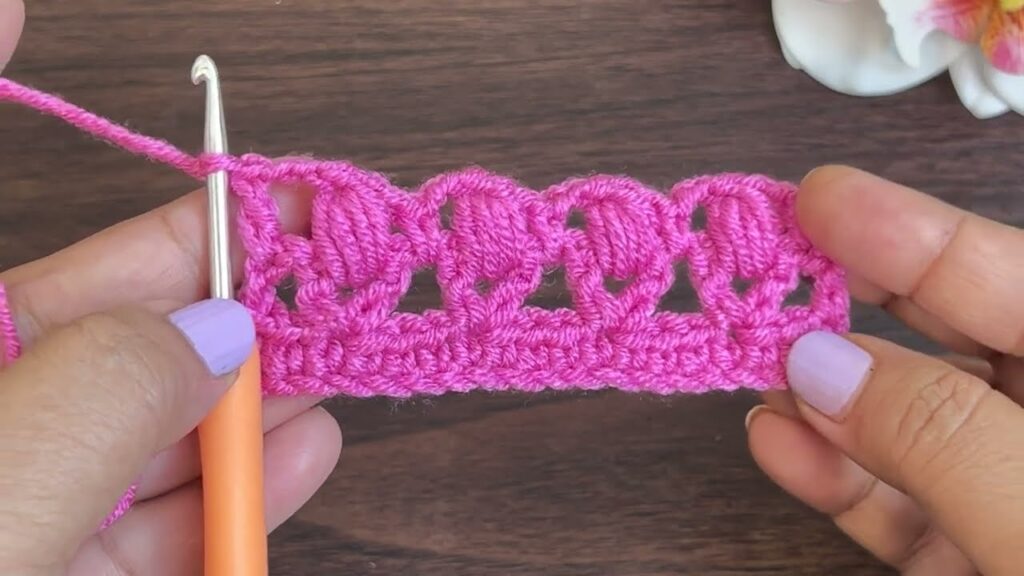
🪡 STEP 4: ROW 2 (FIRST BOBBLE ROW)
- sc in first stitch
- Bobble in next stitch
- sc in next stitch
- Repeat:
- bobble, sc
- End row with sc
- ch 1, turn
📌 Bobbles will be spaced evenly like the picture.
🧶 STEP 5: ROW 3 (FLAT ROW – VERY IMPORTANT)
- sc in every stitch
(yes, even on top of bobbles) - ch 1
- turn
👉 This row separates bobble rows and makes them pop.
🔁 STEP 6: ROW 4 (OFFSET BOBBLES – MAKES THE PATTERN)
- sc in first stitch
- Bobble in next stitch
- sc in next stitch
- Repeat across
- ch 1, turn
🔁 REPEAT PATTERN
Repeat:
- Row 3 (all sc)
- Row 4 (bobble row)
Until your piece is as long as you want.
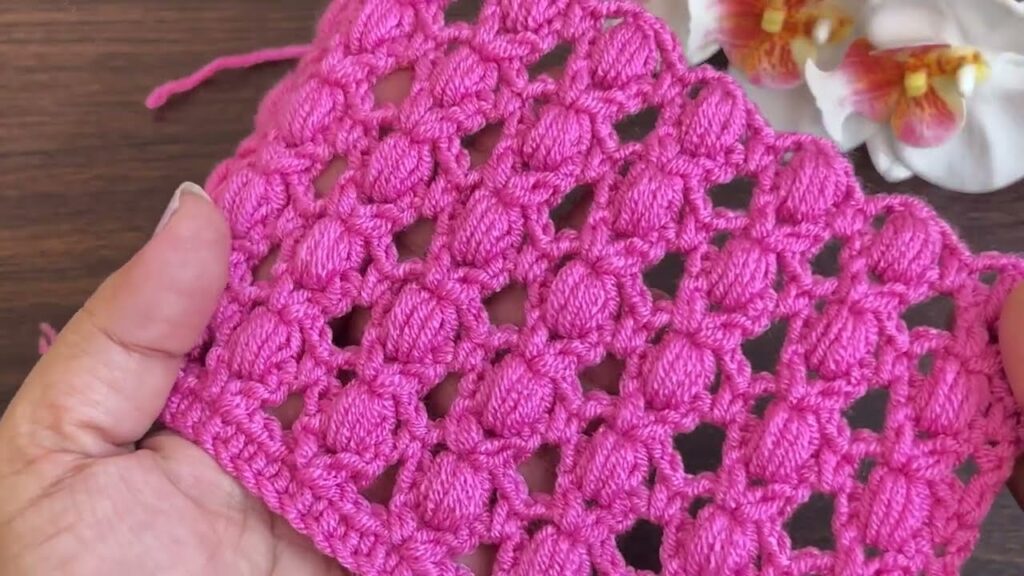
🧼 STEP 7: CLEAN BORDER (LIKE THE PHOTO)
- sc evenly around all sides
- In each corner:
- sc, ch 1, sc
- sl st to first stitch
- Fasten off & weave in ends
💡 IMPORTANT PRO TIPS
✔ If bobbles curl back → you’re crocheting too tight
✔ If holes are big → use smaller hook
✔ Always ch 1 after bobble (don’t skip it!)
✔ Count stitches every row
🧵 WHAT YOU CAN MAKE WITH THIS
- Blanket
- Scarf
- Pillow cover
- Bag
- Baby blanket