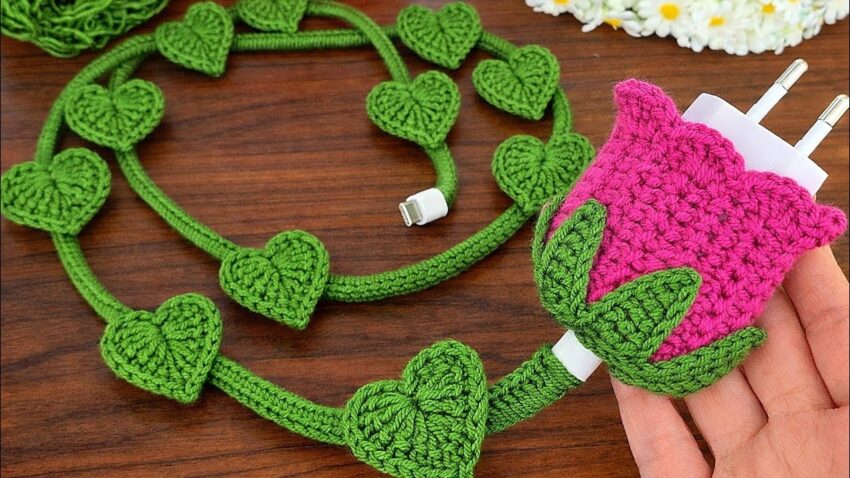
This is a crocheted charging cable cover with heart vines and a rose-shaped charger head cover. I’ll explain step by step in detail (no extra pictures) so you can make it easily.
CROCHET HEART VINE CHARGING CABLE + ROSE CHARGER COVER
(VERY DETAILED PATTERN)
MATERIAL DETAILS (IMPORTANT)
- Yarn:
- Cotton yarn is BEST (size 2–3 / sport or DK)
- Green (vine + hearts)
- Pink (rose cover)
- Hook: 2.0 mm – 2.5 mm
(Use smaller hook for tight stitches so it grips the cable) - Needle for sewing
- Charging cable + adapter

CROCHET TERMS (US)
- ch = chain
- sl st = slip stitch
- sc = single crochet
- hdc = half double crochet
- dc = double crochet
- tr = treble crochet (yarn over 2 times)
- inc = 2 stitches in same stitch
PART A: CABLE TUBE (GREEN)
This makes a tight hollow rope around the cable.
STEP 1: START THE TUBE
- Ch 5
- Insert hook into 1st chain
- Sl st → this makes a small ring
👉 This ring is the center of your tube.
STEP 2: ROUND 1
- Ch 1 (does NOT count as stitch)
- Make 5 sc into the ring
- DO NOT join with sl st
You now have 5 stitches total
STEP 3: CONTINUE THE TUBE (IMPORTANT)
- Crochet in a spiral
- Put 1 sc into each stitch
- ALWAYS keep 5 sc per round
How:
- Insert hook into next stitch
- Yarn over
- Pull through
- Yarn over, pull through both loops
Repeat 5 times every round.
STEP 4: INSERT THE CABLE
After 3–4 cm:
- Slide the charging cable inside the tube
- Keep crocheting around the cable
👉 This keeps the cover tight and straight.
STEP 5: LENGTH
- Crochet until you reach just before the charger head
- Do NOT fasten off yet (we’ll attach later)
PART B: HEART MOTIFS (GREEN)
Each heart is made in one magic ring.
STEP 1: MAGIC RING
- Wrap yarn around fingers
- Insert hook, pull loop
- Ch 1 to secure
STEP 2: HEART STITCH SEQUENCE
ALL stitches go into the ring:
- Ch 3
- 3 treble crochet (tr)
- 3 double crochet (dc)
- Ch 1
- 1 treble crochet (center point)
- Ch 1
- 3 double crochet (dc)
- 3 treble crochet (tr)
- Ch 3
- Sl st into the ring
STEP 3: FINISH HEART
- Pull magic ring tight
- Fasten off
- Leave 10–12 cm yarn tail
👉 Make 10–14 hearts depending on cable length.
PART C: ATTACH HEARTS TO CABLE
STEP 1: POSITION
- Space hearts evenly
- Tip of heart should face outward
STEP 2: SEWING
- Thread yarn tail into needle
- Stitch through:
- back of heart
- 2–3 stitches of cable tube
- Pull tight but don’t flatten tube
- Knot securely on back
- Hide yarn inside tube
Repeat for all hearts.
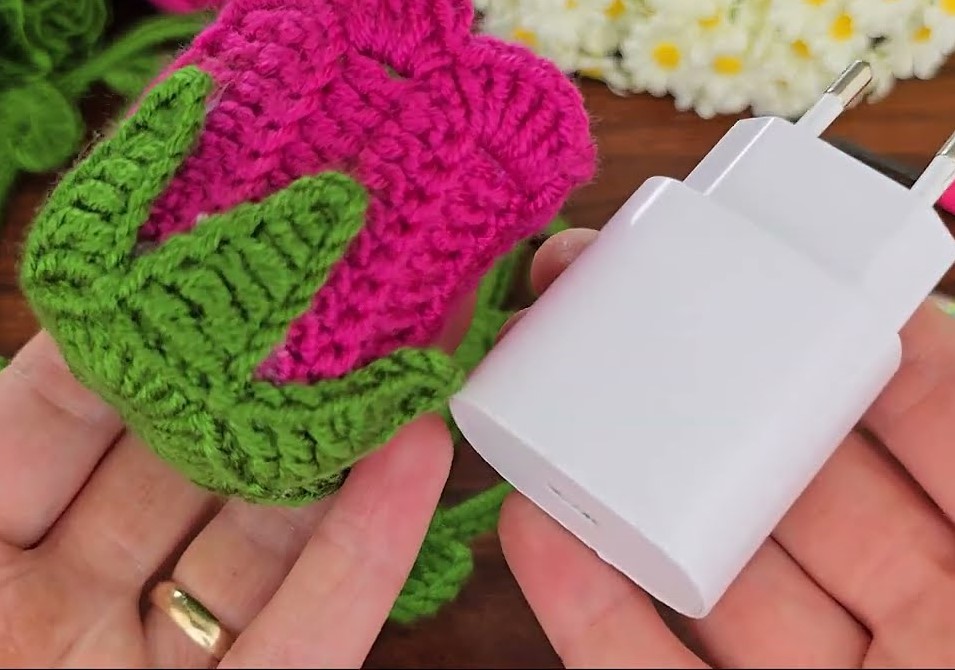
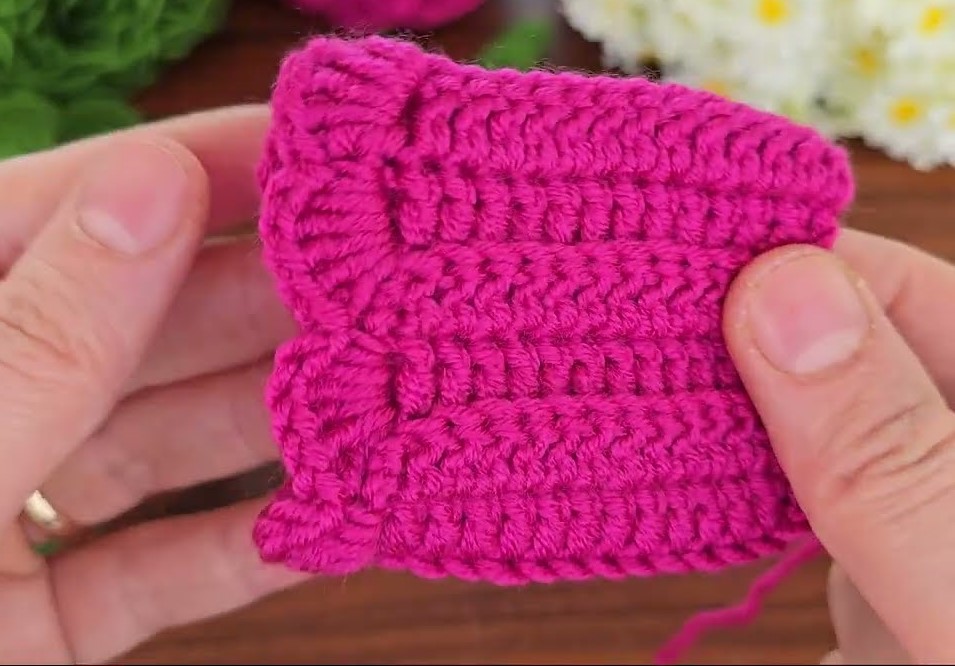
PART D: ROSE CHARGER COVER (PINK)
This covers the adapter block.
STEP 1: BASE CIRCLE
- Magic ring
- 6 sc into ring
- Pull tight, sl st to first sc
STEP 2: INCREASE ROUND
- Ch 1
- 2 sc in each stitch
→ total 12 sc - Sl st to first sc
STEP 3: SIZE ROUND
- Ch 1
- (1 sc, inc) × 6
→ total 18 sc - Sl st
👉 Check fit: base should match charger bottom.
STEP 4: WALLS (NO INCREASE)
- Ch 1
- Sc in back loops only (BLO)
- 18 sc
- Sl st
This creates a clean edge.
STEP 5: ROSE TEXTURE (IMPORTANT)
Work this round loosely:
In each stitch:
- (hdc, dc, hdc)
This creates petal texture.
Repeat all around.
STEP 6: HEIGHT CHECK
- Keep repeating petal round
- Stop when charger head is fully covered
Fasten off.
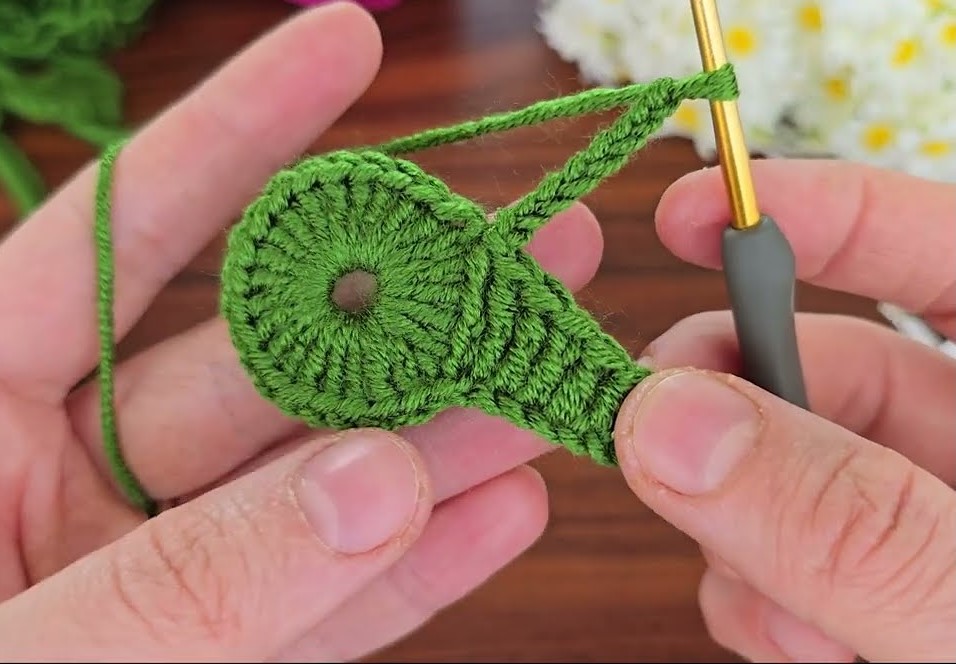
PART E: LEAVES (GREEN)
Make 2 or 3 leaves.
STEP 1: LEAF
- Ch 9
- In 2nd ch from hook:
- sc
- hdc
- dc
- tr
- dc
- hdc
- sc
- Sl st at end
- Fasten off
STEP 2: ATTACH LEAVES
- Sew leaves near bottom of rose cover
- Slight angle for natural look
PART F: FINAL ASSEMBLY
- Slide rose cover onto charger head
- Pull cable through green tube
- Adjust heart spacing
- Weave in ALL ends securely
PRO TIPS 🌱
- Tighter stitches = better grip
- Cotton yarn prevents slipping
- Smaller hook = neater look
- You can replace hearts with:
- flowers
- stars
- leaves