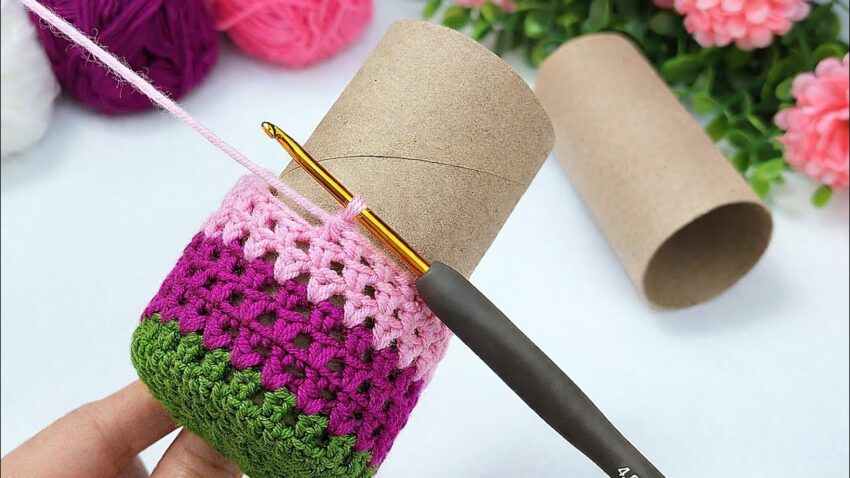
This is a crocheted cover for a cardboard tube (toilet paper roll) made with granny-style clusters, worked in the round. I’ll explain it clearly step by step 🧶
🧶 MATERIALS (VERY IMPORTANT)
- Yarn: Medium weight (4 / worsted)
- Colors:
- Green (bottom)
- Dark pink (middle)
- Light pink (top)
- Crochet hook: 4.0–4.5 mm
- Scissors
- Toilet paper roll (for measuring)

✨ CROCHET TERMS (ENGLISH)
| Term | Meaning |
|---|---|
| ch | chain |
| sl st | slip stitch |
| dc | double crochet |
| sp | space |
| st | stitch |
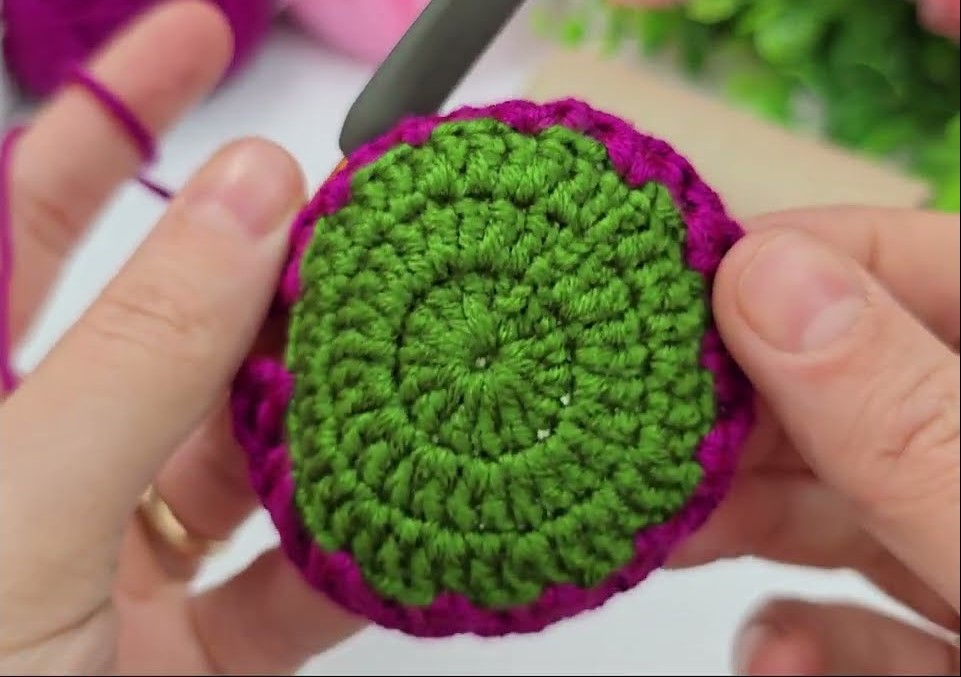
🟢 PART 1: MAKE THE BOTTOM CIRCLE
Round 1 – Magic Ring
- Wrap yarn around your fingers → make magic ring
- Ch 3 (counts as first dc)
- Crochet 11 dc into the ring
- Pull ring tight
- Sl st into top of ch-3
👉 Total: 12 dc

Round 2 – First Granny Clusters
- Ch 3 (counts as 1 dc)
- In SAME stitch: 2 dc
→ this makes 1 granny cluster (3 dc) - Ch 1
- Skip 1 stitch
- In next stitch: 3 dc
- Ch 1
- Repeat steps 4–6 around
- Sl st to join
👉 You should have 6 granny clusters
Round 3 – Increase Circle Size
- Sl st into next ch-1 space
- Ch 3, 2 dc, ch 1
- In next ch-1 space: 3 dc, ch 1
- Repeat in every space
- Sl st to join
📏 Check size
Place the circle on the tube bottom.
✔ If it covers the base → OK
❌ If too small → add one more increase round
🟢 PART 2: BUILD THE SIDES (NO INCREASE)
From now on, crochet straight up.
Round 4 and Above (Important!)
- Sl st into next ch-1 space
- Ch 3, 2 dc
- Ch 1
- In every ch-1 space:
- 3 dc
- ch 1
- Sl st to join
🚫 DO NOT increase
Always crochet only in spaces, not stitches.
🎨 COLOR CHANGE (CLEAN METHOD)
To change color:
- On the last sl st of the round:
- Pull new color through
- Tighten both yarns
- Continue with new color
🌱 COLOR PLAN (LIKE PHOTO)
- Green: 2–3 rounds
- Dark pink: 3–4 rounds
- Light pink: 2 rounds
📏 Keep checking height by sliding onto tube
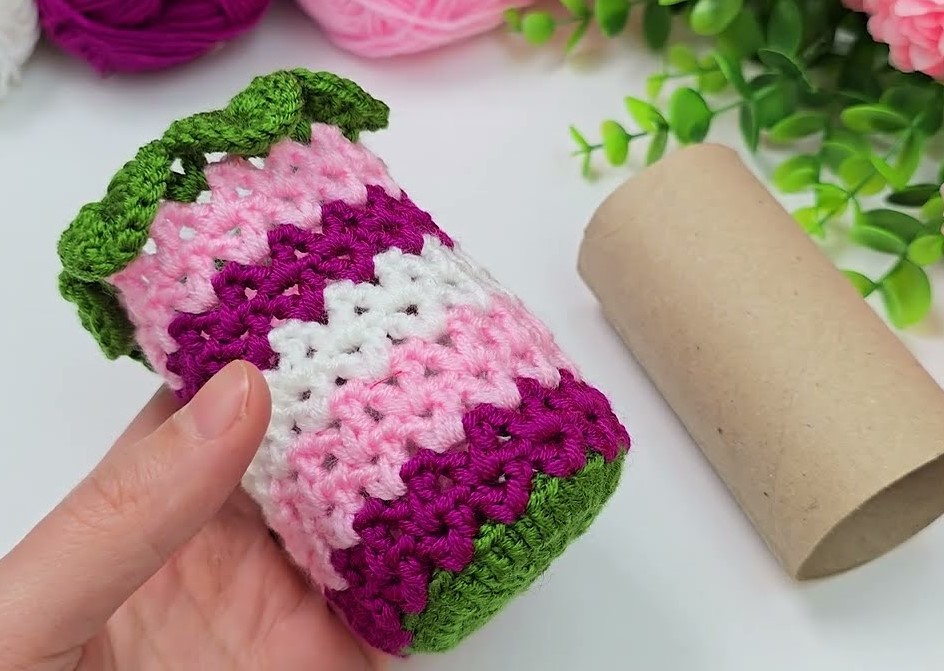
🟢 PART 3: TOP FINISH
Simple Edge
- Sl st around
- Fasten off
- Weave ends
Neat Edge (Recommended)
- Ch 1
- 1 sc in each stitch and space
- Sl st to join
- Fasten off
✔ FINAL CHECK
- Fit should be snug, not loose
- Pattern lines should stack neatly
- Height flush with tube top
🧠 BEGINNER TIPS
✔ Count clusters, not stitches
✔ Always join in same place
✔ If it twists → you missed a space
✔ Use stitch marker if needed