
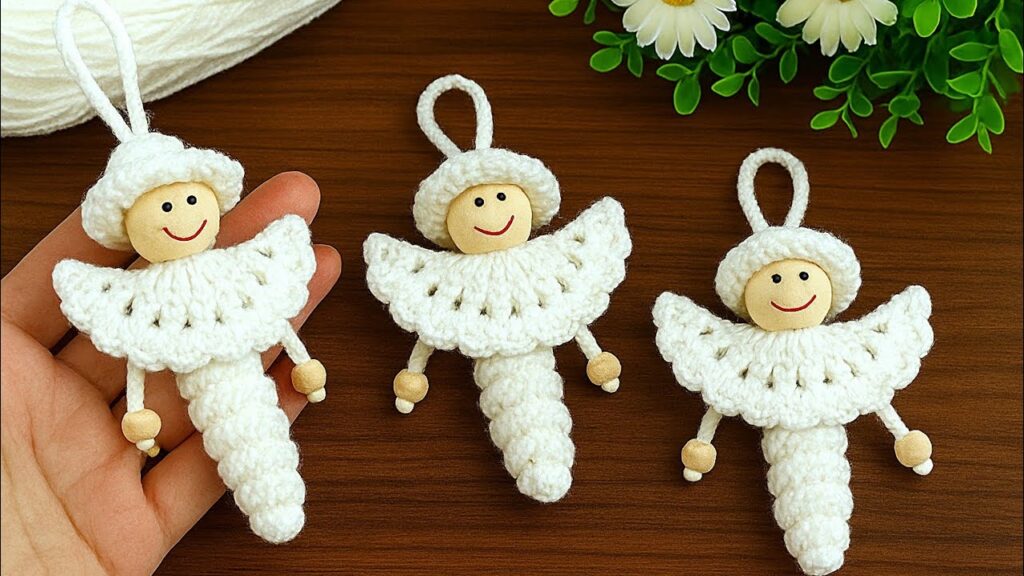
This is a small crochet angel / doll ornament (often used as a Christmas decoration or keychain). I’ll explain it step by step, simple and beginner-friendly, based on the picture.
🧶 CROCHET ANGEL – VERY DETAILED TUTORIAL
📏 Finished size
About 9–11 cm tall (depends on yarn & hook)
🧵 MATERIALS (IMPORTANT)
- White yarn (DK / sport weight works best)
- Crochet hook 2.5–3.0 mm
- 1 wooden bead for head (14–16 mm)
- 2 small wooden beads for hands (8–10 mm)
- Yarn needle
- Scissors
- Fiberfill (a little, optional)
- Black + red marker or embroidery thread
- Thin yarn for hanging loop
✨ STITCH ABBREVIATIONS
- MR = magic ring
- ch = chain
- sc = single crochet
- inc = 2 sc in same stitch
- dec = single crochet decrease
- hdc = half double crochet
- dc = double crochet
- sl st = slip stitch
1️⃣ BODY (CONE SHAPE)
👉 Start from the bottom and crochet upward.
Round 1
- MR, 6 sc into ring
(6)
Round 2
- inc in every stitch
= 12 sc
(12)
Round 3
- (sc, inc) × 6
= 18 sc
(18)
Round 4
- sc in each stitch around
(18)
Round 5
- (2 sc, dec) × 6
= 12 sc
(12)
Round 6
- sc in each stitch
(12)
Round 7
- (sc, dec) × 4
= 8 sc
(8)
Round 8–9
- sc around (no increase)
(8)
➡ Now the opening should fit the wooden bead
➡ Add very little stuffing if you want
❗ Do NOT fasten off yet
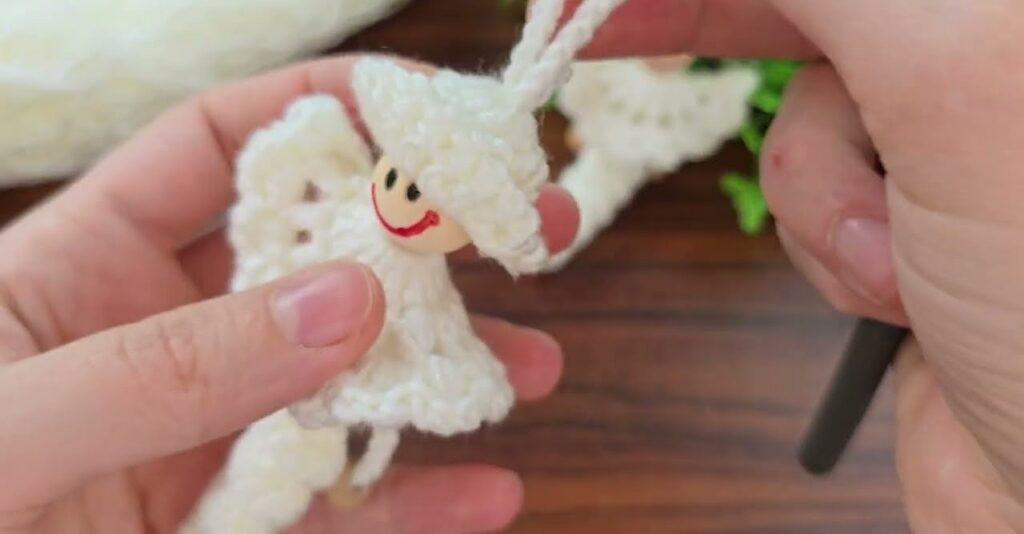
2️⃣ INSERT THE HEAD
- Push the wooden bead into the opening
- Pull yarn tightly around the bead
- Make sl st and fasten off
- Secure tightly so the head does not move
3️⃣ FACE
- Draw:
- 2 small black dots for eyes
- Curved red line for smile
OR embroider with thread

4️⃣ HAT + HANGING LOOP
Attach yarn at the top of the head
Round 1 (Hat brim)
- ch 2
- hdc around the head (12–14 hdc, depending on bead size)
- sl st to join
Hanging loop
- ch 8–10
- sl st into same stitch
- fasten off
5️⃣ WINGS (VERY IMPORTANT PART)
👉 Wings are made directly onto the body, worked flat.
Attach yarn at back of body (just under the head)
Wing pattern (one side)
- ch 3
- Same stitch: 3 dc
- Next stitch: 4 dc
- Next stitch: 5 dc
- Next stitch: 4 dc
- Next stitch: 3 dc
- sl st
➡ This forms one wing
Second wing
- Skip 1 stitch
- Repeat same steps on the other side
- Fasten off
💡 Tip: Pull wings gently to shape them nicely
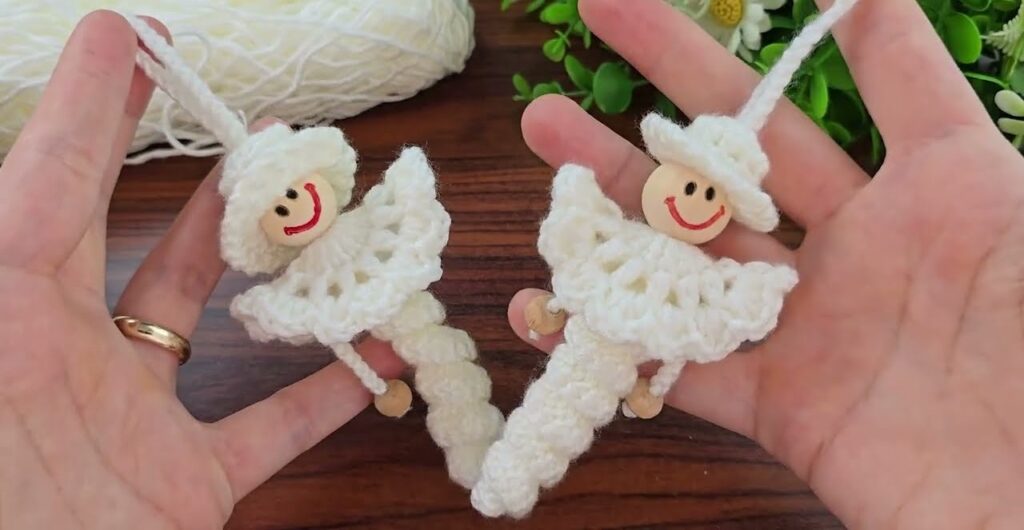
6️⃣ ARMS (MAKE 2)
Each arm:
- ch 9
- Insert small wooden bead
- Pull yarn tight under bead
- Knot securely
- Leave long tail for sewing
Attach arms
- Sew arms to sides of body, just under wings
7️⃣ FINAL FINISHING
- Weave in all yarn ends
- Adjust wings and arms
- Trim excess yarn
✨ DONE! ✨
🌟 OPTIONAL IDEAS
- Add gold thread halo
- Use sparkly yarn
- Make it bigger with thicker yarn
- Turn into:
- Christmas ornament
- Keychain
- Gift decoration