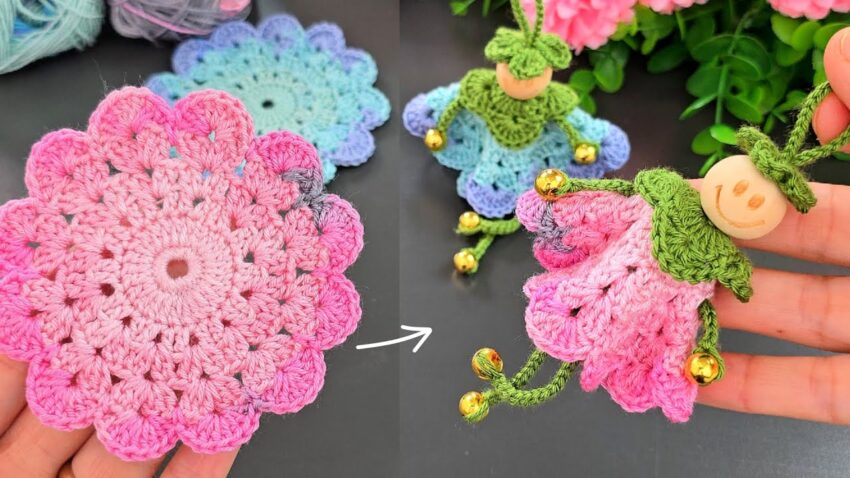
Sure! Here is a step-by-step pattern, written clearly so you can follow every stitch to create the exact flower fairy doll shown in the picture.
🌸 FULL DETAILED TUTORIAL
(From flat flower motif → doll)
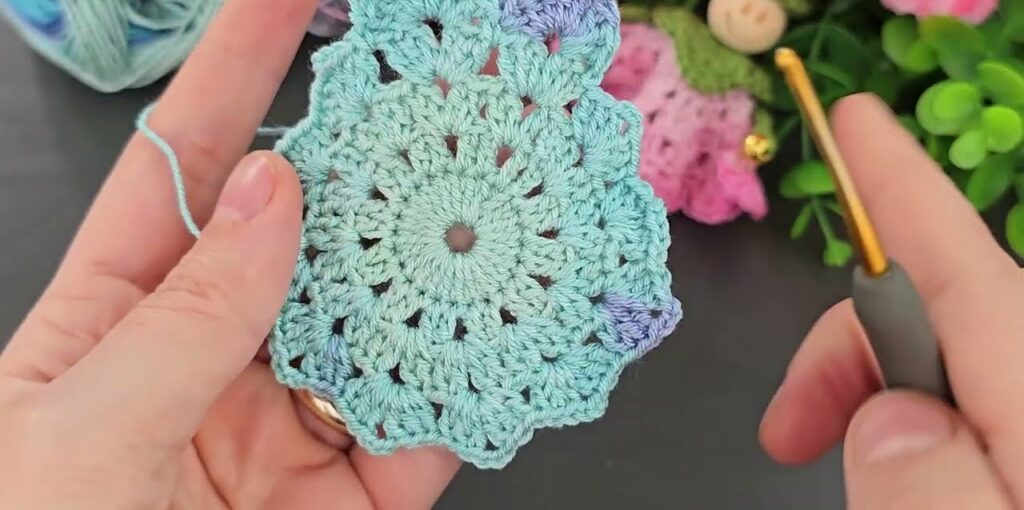
⭐ PART 1 — MAKE THE FLOWER MOTIF (SKIRT)
Yarn: size 1–2 cotton
Hook: 2.0–2.5 mm
Round 1 – Center Circle
- Make a magic ring.
- Ch 2 (counts as dc).
- Work 11 dc into the ring (12 sts total).
- Pull tight, join with a sl st into the first dc.
Round 2 – Increase
- Ch 2.
- 2 dc in each stitch around.
- You now have 24 dc.
- Join with a sl st.
Round 3 – Increase Again
- Ch 2.
- Pattern: 2 dc in first stitch, 1 dc in next stitch.
- Repeat all around (36 dc).
- Join.
Round 4 – Start forming petal bases
- Ch 3 (counts as tr).
- Into same stitch: 1 tr.
- Next stitch: 2 dc.
- Skip 1 stitch.
- Repeat pattern around:
🔸 Petal pattern:
(2 dc, 2 tr, 2 dc), skip 1 stitch
You should get 9 petals like in the picture.
- Join and fasten off.
This is the flat flower circle.

⭐ PART 2 — SHAPE THE FLOWER INTO A DRESS
- Hold the flower cup in your hands.
- The petals will naturally bend forward.
- Fold it gently so the center becomes a little hollow cup.
- Thread a long strand of matching yarn.
- Sew a running stitch around the inner circle.
- Pull slightly to make the flower into a bell-shape.
This becomes the skirt of the fairy.
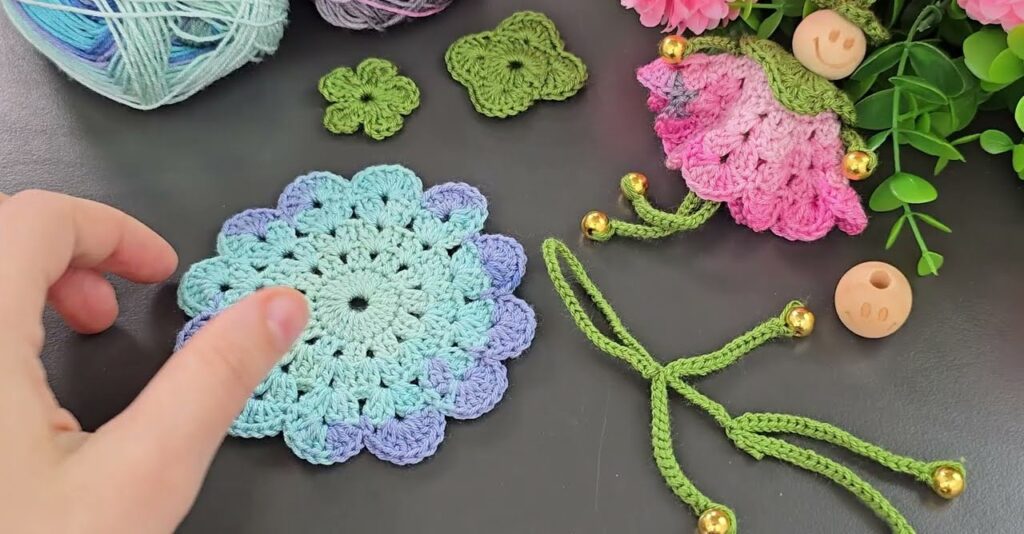
⭐ PART 3 — MAKE THE FAIRY COLLAR (GREEN)
Round 1
- Magic ring.
- 8 sc into the ring.
- Pull tight, join.
Round 2 — Make Leaves
In each stitch:
(1 sc, 1 hdc, 1 dc, 1 hdc, 1 sc)
This forms 8 tiny leaves around the collar, exactly like the photo.
Fasten off and leave tail for sewing.
Slip this over the top of the skirt later.
⭐ PART 4 — MAKE THE HAT
Round 1
Magic ring → 6 sc.
Round 2
Inc in each stitch → 12 sc.
Round 3
1 sc, inc around → 18 sc.
Round 4 – Form Hat Wall
Work 18 sc ONLY in back loops.
Round 5 – Hat Brim (ruffled like picture)
In each stitch:
(1 sc, 1 hdc)
This creates a wavy brim.
Fasten off.
⭐ PART 5 — MAKE ARMS & LEGS
These are simple strands with bells.
Arms (make 2)
- Ch 20.
- Sl st back down the chain.
- Attach a bell to each end.
Legs (make 2)
- Ch 30.
- Sl st back down.
- Add bells.
Optionally, wrap the end around the bell to make it secure.
⭐ PART 6 — ASSEMBLE THE FAIRY
✔ Step 1 — Insert Legs
- Thread both legs through the center hole of the flower skirt.
- Tie a secure knot inside.
✔ Step 2 — Add the Collar
Slide the green collar over the top opening.
✔ Step 3 — Add Head
Use a wooden bead (2–2.5 cm).
Thread the center yarn tail through the bead.
Draw a happy face.
✔ Step 4 — Add Arms
Tie the arms around the base of the wooden bead (neck).
✔ Step 5 — Attach Hat
Sew the hat on top of the wooden bead.
✔ Step 6 — Make Hanging Loop
Chain 25–30.
Attach to back of hat.
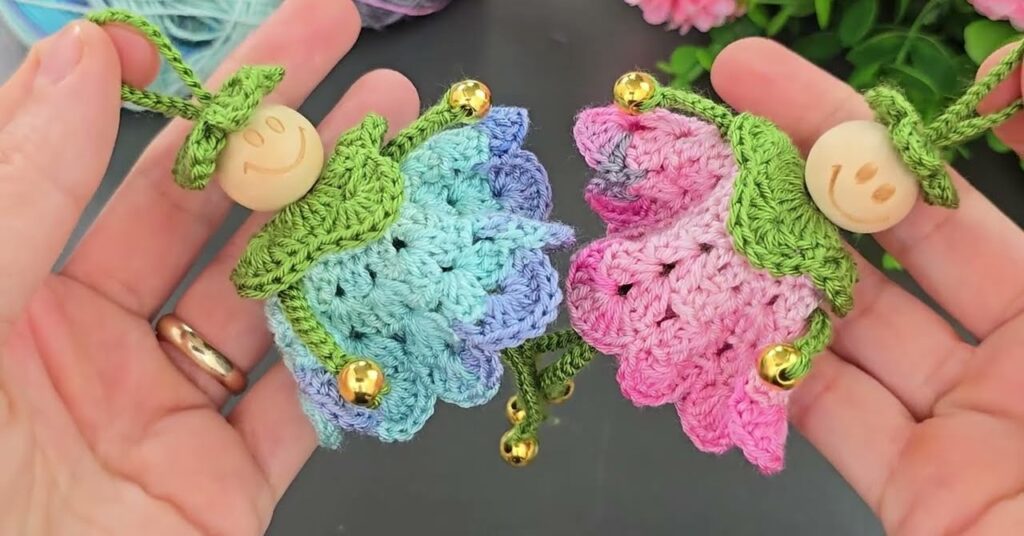
🌸 Your doll is complete!
It should look exactly like the one in the picture, with:
✔ bell skirt
✔ wavy hat
✔ wooden bead head
✔ dangling arms and legs
✔ curved flower dress