
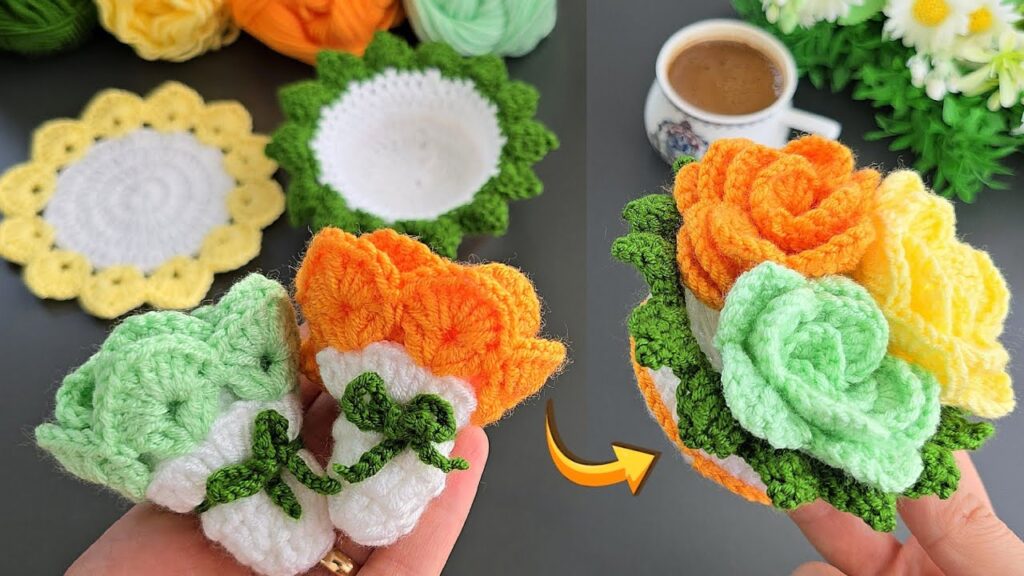
Great! Here is a step-by-step crochet pattern for the exact flower basket shown in the image.
I will break it into FULL INSTRUCTIONS for:
1️⃣ Base bowl
2️⃣ Scallop border
3️⃣ Roses (3 colors)
4️⃣ Leaves
5️⃣ Assembly
Everything is written slowly and clearly so you can follow easily.
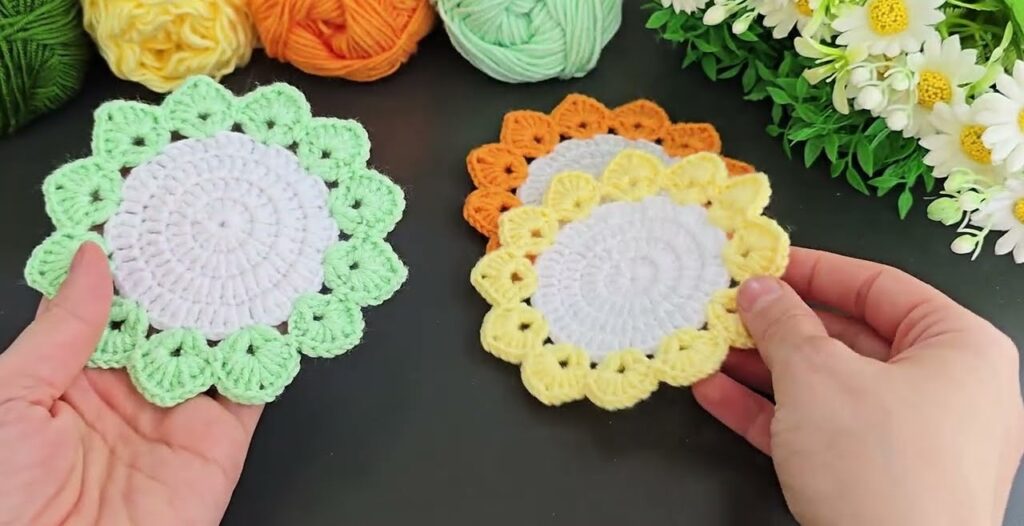
🌼 PART 1 — BASE BOWL (WHITE)
This is the small “cup” inside that holds the 3 roses.
Round 1 — Flat Circle
- Make a magic ring
- Ch 1
- Work 10 single crochet (10 sc) into the ring
- Pull tight and join with sl st
Round 2
- Ch 1
- Work 2 sc into each stitch → 20 sc
- Join
Round 3
- Ch 1
- (1 sc, 2 sc in next stitch) repeat all around → 30 sc
- Join
Round 4
- Ch 1
- (1 sc in next 2 stitches, 2 sc in next stitch) repeat → 40 sc
- Join
👉 This gives you a flat circle bottom.
🧺 FORMING THE BOWL WALLS
Round 5
- Ch 1
- Work in back loops only (BLO): sc in each stitch (40 sc)
- Join
This BLO round bends the sides upward.
Round 6–9
- Ch 1
- Sc in each stitch around
- Join
Repeat until you have 4 rounds of height, forming a small bowl.
Cut yarn if you will switch to green for the scallops.
🌿 PART 2 — SCALLOP EDGE
Attach green yarn to the top edge.
Round 10 (scallops)
Repeat around:
- Skip 1 stitch
- Work 6 double crochet (6 dc) in next stitch
- Skip 1 stitch
- Slip stitch (sl st) in next stitch
Continue until all around the rim is covered in scallops.
Cut yarn and weave.
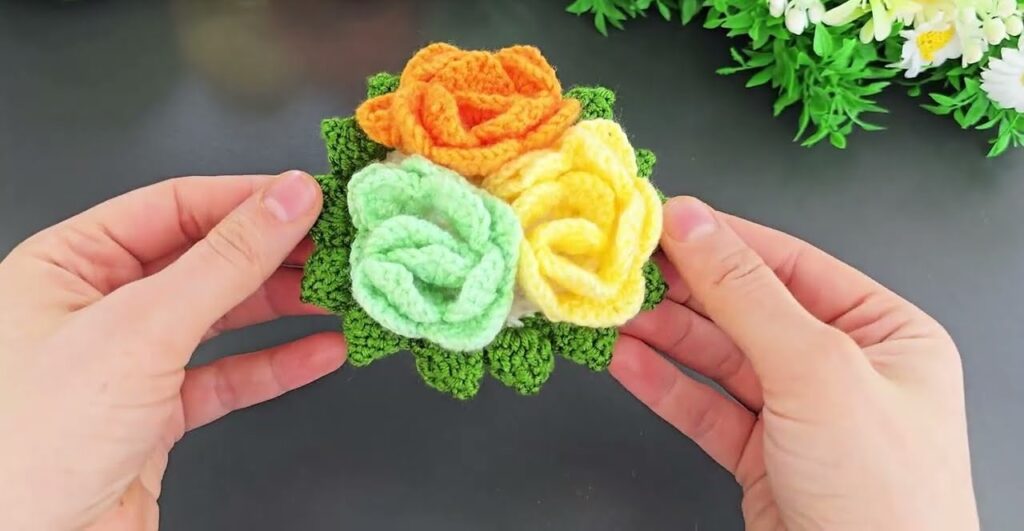
🌹 PART 3 — 3D ROSES (VERY DETAILED)
You will make 3 roses:
- Yellow
- Orange
- Light green
Step 1 — Foundation strip
- Ch 55 (longer chain = bigger flower)
- In 3rd chain from hook: 1 dc
- Now in EACH chain across: 2 dc in every stitch
→ You will get a long, very wavy strip.
Why 2 dc in each chain?
This creates the ruffles that allow the strip to curl into a rose.
Step 2 — Petals (important)
Turn your work.
Repeat this all the way across:
- Sl st in first space between dc groups
- In next space: 5 dc
- Sl st into next space
- 5 dc in the next
…continue to the end.
You will now have a curly strip with 20–25 petals.
Step 3 — Rolling the rose
- Start at one narrow end
- Roll tightly for the middle of the flower
- Gradually loosen rolling to make outer petals wider
- Use a yarn needle
- Sew across the bottom multiple times
Make sure it cannot unroll.
Repeat 3 times to make 3 roses.
🌱 PART 4 — LEAVES (SMALL AND CUTE)
Make 6 leaves total.
Leaf Pattern
- Ch 9
- In 2nd ch from hook, work:
- sl st
- sc
- hdc
- dc
- dc
- hdc
- sc
- sl st
- Turn your work
- Repeat the same stitch sequence on the OTHER SIDE of the chain
- Sl st to finish
The leaf naturally curves, just like in the picture.
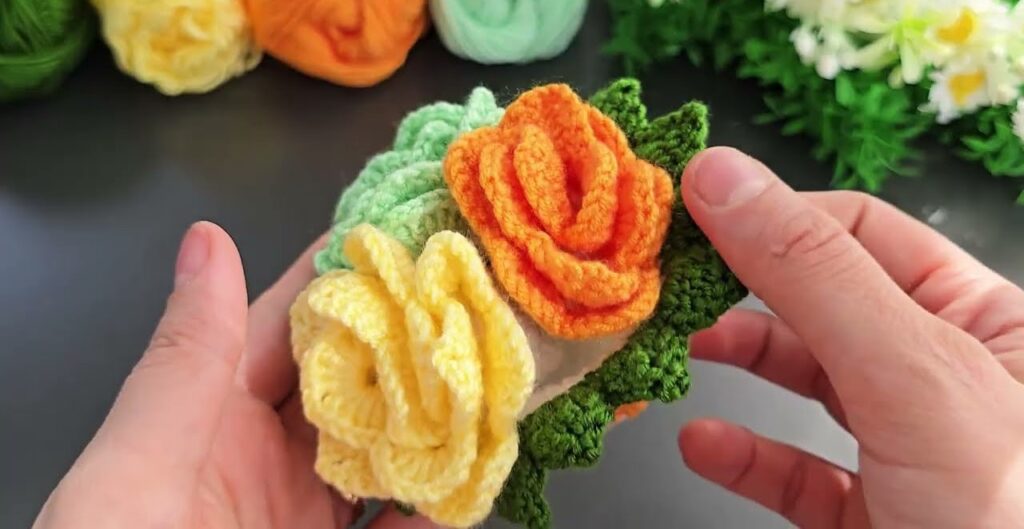
🌼 PART 5 — ASSEMBLY (IMPORTANT)
Step 1 — Attach leaves
- Sew or hot-glue 3 leaves inside the bowl’s rim
- Sew 3 leaves around the outside for fullness
This gives the nice green border around the flowers.
Step 2 — Attach the roses
- Sew the orange rose slightly to the left
- Sew the yellow rose slightly to the right
- Put the green rose in front
They must fit snugly inside the bowl.
Position carefully so the bouquet shape looks balanced.
🌟 FINISHED PIECE
You now have a:
✔ 3D floral bowl
✔ With 3 roses
✔ Green scallop rim
✔ Perfect for decor, gifts, table display
Just like in your picture.