
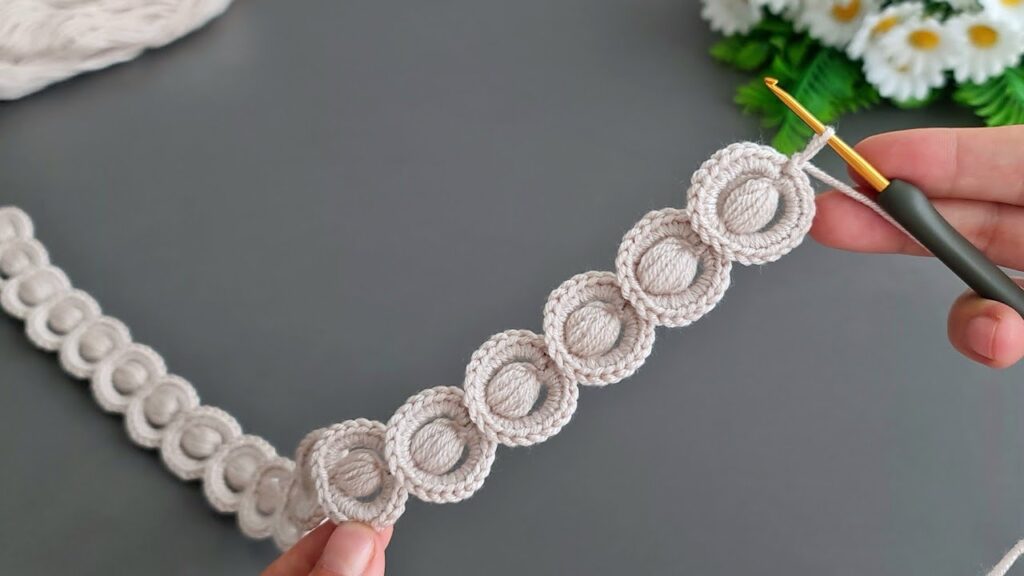
Here is a step-by-step tutorial for making the crochet linked circles/loop chain shown in the image.
This pattern is easy, repetitive, and perfect for borders, straps, belts, and decorations.
🌸 CROCHET LINKED CIRCLES – SUPER DETAILED TUTORIAL
⭐ PART 1 — MAKE THE FIRST CIRCLE
Step 1: Make the center ring
You have two options:
Option A — Magic ring
- Wrap yarn around 2 fingers
- Insert hook, pull up a loop
- Chain 1 to secure
Option B — Chain ring
- Ch 6
- Sl st into first chain to form a loop
Either makes a small ring.
Step 2: Crochet the inner stitches
Inside the ring:
- Ch 1 (does NOT count as a stitch)
- Work 12 single crochets (12 sc) inside the ring
- Pull tail to close (if magic ring)
- Join with a sl st into the first sc
You now have a small, firm inner circle.
Step 3: Make the outer circle
- Ch 1
- Work 2 sc into each stitch around
- That gives 24 sc total
- Sl st into first sc to close the round
✔ Your first circle is complete
✔ Stitch count: inner 12, outer 24
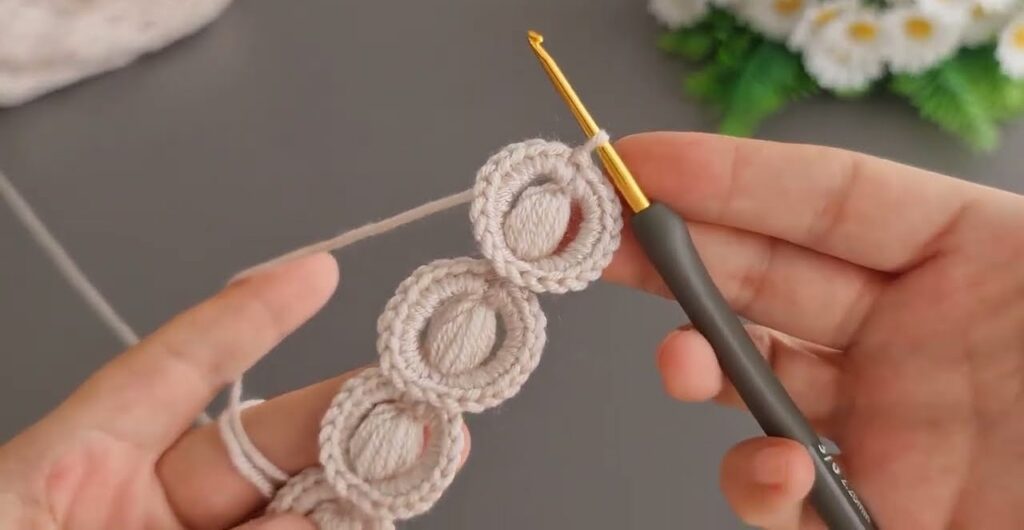
⭐ PART 2 — START THE SECOND LINKED CIRCLE
This is where the interlocking chain effect begins.
Step 4: Make the linking chain
- Ch 8 (you can adjust to 6–10 depending on circle size)
This chain will form the INNER RING of the next circle.
Step 5: Insert chain through the previous circle
- Take the chain you just made
- Push it through the hole in the middle of the first circle
- Pull it fully through so it sits inside the circle
✔ This links the new circle to the old one
✔ The chain loop is now inside the first circle
Step 6: Turn chain into a ring
- Bring the end of the chain around
- Sl st into the first chain you made
This closes the chain into a small ring.
You now have a closed loop INSIDE the previous circle.
⭐ PART 3 — CROCHET THE NEW CIRCLE (AROUND THE RING)
Now repeat the same structure as Circle 1.
Step 7: Inner circle (12 sc)
Inside the little ring you formed:
- Ch 1
- Work 12 sc inside the ring
- Sl st into first sc
✔ Now you have the inner circle completed
✔ It is held inside the previous circle’s center
Step 8: Outer circle (24 sc)
- Ch 1
- Work 2 sc in each stitch around (24 total)
- Sl st to the first sc
✔ Second circle complete
✔ Both circles are linked perfectly
✔ You can pull them slightly so they align neatly

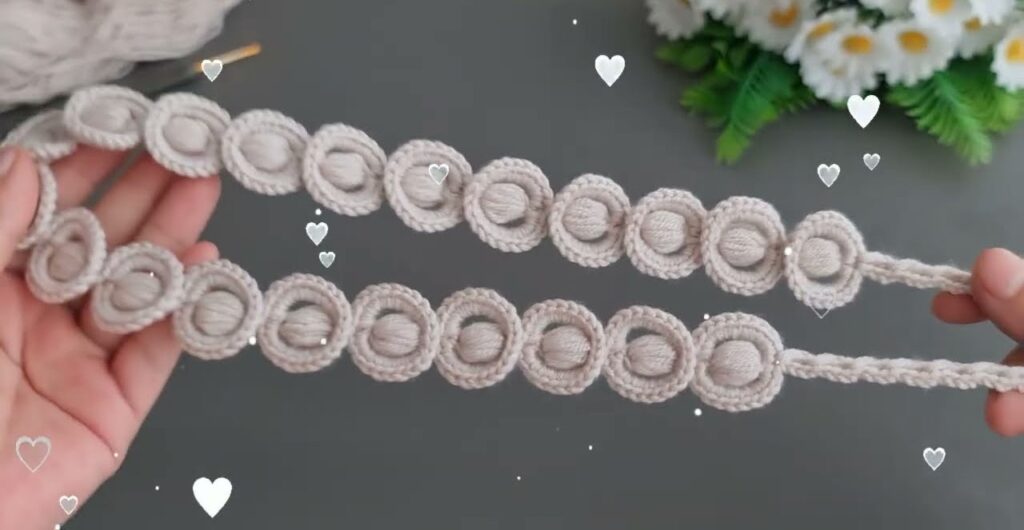
⭐ PART 4 — MAKE AS MANY CIRCLES AS YOU WANT
Repeat the exact process:
🔁 FOR EACH NEW CIRCLE:
- Ch 8
- Push chain through the last circle’s center
- Sl st to close the chain into a ring
- 12 sc inside the ring
- 24 sc around the circle
- Sl st to finish
Continue repeating until your border reaches the length you need.
🌿 EXTRA TIPS FOR PERFECT CIRCLES
✔ Make the chain tight
Loose chains make uneven circles.
✔ Use a small hook
A tighter fabric makes the circles stand out.
✔ Stretch gently as you go
Helps each new circle sit flat.
✔ Use cotton yarn for crisp circles
It holds shape beautifully.